How to add Programmability to your existing SIP network
Info
If you are looking to explore SIP functionality, we recommend following the SIP Quickstart to get you up and running in a few clicks!
Are you interested in learning how to make calls using SIP with Twilio programmability? This guide will show you how to use Programmable Voice to receive SIP inbound phone calls from your SIP infrastructure to Twilio
Twilio Programmable SIP Domain makes it possible to create Enterprise Grade features, contact center feasible functionality in minutes. It's possible to add to programmable logic to your calls to make your business applications more intelligent. Twilio also offers global reach with its rich and reliable PSTN network.
- Configure SIP Domain
- Configure your SIP Endpoint
- Make an inbound SIP call from Twilio Registered Endpoint
Let's get started!
Note: Step 2.5 and 2.6 are not required if you are not using Twilio Registered Endpoint.
To receive SIP traffic from your network you need to configure SIP Domain in Twilio. In this example, we are going to use Twilio Registered endpoint to send SIP traffic to Twilio. Therefore we are enabling SIP Registration and associating the credential list.
-
Configure Credential List
- Log in to your twilio account go to programmable voice. Select " credential lists "
- Click the "+" icon to create credential list.
-
Add a Friendly Name as
Endpoint, Username (this can be E164 number, Extention number or name) asUserAand Password asyourpasswordand click Create. Note: The credential username and password created here will be used on your SIP Endpoints for authentication.
-
Configure SIP Domain
- Select " Domains "
- Click the "+" icon to create SIP Domain .
-
Add a Friendly Name as
T1and a unique SIP URI asTrunk1. Note: SIP URI names needs to be unique, I have used Trunk1 in my example. You might have to find a name that is available -
Scroll down to "Voice Authentication" and associate the "Credential Lists"
Endpointthat you created - Scroll down to "SIP Registration" and click "Enabled"
- In "SIP Registration Authentication" associate the "Credential Lists" that you created. Then click "Save"
SIP Endpoint can be desk phone or soft phone. In this guide, we will use the soft phone and will configure the phone to successfully register to SIP Registrar.
Note: If you are not using Twilio Registered Endpoint then this step is not applicable to you.
- Download and install SIP Endpoint. Zoiper is used for example
-
Provide login name -
UserA@Trunk1.sip.us1.twilio.com(do add us1 region parameter to your sip domain) and password- Username and password from Credential List Username
-
Yourdomain from
SIP Domains
. For example,
Trunk1.sip.us1.twilio.com(do add us1 region parameter to your sip domain while configuring zoiper)
- Click "Next/continue" to confirm the Domain
- Optional settings can be skipped
- Done! You see in Zoiper that it is "Registered" and has "Tick" next to your login name.
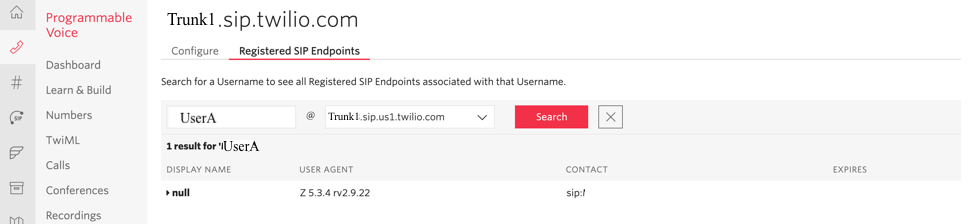
- You can also verify the successfully registered endpoints under your SIP domain > Registered SIP Endpoints in the Twilio console
It is possible to add programmable logic to your call when the call is received by Twilio. For example, we will have the code that greets the caller and make a call to your cellphone.
With Twilio you can make calls only from a verified phone number or from Twilio number. If you plan to use a number other than Twilio phone number, then go to Verified callerID page and click the + icon to ensure your number is valid and verified. Great!
We will now write the TwiML for our application. Because this is a static application, we will use a TwiML Bin. Visit the TwiML Bin page and click the + icon to add a new bin.
Set the Friendly Name as Greet and call and copy and paste the TwiML below
_10<?xml version="1.0" encoding="UTF-8"?>_10<Response>_10 <Say>Thank you for doing the tutorial. Will now call your cellphone</Say>_10 <Dial callerId="+1233451789">+15557650987</Dial>_10</Response>
Warning
Make sure to add a verified number for callerId and your cellphone number to dial
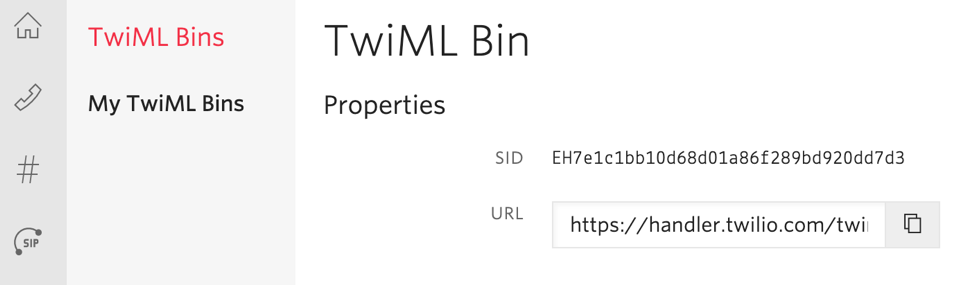
Create the TwiML Bin and copy the URL, see below
With our TwiML Bin created, now we need to wire it up to our SIP Domain.
- Go to SIP Domain and click on the domain you created
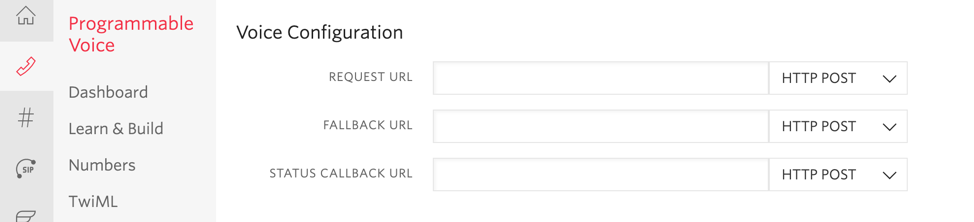
- Scroll down to "Voice Configuration" paste the copied URL from above to "Request URL" and click "Save"
Now go to zoiper SIP client and dial your cellphone. You will hear the greeting in zoiper and it will ring your cellphone. Congratulations! you have made your inbound SIP call!!
Great work!
- How to route calls to your SIP network with an outbound call
- More about Programmable SIP Trunk and its feature
- Pricing
Happy hacking!