Add and authenticate email domains
Not a HIPAA Eligible Service
Email in Twilio Flex is not a HIPAA Eligible Service and should not be used in workflows that are subject to HIPAA.
To prove that you own the domains you will use for Flex, you must add and authenticate your email domains in Twilio using the following steps.
Before you begin, ensure that you know who your domain provider is and that you have the ability to add CNAME and MX records through your domain provider's website. If you're not sure who your domain provider is or if you don't have the right permissions to add these records, contact your website administrator for help with this procedure.
Each email domain must be authenticated for only one SendGrid account that is linked to your Flex account.
-
From Channels > Email, click Authenticate domain.
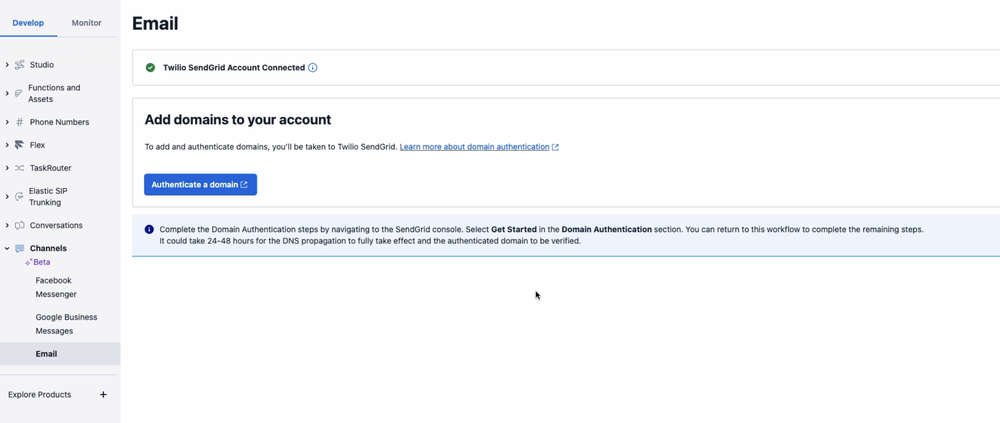
- In the Domain name box, enter the subdomain (if you use one) and base URL of your domain. Then, click Authenticate.
-
Validate your domain by adding DNS records through your domain provider's website:
a. From your domain provider's website, navigate to the DNS records page.
b. Add a CNAME record for each row in the Twilio DNS records table. Copy the host name and value from the table by clicking the copy icons in the Twilio DNS records table.
-
From your domain provider's website, add an MX record to process incoming email:
a. On your domain provider's website, navigate to the MX records page.
b. Create a new MX record for the subdomain to process incoming email. For example:
subdomain.yourdomain.com. This hostname should be used exclusively to parse your incoming email. Warning: Do not change the existing MX record for your domain. If you do, you will no longer receive email.c. Assign the new MX record a priority of 10 and point it to this address:
mx.sendgrid.net. If there is no field for priority, type 10 before the address. For example:10 mx.sendgrid.net. Your entry should look similar to this:
-
After adding an MX record, return to the Flex DNS records page. Select I've added these records to my domain provider page and then click Verify.
Your domain won't be successfully verified until the changes to your domain provider take effect. It typically takes an hour or less. You can leave this page, then come back to this step later and try again.
When the verification is successful, the status of each CNAME record changes to Verified. If verification is not successful and you need help, see Troubleshooting sender authentication.
-
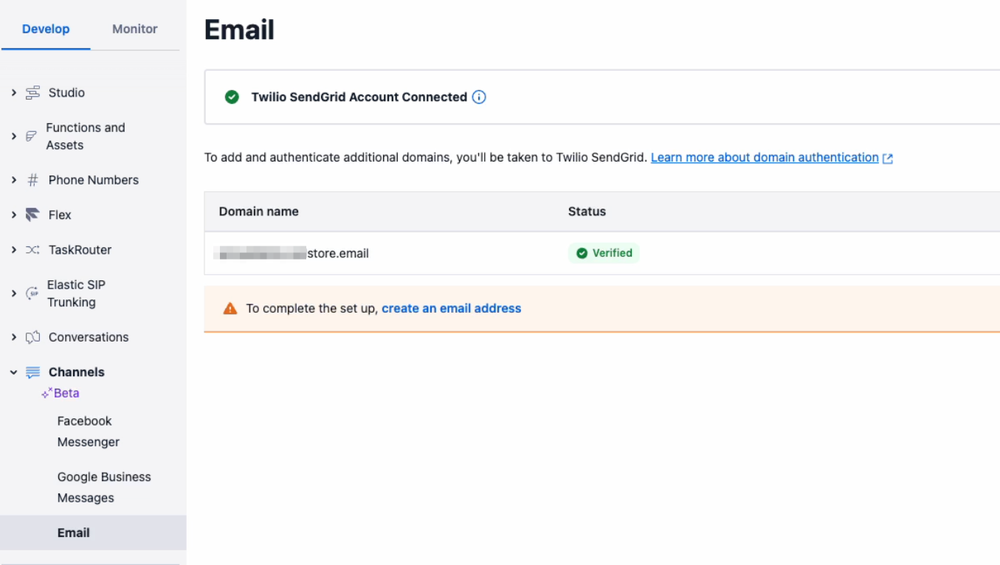
When you've completed these steps successfully, the status of your domain on Channels > Email changes to Verified.