Send Email Verifications with Verify and Twilio SendGrid
Here's your checklist for setting up your account to send email verifications with Verify and SendGrid. Detailed instructions for each step are included below.
- [SendGrid] Create or log in to your SendGrid account
- [SendGrid] Create a SendGrid API Key
- [SendGrid] Set up domain authentication
- [SendGrid] Create an email template
- [Verify] Create a Verify service
- [Verify] Create an email integration and connect to your Verify service
- [Verify] Send an email verification code
- [Verify] Check an email verification code
The initial configuration in Steps 1-6 only needs to be done once. You can then use your email-configured Verify service to send verification emails through the API.
Create a SendGrid account or log in to your existing account. Email verifications use the SendGrid transactional email API.
Next, Create a SendGrid API Key via the API or in the SendGrid dashboard
Warning
We strongly recommend generating SendGrid API Keys with limited scopes.
Create an API Key in one of two ways:
Option 1: Create an API Key with the SendGrid API.
Option 2: Create an API Key in the SendGrid UI. For permissions, select "Restricted Access" and choose the following limited scopes:
| Access Details | Access Level |
|---|---|
| Mail Send (nested under Mail Send category) | Full Access |
| Scheduled Send (nested under Mail Send category) | No Access |
| Template Engine | Read Access |
Info
Save your SendGrid API Key - you'll need it to set up your verification email integration.
Domain authentication allows you to send an email from your company's domain without "via sendgrid.net". Head over to the SendGrid docs to learn about how to set up domain authentication then authenticate your domain in the SendGrid dashboard.
Warning
It can take up to 48 hours for the records to verify after you upload them into your DNS host. You can still continue set-up and testing while domain authentication is pending by using Single Sender Verification. Single sender verification allows you to send from a single email address that you confirm ownership of by clicking a verification link in the email's inbox. Read Sender Identity for more information on the differences between domain authentication and single sender verification.
Navigate to the SendGrid Dynamic Templates page and create a new template. In this process you will name and create or select a design for your template. For more information on creating and working with dynamic templates, reference the SendGrid documentation.
Use at least one of the first three variables below to include the verify code in your email template.
| Available Variables | Description |
|---|---|
| {{twilio_code}} | The 4-10 digit numeric One Time Passcode. OTP only, no descriptive text. |
| {{twilio_message}} | Contains both internationalized descriptive text and OTP. i.e. "Your MyServiceName verification code is: 123456" or "Su codigo de verificacion para MyServiceName es: 123456". Default language is English, override language using the Locale parameter. |
| {{twilio_message_without_code}} | Contains the internationalized descriptive text only. i.e. "Your MyServiceName verification code is" or "Su codigo de verificacion para MyServiceName es". |
| {{twilio_service_name}} | [Optional] the Friendly Name of the Service. |
You can find a list of your templates and their unique IDs on the SendGrid Dynamic Templates page. A template ID is 64 characters with one dash (d-uuid) and is required for creating a Verify email integration.
Info
Need template design help? Check out SendGrid's free and open source library of transactional email templates for robust and responsive designs.
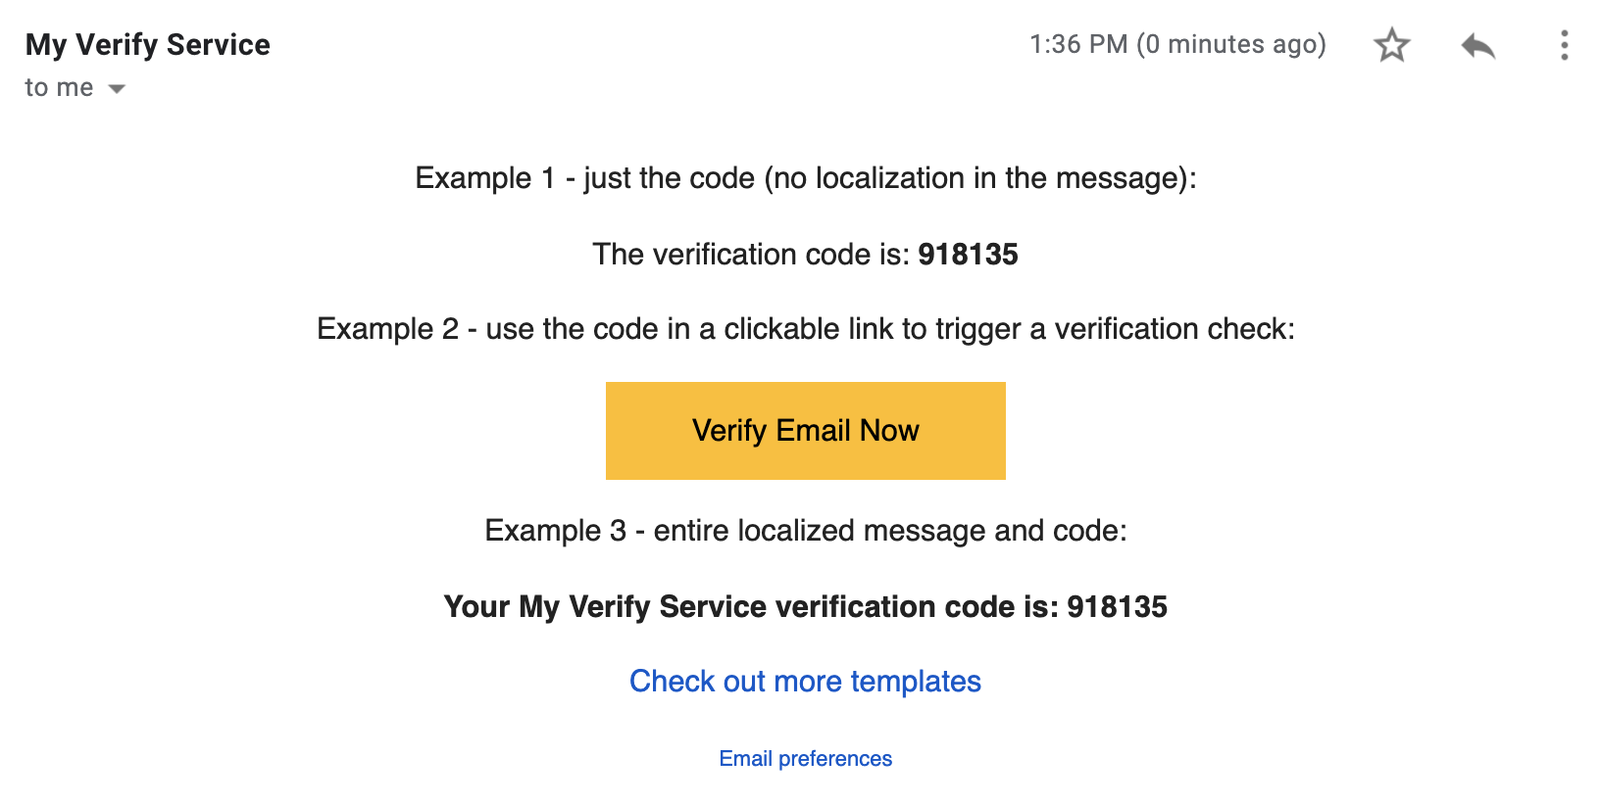
_40<html>_40 <head>_40 <style type="text/css">_40 body, p, div {_40 font-family: Helvetica, Arial, sans-serif;_40 font-size: 14px;_40 }_40 a {_40 text-decoration: none;_40 }_40 </style>_40 <title></title>_40 </head>_40 <body>_40 <center>_40 <p>_40 Example 1 - just the code (no localization in the message):_40 </p>_40 <p>_40 The verification code is: <strong>{{twilio_code}}</strong>_40 </p>_40 <p>_40 Example 2 - use the code in a clickable link to trigger a verification check:_40 </p>_40 <p>_40 <a href="https://your-company.com/signup/email/verify?token={{twilio_code}}" _40 style="background-color:#ffbe00; color:#000000; display:inline-block; padding:12px 40px 12px 40px; text-align:center; text-decoration:none;" _40 target="_blank">Verify Email Now</a>_40 </p>_40 <p>_40 Example 3 - entire localized message and code:_40 </p>_40 <p>_40 <strong>{{twilio_message}}</strong>_40 </p>_40 <p><a href="https://sendgrid.com/blog/open-source-transactional-email-templates/">Check out more templates</a></p>_40 <span style="font-size: 10px;"><a href=".">Email preferences</a></span>_40 </center>_40 </body>_40</html>
This will produce an email that looks like:
Info
We recommend using "email preferences" instead of "unsubscribe" for transactional emails like these. Read more: Should you include an unsubscribe link in your transactional email messages?
Head to the Email Integration section of the Twilio Verify console to create a new integration. Name your integration, this can be changed later. Fill in:
- SendGrid API Key
- Default Template ID
- Default From Email (see: Domain Authentication )
- Default From Name (see: Domain Authentication )
Connect your email integration to your Verify service in one of two ways:
Option 1: From Email Integration, check the service or services you want to associate with that email integration. A single email integration can be used for multiple services.
OR
Option 2: From Verify Services, select your service and navigate to the Email tab to select an email integration. Each service can only have one email integration.
Now the exciting part! Send your first email verification with the following code:
You can override the default template ID, default from name, or default from email with a channel configuration:
Override default email configuration
Channel Configuration also support Sendgrid's Substitutions.
Specify Sendgrid Substitutions
Checking an email verification token uses the same code as other channels like sms or voice.