Set up an SMS Autoresponder with Twilio Studio
In this tutorial, you'll learn how to create an SMS autoresponder that responds with a message anytime someone texts your Twilio phone number. If you're tired of sending individual replies to texts when you have the same information to share each time, you can set this up Twilio Studio to send the message for you, automatically!
Info
New to Twilio Studio? We recommend you check out our Getting Started guide for working with Twilio Studio to familiarize yourself with Studio mechanics before you start this tutorial.
Before you get started, you'll need:
- A Twilio Account. If you are new to Twilio, create a free account . You can review the features and limitations of a free Twilio account here .
- A Twilio Phone Number. View instructions for purchasing a Twilio Phone Number here .
You'll start by creating a brand-new Studio Flow for your autoresponder. All the logic and routing for your project will exist in this Flow.
Create a new Flow from scratch using the Twilio Console. If this is your first time working with Studio, you can see how to create a Flow here. You may wish to name this Flow something like "SMS Autoresponder."
In this Flow, you're creating an autoresponder that responds to an incoming message with an automated text message response.
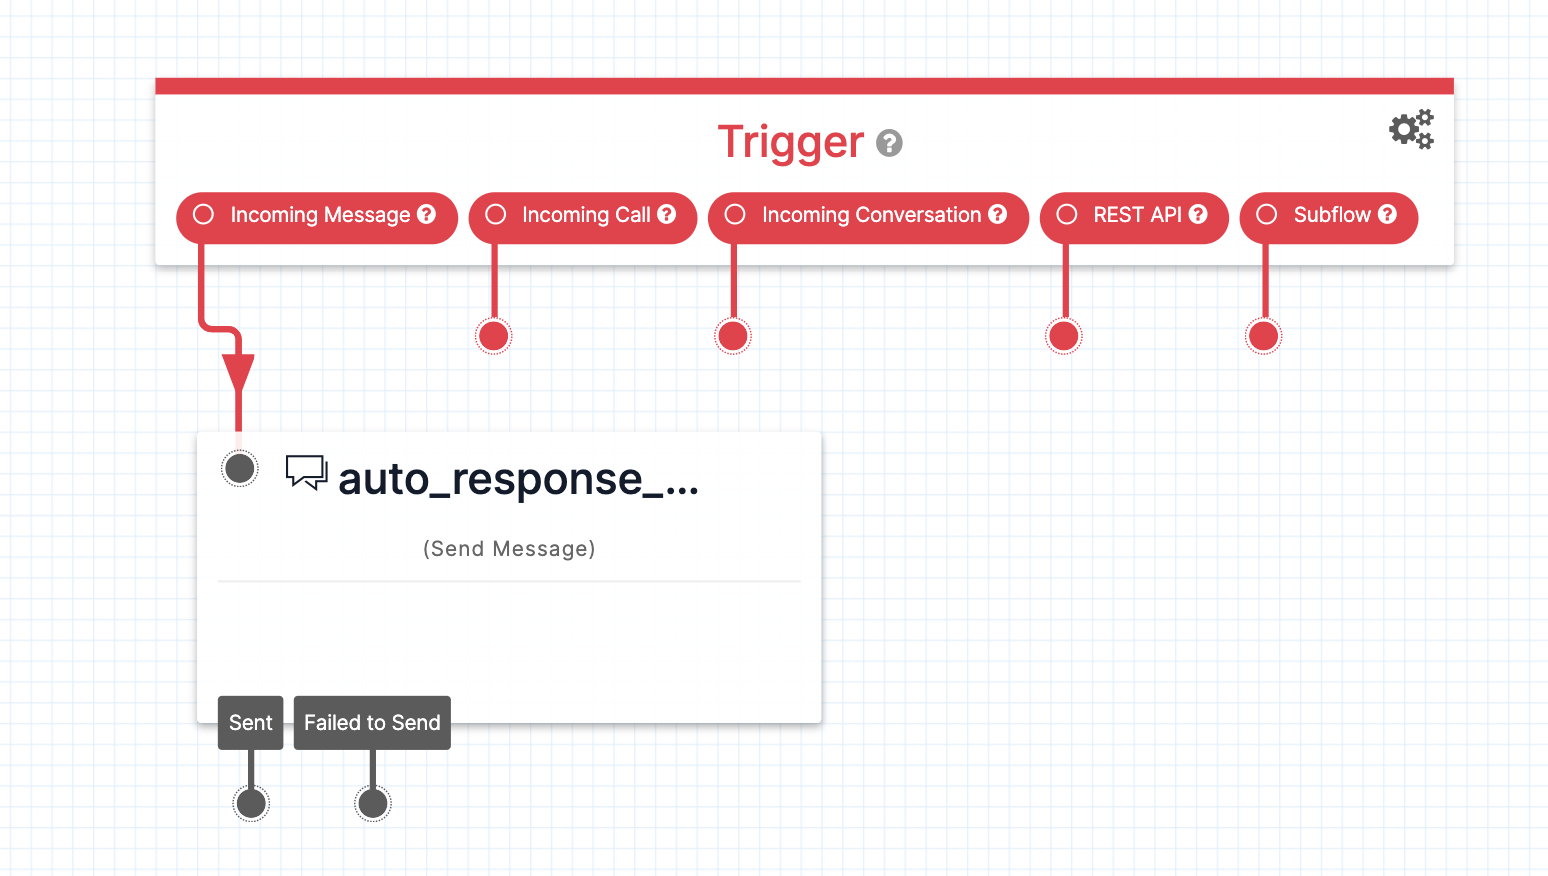
The Flow only needs one more Widget on the Canvas — the Send Message Widget. From the Widget Library on the right side of the Canvas, drag and drop the Send Message Widget onto the Canvas. Rename the Widget to auto_response_message.
You'll need to connect your Trigger (Start) Widget to this Widget, so click on the red dot underneath Incoming Message and drag it to connect it to your new Widget. This will create a line between the two Widgets and tells your Studio application what to do with incoming messages. To learn more about creating Transitions between Widgets, see the Getting Started guide.
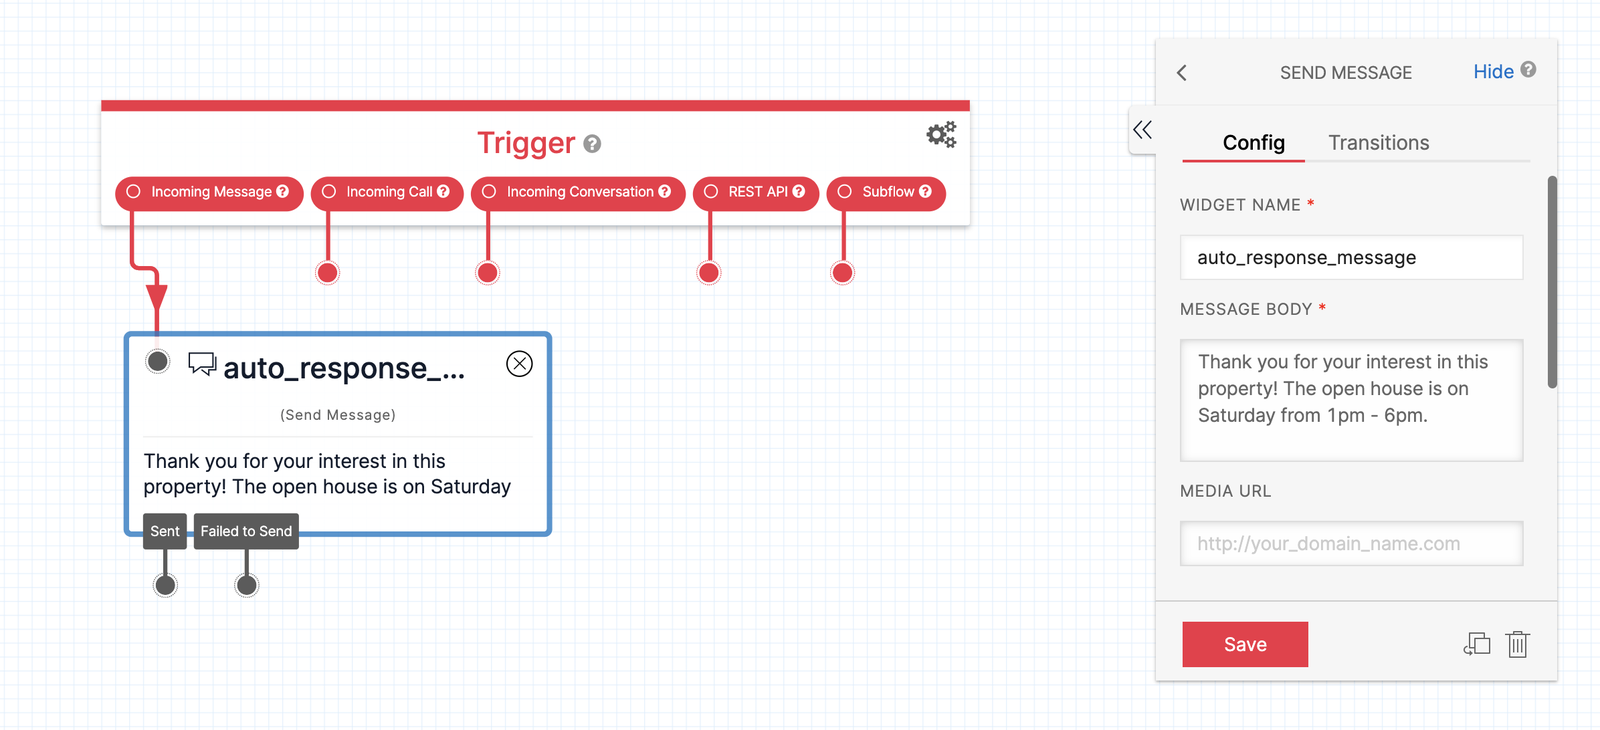
Click on the Send Message Widget you just added to the Canvas. Inside the Widget's Inspector Panel on the right side of the Canvas, type something into the Message Body field. This can be anything you'd like to send to everyone who texts your number — reminders, requests to call, website information, or anything else. You can also add an image to the message by pasting the image's URL into the Media URL field for the Widget. Note that the Media URL field only supports .jpg, .jpeg, .png, and .gif files.
Once you've entered the text you want to send in the Message Body, your Canvas will look something like this:
The final step before your Flow is complete is to click Publish at the top of the Canvas. This makes your changes live. You'll need to click Publish anytime you have changes to your Flow that you want to go into effect for end users.
After you've published, your Flow is finished! Now you can connect the Flow to your Twilio number so that when someone texts that number, they receive the autoresponder message you just configured.
Once you're happy with your Flow and you've published all changes, you can connect it to a Twilio Number so people can start interacting with it.
Navigate to the Active Numbers section of the Twilio Console and click on the number you'd like to connect to the Flow. (If you do not have any phone numbers, you can purchase one from the Console.)
After clicking on the number, you will see its configuration menu where you can connect the number to your Studio Flow.
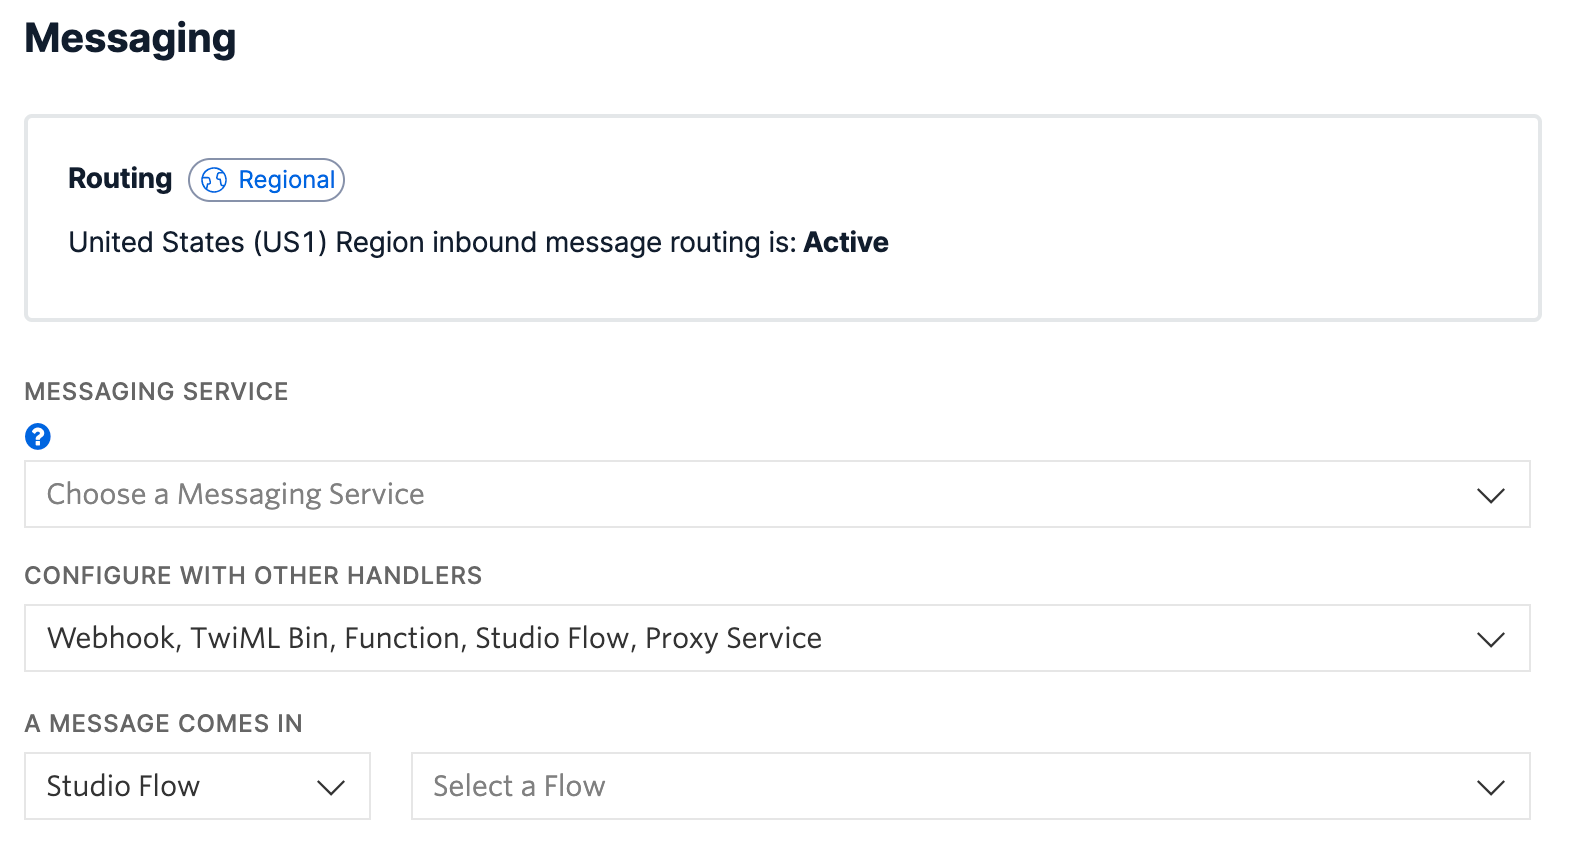
To trigger a Studio Flow with an Incoming Message, scroll down to the Messaging section in the configuration menu. Under Configure with Other Handlers, select the dropdown option "Webhook, TwiML Bin, Function, Studio Flow, Proxy Service". Then, under A Message Comes In, select the dropdown option "Studio Flow". You'll see another dropdown menu appear where you can select the Studio Flow you'd like to connect to when a message comes in to this number.
Choose the Flow you'd like to connect the number to, and then press Save to save these changes. Your Flow is now connected to your Twilio number!
Now you can test out your autoresponder! Send an SMS to your Twilio number, and the response you configured will be sent back.
To connect this Autoresponder to WhatsApp or another Messaging Service, you'll use the Studio Flow's Webhook URL. You can find the Webhook URL in the Trigger Widget's Inspector Panel. Click on the Trigger Widget at the top of your Flow to open its Inspector Panel. Then, copy the Webhook URL that you see in the menu under Webhook URL.
Navigate to your list of WhatsApp Senders in the Twilio console. Click to select the sender that you want to use with this Studio Flow. Paste the Webhook URL that you copied from your Studio Flow into the field Webhook URL for incoming messages. Click Update WhatsApp Sender to save the changes.
If you don't have any WhatsApp Senders, you can use the WhatsApp Sandbox to send trial messages.
Now that you've built an autoresponder with the Send Message Widget, you can explore other Studio Widgets.
- Check out the Say/Play Widget to learn about responding to an incoming phone call with a specific message, and translate this Flow into one that works for voice calls as well.
- Try out the tutorial for building a Chatbot with Studio , which uses the messaging Widgets along with serverless functions and Voice Widgets.