Post Messages to Slack with Twilio Studio
In this tutorial you will post an inbound SMS to a Slack feed using Twilio Studio and an incoming Slack webhook. You'll need an existing Slack team to follow along with this tutorial, so if you don't have one yet, create one for free now.
Before you get started, you'll need:
- A Twilio Account. If you are new to Twilio, create a free account . You can review the features and limitations of a free Twilio account here .
- A Twilio Phone Number. View instructions for purchasing a Twilio Phone Number here .
New to Twilio Studio? Before completing this tutorial, you should familiarize yourself with the mechanics of working with Studio by reviewing the Getting Started guide.
You'll start with a new Twilio Studio Flow. A Flow is an individual workflow you create to handle your use case. For example, in this case you're going to post an inbound SMS to a Slack Feed. All the logic for this will exist in the Twilio Studio Flow you create.
To create a new Studio Flow:
- Log into your Twilio account and navigate to the Studio Dashboard .
- Click the Create a Flow button to create your first Studio flow. If you already have some Studio Flows (awesome!), tap the "+" icon instead.
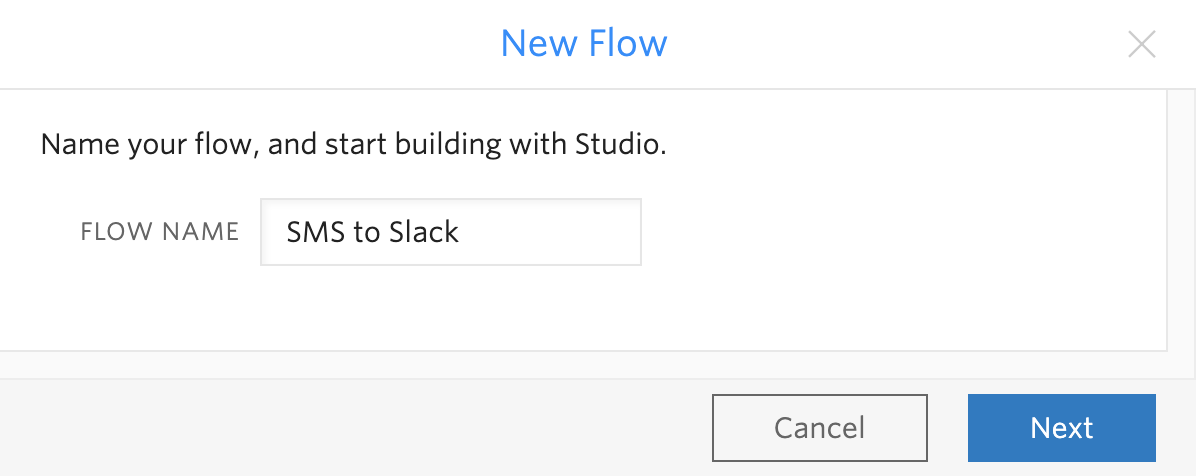
- Name your Flow. You can name your Flow anything you like; we're calling ours "SMS to Slack".
-
Click next to select a template. You'll see a few different templates you can use but you'll want a blank Canvas for this tutorial, so select Start from scratch on the template selection screen.
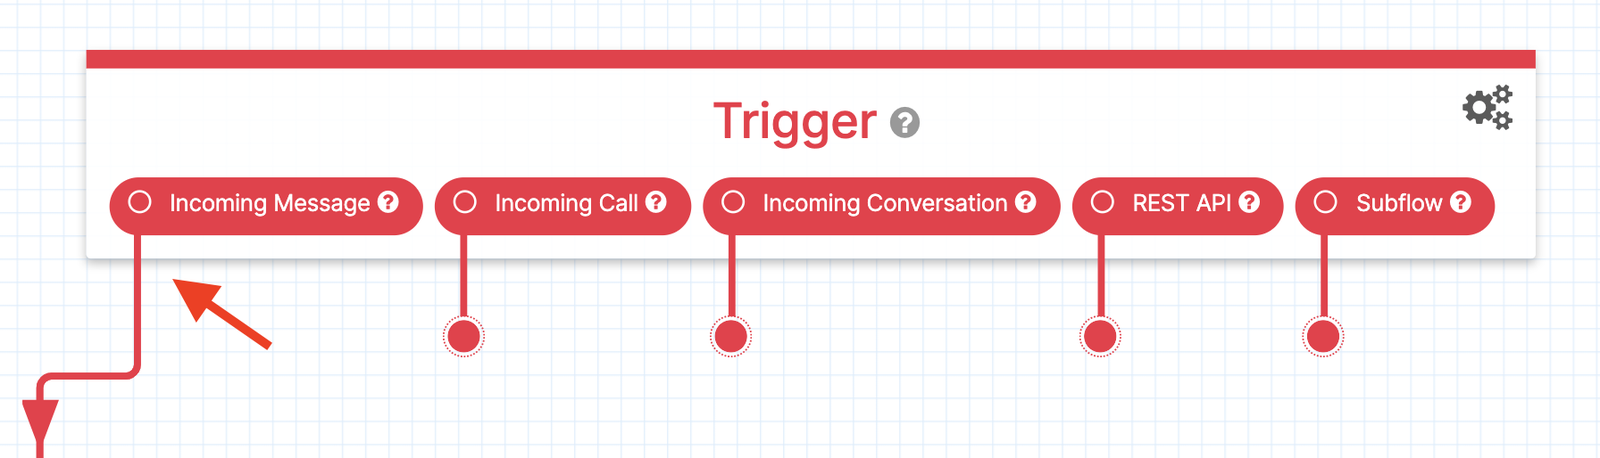
You'll notice that the Canvas comes with a Widget already in place - that's the Trigger (Start) Widget. It will kick off your Flow when the trigger you specify is fired. In this case, your trigger is going to be an Incoming Message.
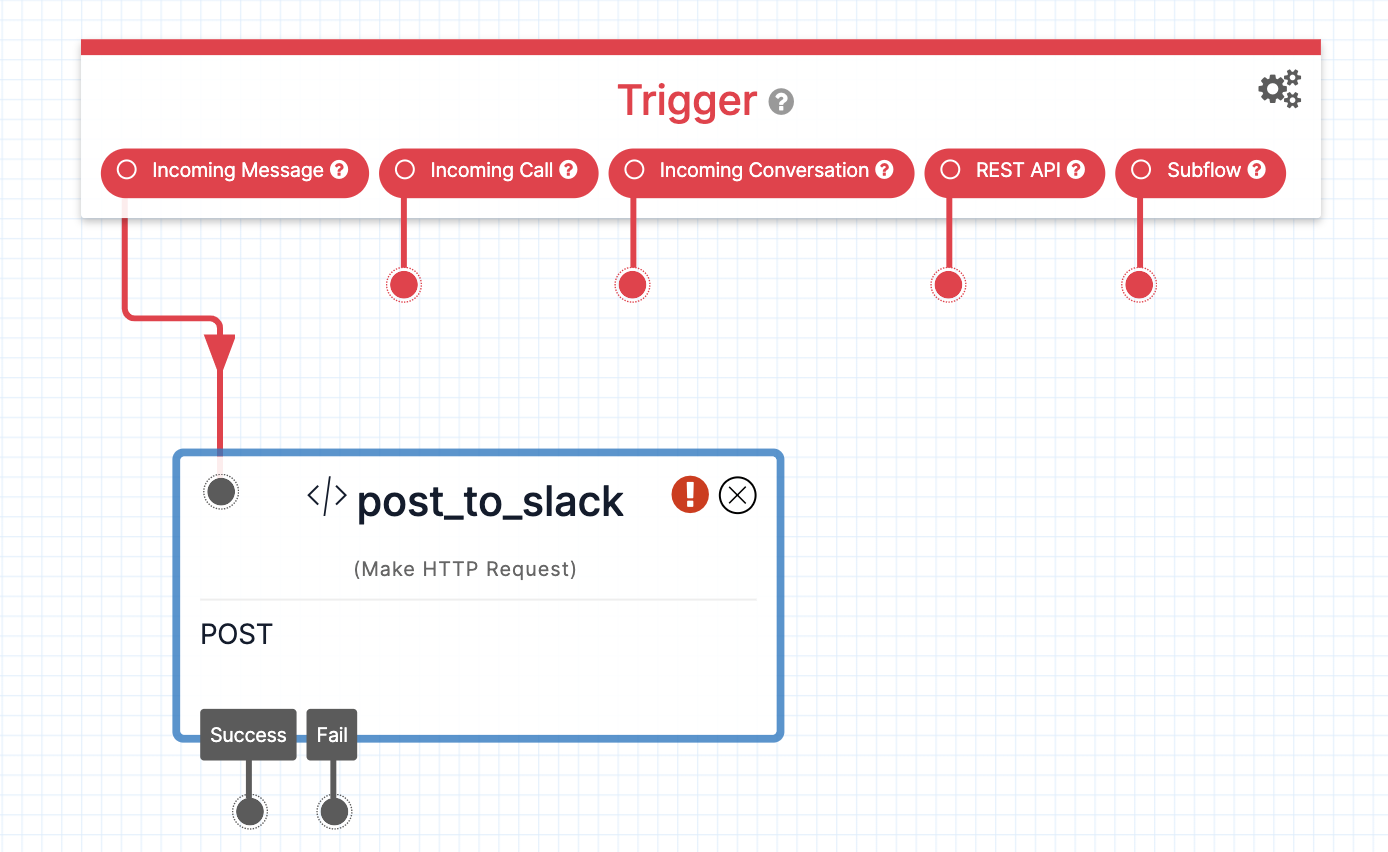
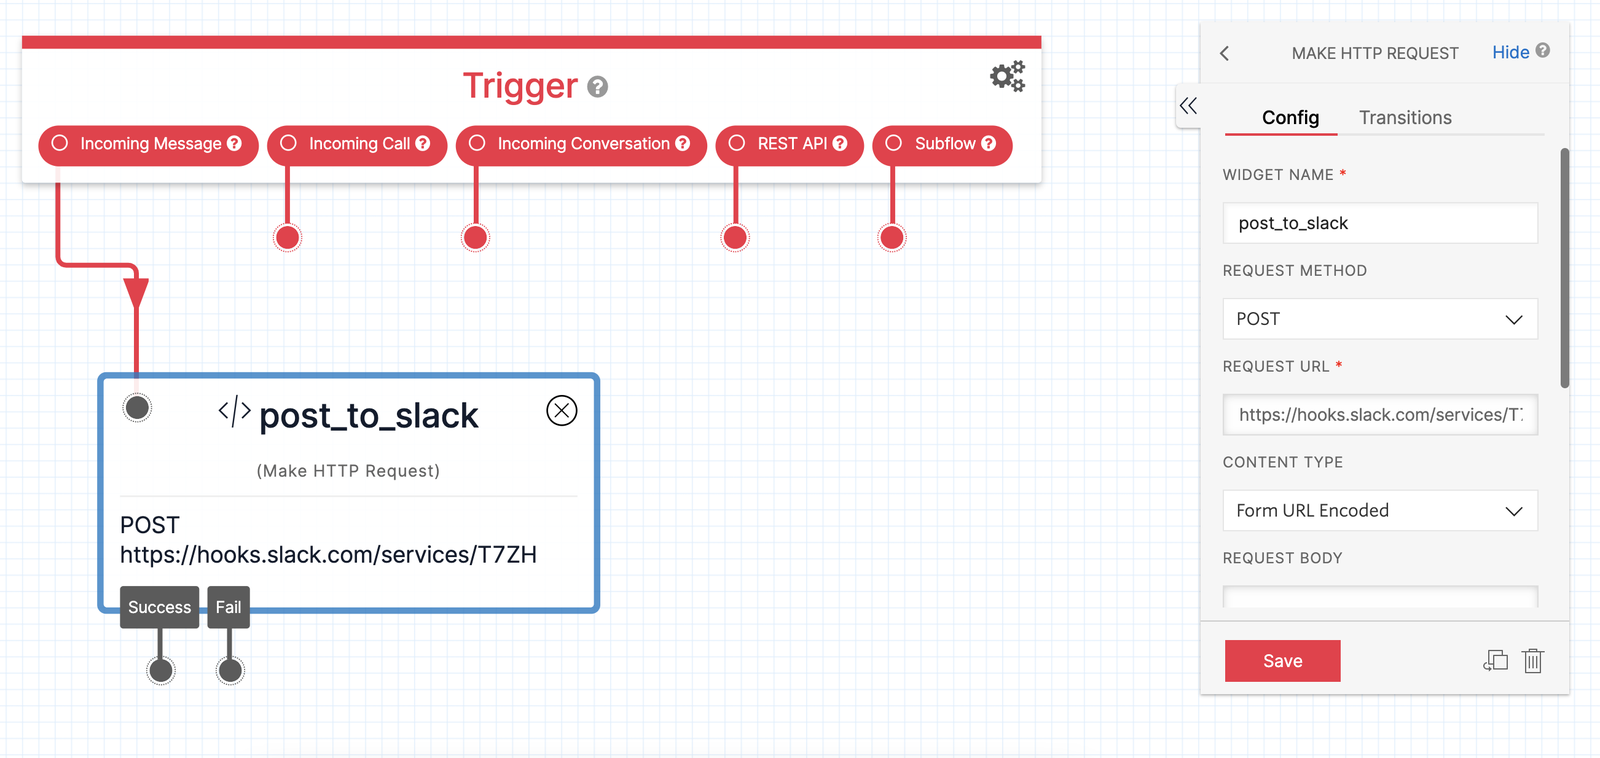
This Studio Flow only requires one Widget — the Make HTTP Request Widget. Drag a Make HTTP Request Widget onto the Canvas from the Tools & Execute Code section of the Widget Library, and connect the red dot from the Incoming Message trigger to the gray dot in the upper left corner of the Make HTTP Request Widget. Give your Widget a name (in this example, post_to_slack is used).
You'll need a Request URL in order to successfully use the Make HTTP Request Widget, and in this case, it's going to be a Slack webhook URL.
Slack has excellent documentation around setting up incoming webhooks, and we encourage you to learn about the available customizations. Today, you'll focus on the part that is most relevant to the Make HTTP Request widget — the webhook URL.
First, head over to Slack to set up an incoming webhook integration.
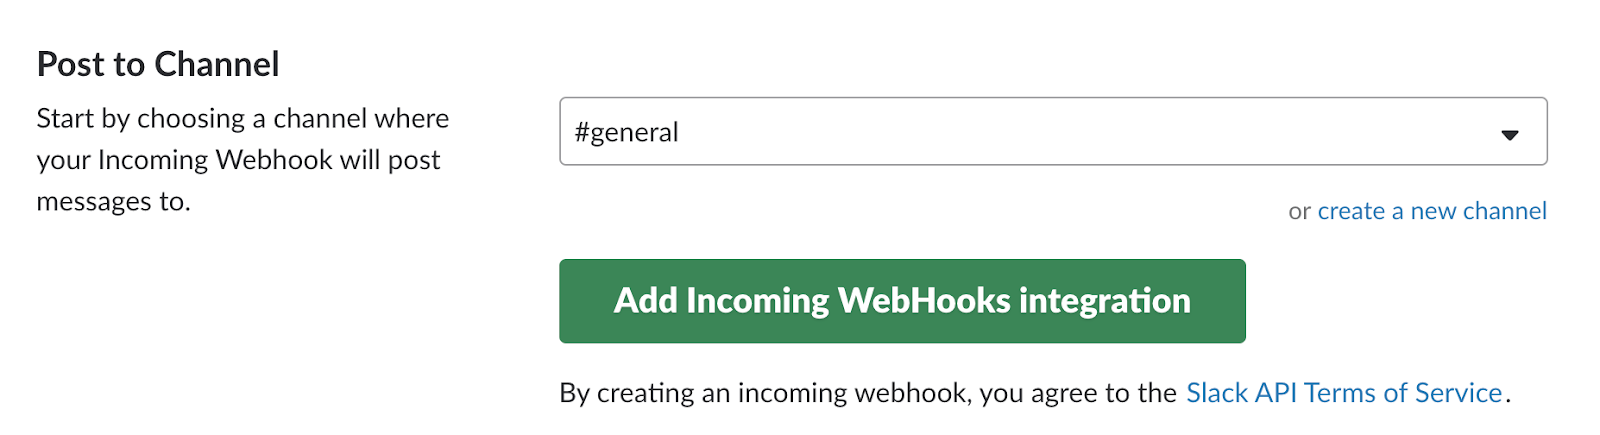
Navigate to the incoming webhooks configuration page and select the Slack channel you'd like to send your inbound SMS to. Click the Add Incoming WebHooks integration button to create a new incoming webhook.
Once you create a new webhook integration, you'll get a Webhook URL like the one shown in the screenshot below:

Copy this URL to your clipboard; you'll need it for the Make HTTP Request widget. Paste the URL into the Request URL field in the Widget configuration menu for the Make HTTP Request Widget.
Halfway there! Once you've got the Request URL set up, the next step is to declare a payload (the incoming SMS message). You can do this by setting an HTTP Body in a format that Slack will recognize.
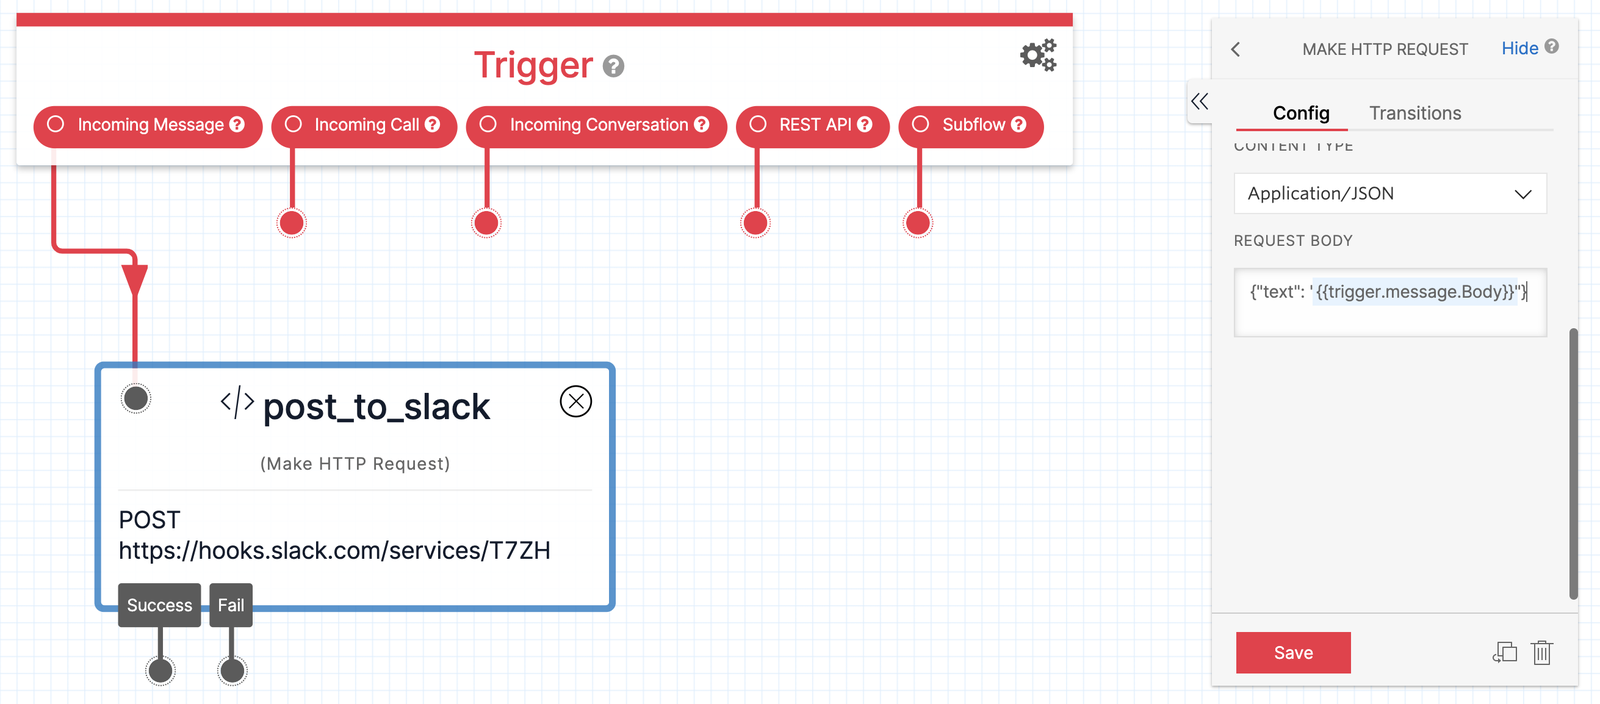
In the Make HTTP Request Widget configuration menu, set the Widget's Content Type to Application/JSON so that Slack knows what to expect. To format inbound SMS messages for the payload, set the Request Body field to the following, keeping the curly braces and quote marks in place:
{"text": "{{trigger.message.Body}}"}
Your HTTP request is now configured! Now you're ready to connect the Studio Flow to a Twilio phone number.
Once you're happy with your Flow and you've published all changes, you can connect it to a Twilio Number so people can start interacting with it.
Navigate to the Active Numbers section of the Twilio Console and click on the number you'd like to connect to the Flow. (If you do not have any phone numbers, you can purchase one from the Console.)
After clicking on the number, you will see its configuration menu where you can connect the number to your Studio Flow.
To trigger a Studio Flow with an Incoming Message, scroll down to the Messaging section in the configuration menu. Under Configure with Other Handlers, select the dropdown option "Webhook, TwiML Bin, Function, Studio Flow, Proxy Service". Then, under A Message Comes In, select the dropdown option "Studio Flow". You'll see another dropdown menu appear where you can select the Studio Flow you'd like to connect to when a message comes in to this number.
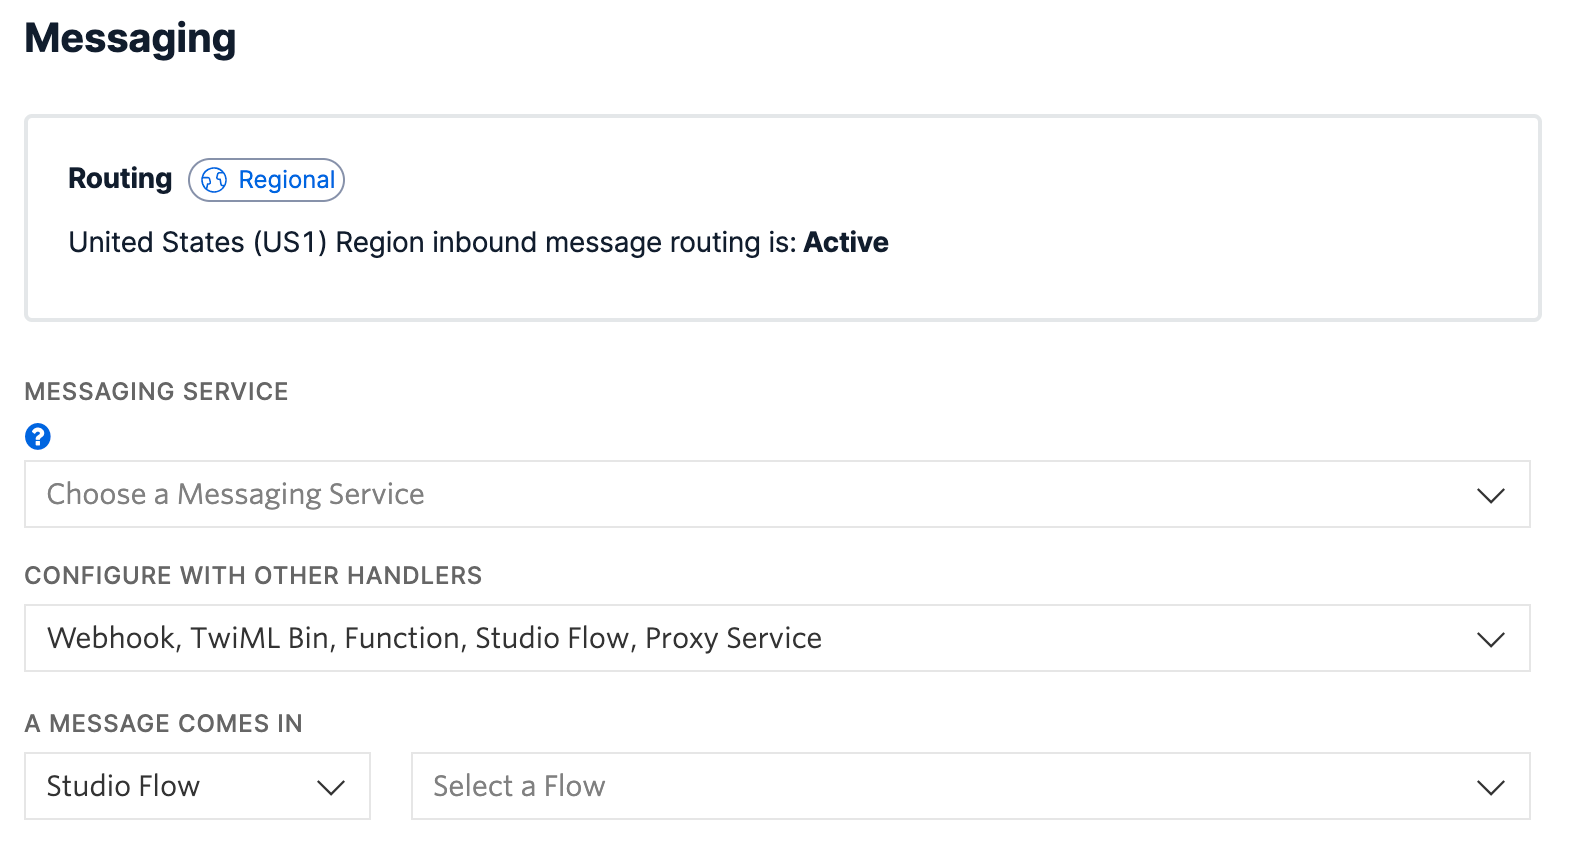
Choose the Flow you'd like to connect the number to, and then press Save to save these changes. Your Flow is now connected to your Twilio number!
Now you can test out your SMS to Slack hook! Send an SMS to your Twilio number, and watch your Slack channel for an inbound message.

Want to get creative? You can specify additional payload properties, such as icon_emoji, username, and more. Enjoy watching the stream of messages in your Slack channel!
Learn more about Twilio Studio:
- Check out the Trigger Widget documentation to learn about the Widget that begins your Studio Flow.
- Dive deeper into the HTTP Request Widget with the Make HTTP Request Widget documentation.