Get Started with Super SIM
This guide will walk you through the process of ordering your first Super SIM and preparing it for use. Once you've performed these straightforward but essential tasks, you'll be ready to try out Super SIM in an IoT device.
We have a series of guides which you can follow to get commonly used IoT hardware development platforms connected to Twilio's seamless global cellular network — just pick the guide that matches the platform you intend to use to prototype your own IoT hardware, or one you're familiar with, so you can quickly put Super SIM through its paces.
But that's for later — the very first step is to obtain a Super SIM and activate it.
Twilio's IoT business unit was acquired by KORE in June 2023. In addition to your Twilio account, you need to make a KORE account and link it to your Twilio account.
Your first step will be to create your Twilio account if you don't already have one.
Next, you will need to create and link a KORE account to your Twilio Account. You can follow this step-by-step guide to complete that. Then, return to this guide to order and configure your first Super SIM.
Your Twilio account will not be charged for IoT usage. Instead you'll be charged by KORE. You'll continue to use the Twilio Console and APIs to manage your Super SIMs until equivalent experiences are available from KORE. For more details on what to expect see this overview and FAQ.
Warning
If you already have a Super SIM that you received at a developer event, conference, or in-person meeting, or that you received through some other channel, you may need to register it with your Twilio Account in Console. You can then skip this ordering step and jump to preparing it for use once its registered to your Twilio Account.
You order Super SIMs using the Twilio Console — just go to Internet of Things > Order SIMs to login and enter the number of Super SIMs you require.
-
Select the number and type of Super SIMs you want to order:
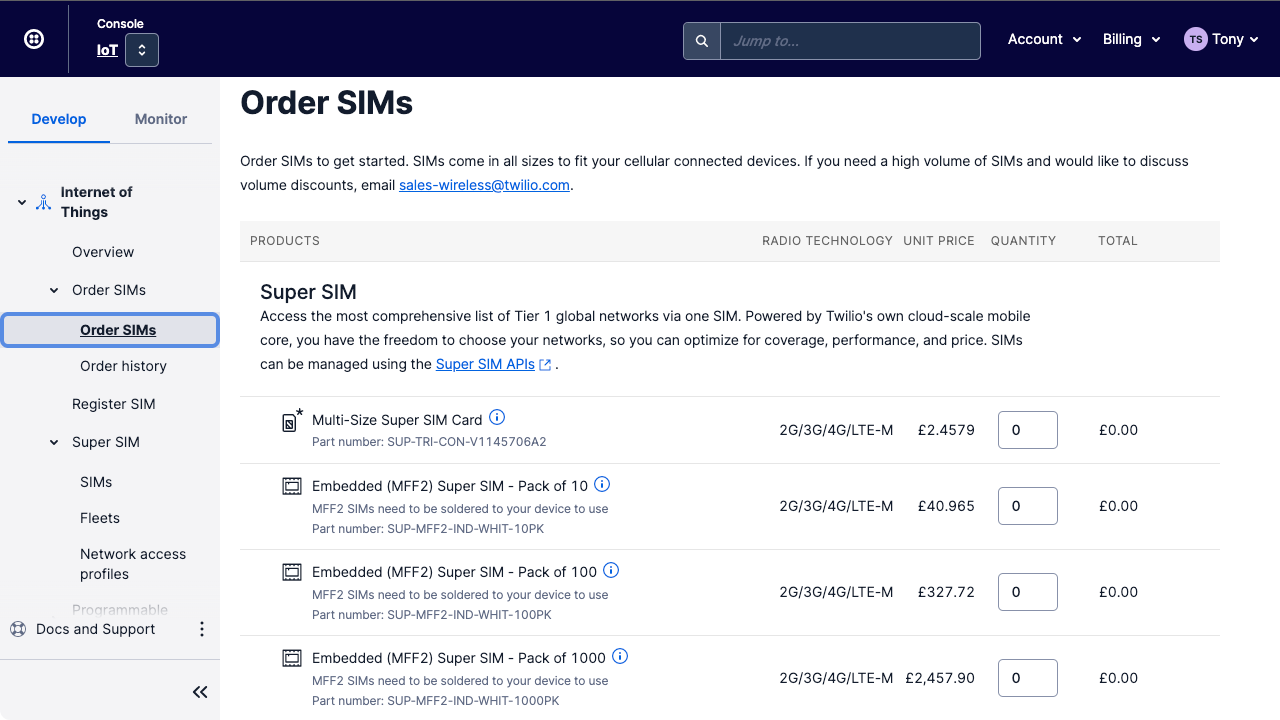
- Scroll down and complete add or choose your Delivery Address .
- Click the Order button.
Once your Super SIM has shipped, it will be automatically added to your Twilio account. In the meantime, the following two tasks can be performed straight away — you don't need to have your Super SIM in front of you to complete them.
Network Access Profiles give you control over which cellular networks your Super SIMs can connect to around the world. You can either start from scratch with a new, empty Network Access Profile and add the networks that best suit your needs, or generate one that starts with all of our cheapest networks around the world already enabled. You can update your Network Access Profile's list of enabled networks at any time.
-
Go to Internet of Things > Super SIM > Network Access Profiles:
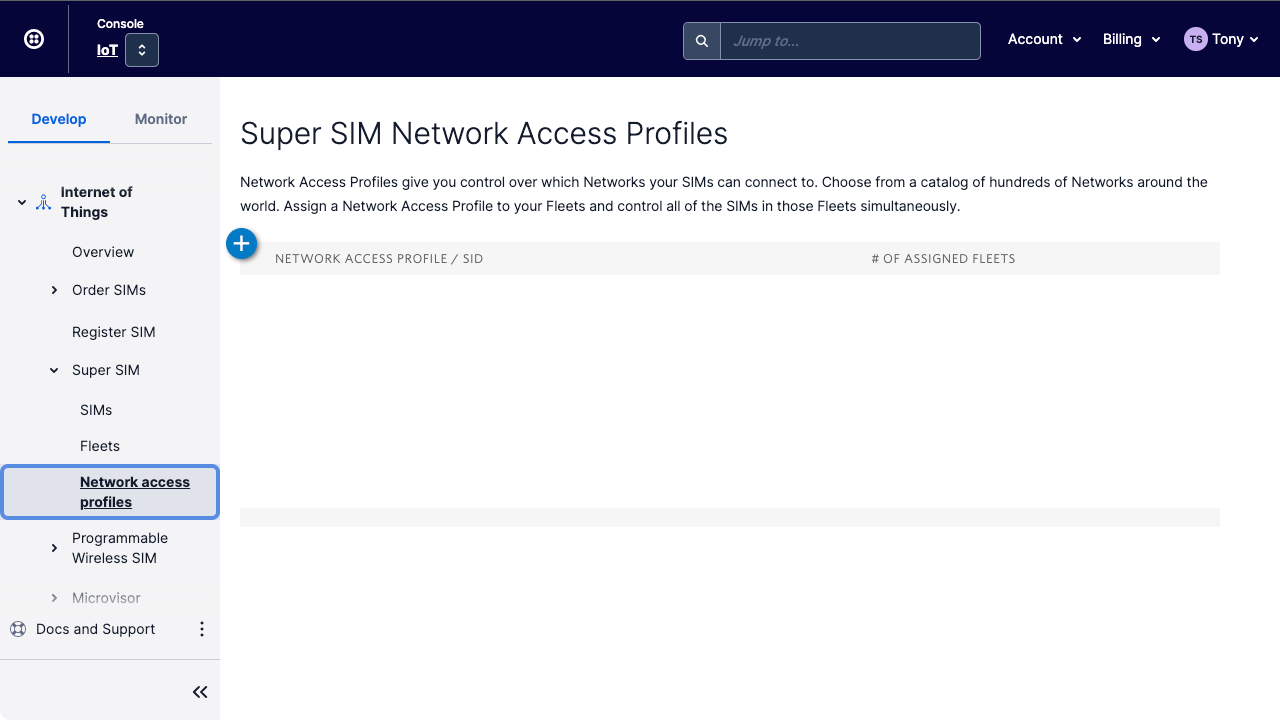
- Click on the blue + button .
-
Give your new Network Access Profile a memorable Unique Name to make it easy to identify in future:
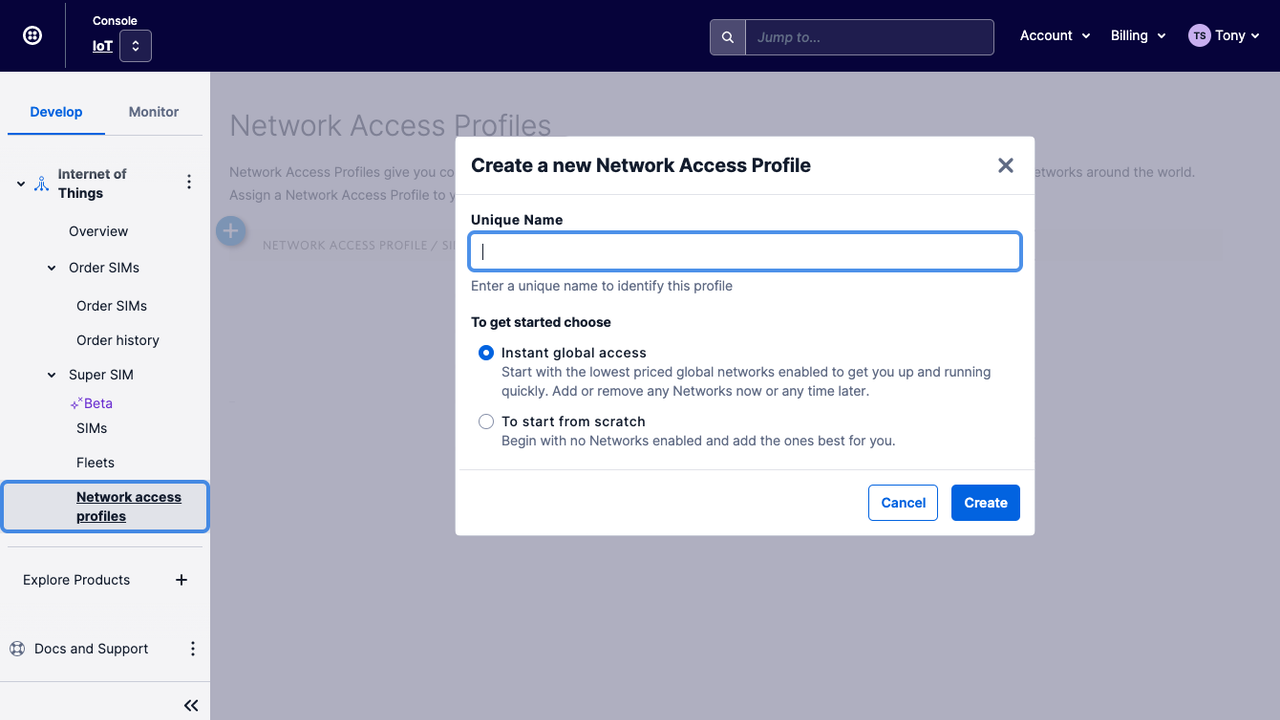
- Select Instant global access . This is the recommended setting for new users: it pre-selects a set of networks around the world and favoring those with the lowest data and SMS Command usage rates. If you select To start from Scratch , you will have to select networks yourself.
- Click the Create button.
-
You will see the new Network Access Profile's Networks tab. This shows a list of mobile networks organized by continent and country. Only networks which have been selected will be accessed by Super SIMs using this Network Access Profile:
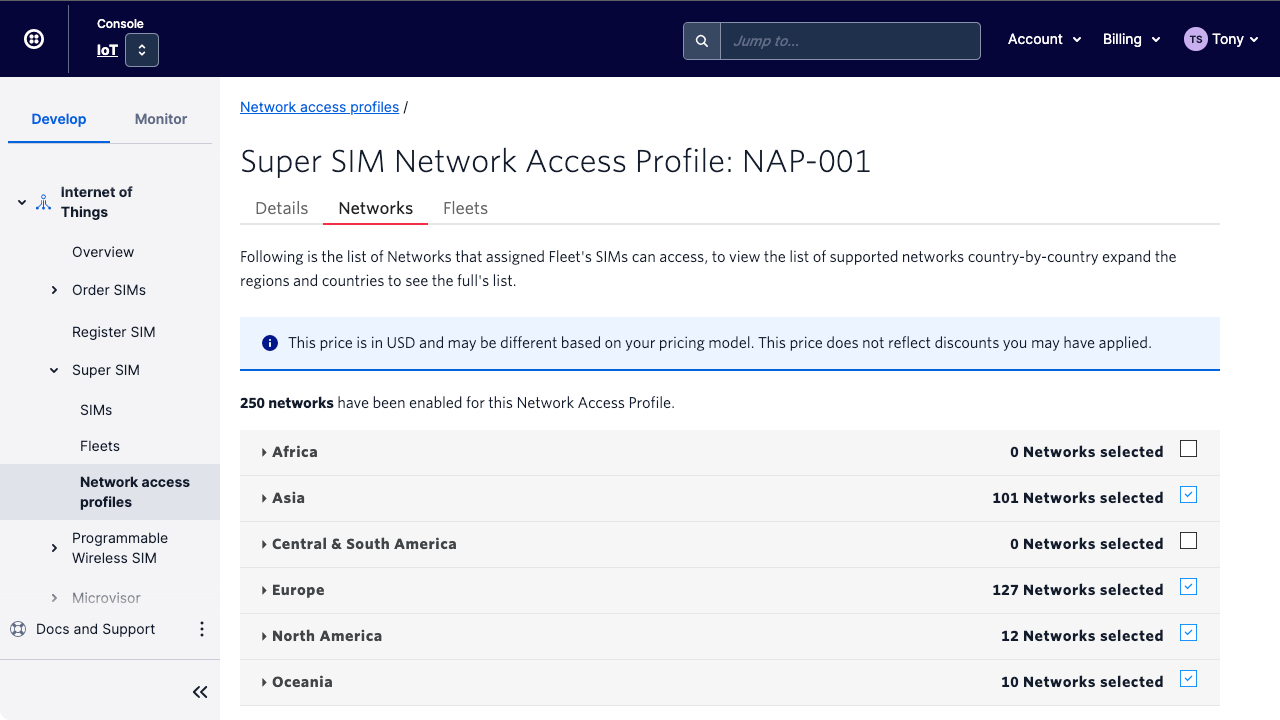
If you selected Instant global access in step 4, a number of networks will already be enabled for you. If you selected To start from Scratch, you will have to select some networks yourself. If you make any changes to the list of selected networks, click the Update Networks button at the bottom of the page.
Info
You can update a Network Access Profile's list of networks at any time, using Console or the Super SIM API. You can delete Network Access Profiles in Console provided it has not been assigned to a Fleet. If you'd like to know more about Network Access Profiles, take a look at How to Use Super SIM Fleets and Network Access Profiles.
A Fleet is a way of bringing together one or more Super SIMs to set their behavior as a group. For example, you might want a set of Super SIMs to have their data usage billed the same way and to all accept SMS Commands. Rather than apply these settings to each Super SIM individually — imagine hundreds of thousands of these integrated into IoT devices in the field — you just update the Fleet, and all the Super SIMs in that Fleet automatically adopt the new configuration. Easy.
All Super SIMs inherit their capabilities from the Fleet they've been assigned to, so you need to create a Fleet and add your Super SIM to it before you can use that SIM. The mobile networks a Fleet can use is set through its own Network Access Profile, so you will need to select this too.
You can create a new Fleet using the Super SIM API or the Console. We'll use the latter here because it works well with single Super SIMs, but the API documentation will show you how to work with Fleets when you're managing large volumes of Super SIMs.
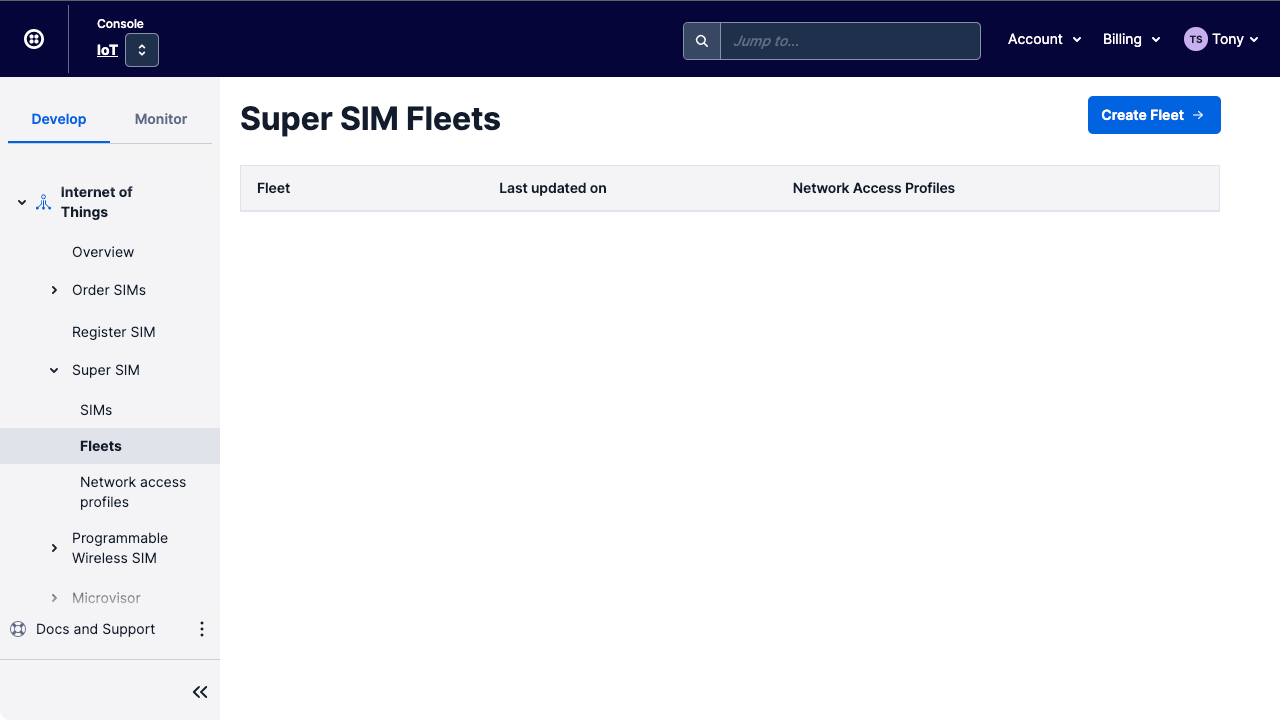
- Go to Internet of Things > Super SIM > Fleets .
-
Click the Create Fleet button at the top:
-
Give the Fleet a unique, memorable name to make it easy to identify in future:
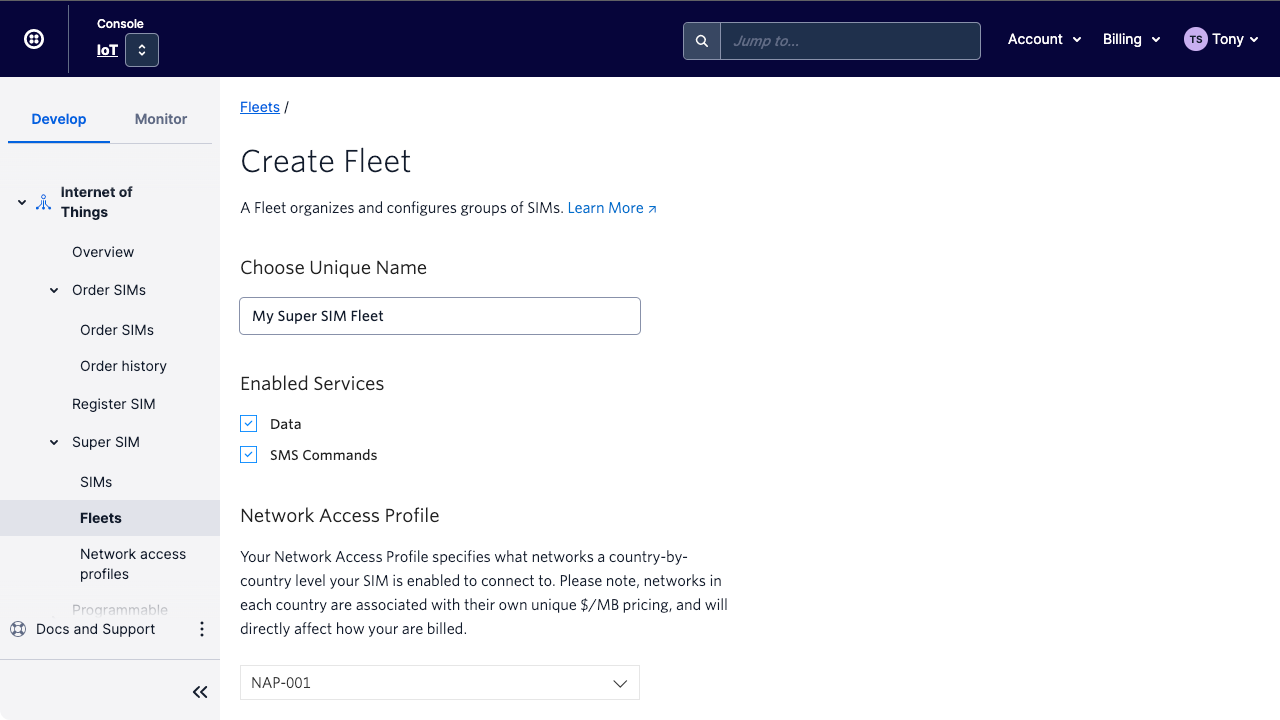
- The Console automatically enables the Fleet's Data and SMS Commands services; leave these as they are for now. In future, you can use these settings to block all the Super SIMs in the Fleet from transferring data across the network, or from receiving SMS Commands .
- Under Network Access Profile select the NAP you created in Step 1 — Create a Network Access Profile .
- The Console automatically sets the Fleet's Data Limit to 1GB (1,000MB) per month. This means that each Super SIM assigned to the Fleet can use 1GB of data. This number may be too high or low depending on your use case. If you have a better estimate for how much data your IoT device needs each month, put that number here now — or update your data limit later if your figure turns out to be a little wide of the mark after testing.
- Scroll down and click the Create button.
You're now ready to activate your Super SIM when it dispatches.
Once your Super SIM has been shipped you'll be able to see it in your Twilio Account. Now you can finish configuring it even though you may not have received it yet.
- Go to Internet of Things > Super SIM > SIMs .
- In the list of SIMs you should see a single Super SIM: the one you ordered earlier. Click anywhere on the SIM's row.
-
Take this opportunity, if you haven't already, to give the Super SIM a unique, memorable name — this will make it easier to locate in future:
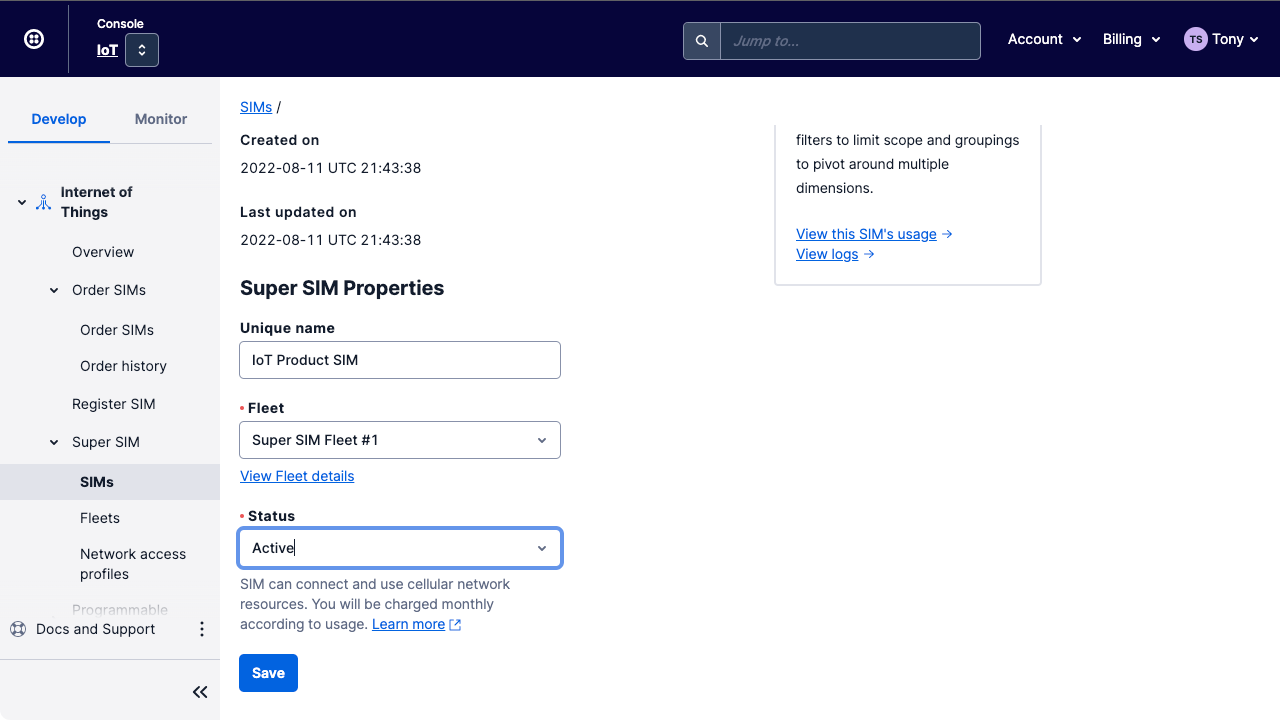
- From the Fleet menu, select the Fleet you created in Step 2 — Create a Fleet .
- Change the SIM's Status from New to Active .
- Click the Save button.
Info
We've worked through the process for a single SIM, but if you have any larger number of new SIMs to set up, you can use the Bulk Actions functionality provided by the console.
For example, to assign a number of SIMs to the Fleet you created earlier, check the SIMs you want to update, click the Update SIMs button, and in the panel that appears, select your new Fleet. Click Continue and then confirm the change, and all the selected SIMs will be assigned to the chosen Fleet. You can set the status of those SIMs at the same time.
For full details, please see How to Use Console Bulk Actions to Update Multiple Super SIMs.
Warning
When you activate a Super SIM by changing its status in the Console from New to Active (or new to active, if you're using the API), you will begin incurring a monthly active SIM fee of $2.00. You can change the Super SIM's status to Inactive (Console) or inactive (API) at any time to disable the SIM and stop incurring the monthly fee. You can reactivate at any time by switching the status back to Active /active.
Whichever IoT development hardware you're using, you'll need to set its Access Point Name (APN) to super.
This is a straightforward process, but different devices place the setting in different locations, so please follow these instructions, which will help you set up your type of device.
All devices using Super SIM must be set to allow roaming across mobile networks, even if they are only going to be used in the US.
Again, this isn't a complex task, but it will require different steps depending on which device you have added your Super SIM to. Please follow the instructions here for your device.
Your Super SIM is now ready to be used as the basis for your IoT device's global cellular connectivity — why not try it out with one of our Quickstart guides?
- Get Started with Super SIM, the Raspberry Pi 4, and the Sixfab Base Hat
- Get Started with Super SIM, the Raspberry Pi 4, and the Waveshare 4G Hat
- Get Started with Super SIM and the Raspberry Pi Pico
- Get Started with Super SIM SMS Commands and the Raspberry Pi
- Get Started with Super SIM SMS Commands and the Raspberry Pi Pico
- Get Started with Super SIM IP Commands and the Raspberry Pi
- Get Started with Super SIM IP Commands and the Raspberry Pi Pico
- Get Started with Super SIM Connection Events
- Get Started with Super SIM eSIM Profiles for eUICC
All the information you need to become a proficient Super SIM user is right here in the Twilio IoT docs. In particular, check out the Super SIM API documentation to get a thorough grounding in how the API can help you wrangle all of your IoT products' Super SIMs.
To discover how Super SIM works and to understand its behaviors, take a look in the left-hand navigation menu's Help and Support section, in particular:
- Super SIM Multi-IMSI
- Super SIM Over-the-Air Updates
- Super SIM States
- Super SIM Partner Networks
- Super SIM Connection Events
- Super SIM Network Attach Priority Lists
- Super SIM Console Bulk Actions
If you need assistance using Super SIM with a specific cellular modem, be sure to investigate the Cellular Module Knowledgebase. It contains configuration and usage information for an array of devices from different manufacturers, and it's growing all the time. It also contains handy generic guidance which can be invaluable if your chosen module is yet not one of the ones we've detailed.