How to Use Console Bulk Actions to Update Multiple Super SIMs
Warning
Bulk Actions Public Beta
Bulk Actions is in Public Beta, so some aspects of the functionality and how the Console makes those features accessible may change before Bulk Actions becomes generally available.
Bulk Actions allows you to configure a large number of Super SIMs with just a few clicks in the Twilio Console. For example, you can perform operations like activating thousands of SIMs, or batch-assigning them to a given Fleet. This can be done all in one go instead of updating each SIM one at a time.
Although Bulk Actions may take several moments to finish, especially for those that involve a large number of SIMs, you do not have to wait in front of the Console for them to finish. Instead, the job will run asynchronously, and we will notify you via email once it has completed. Upon completion, we provide a report in the Console detailing which SIMs, if any, could not be modified. Each of these has a corresponding error message, allowing you to easily follow up.
Bulk Actions can be performed in six easy steps:
- Go to the Develop > Super SIM > SIMs page in the Console.
-
Optionally, apply a filter to narrow down a subset of SIMs you wish to apply a Bulk Action to. For example, you might want to list the SIMs in a particular Fleet, or those that were shipped together in an Order:
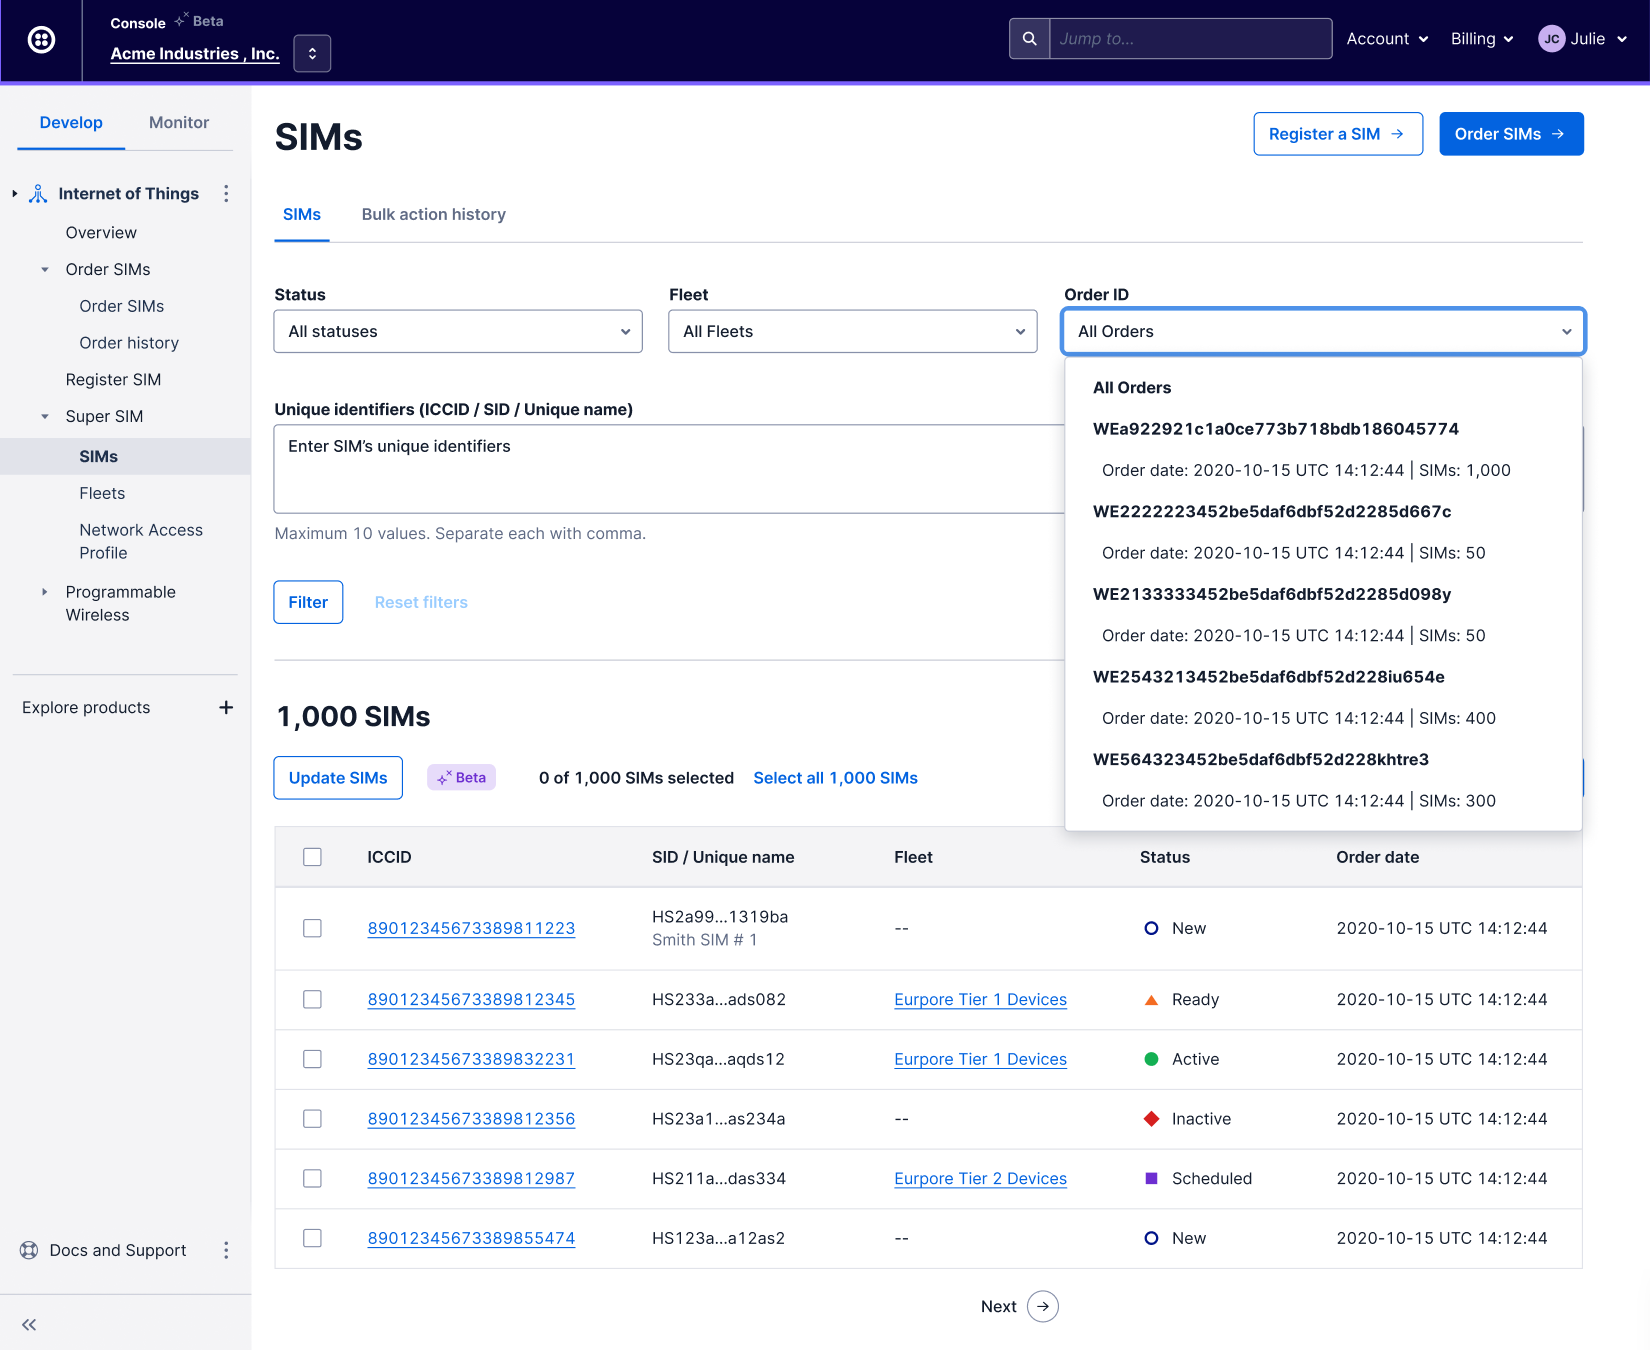
Click the Filter button to update the list of SIMs.
-
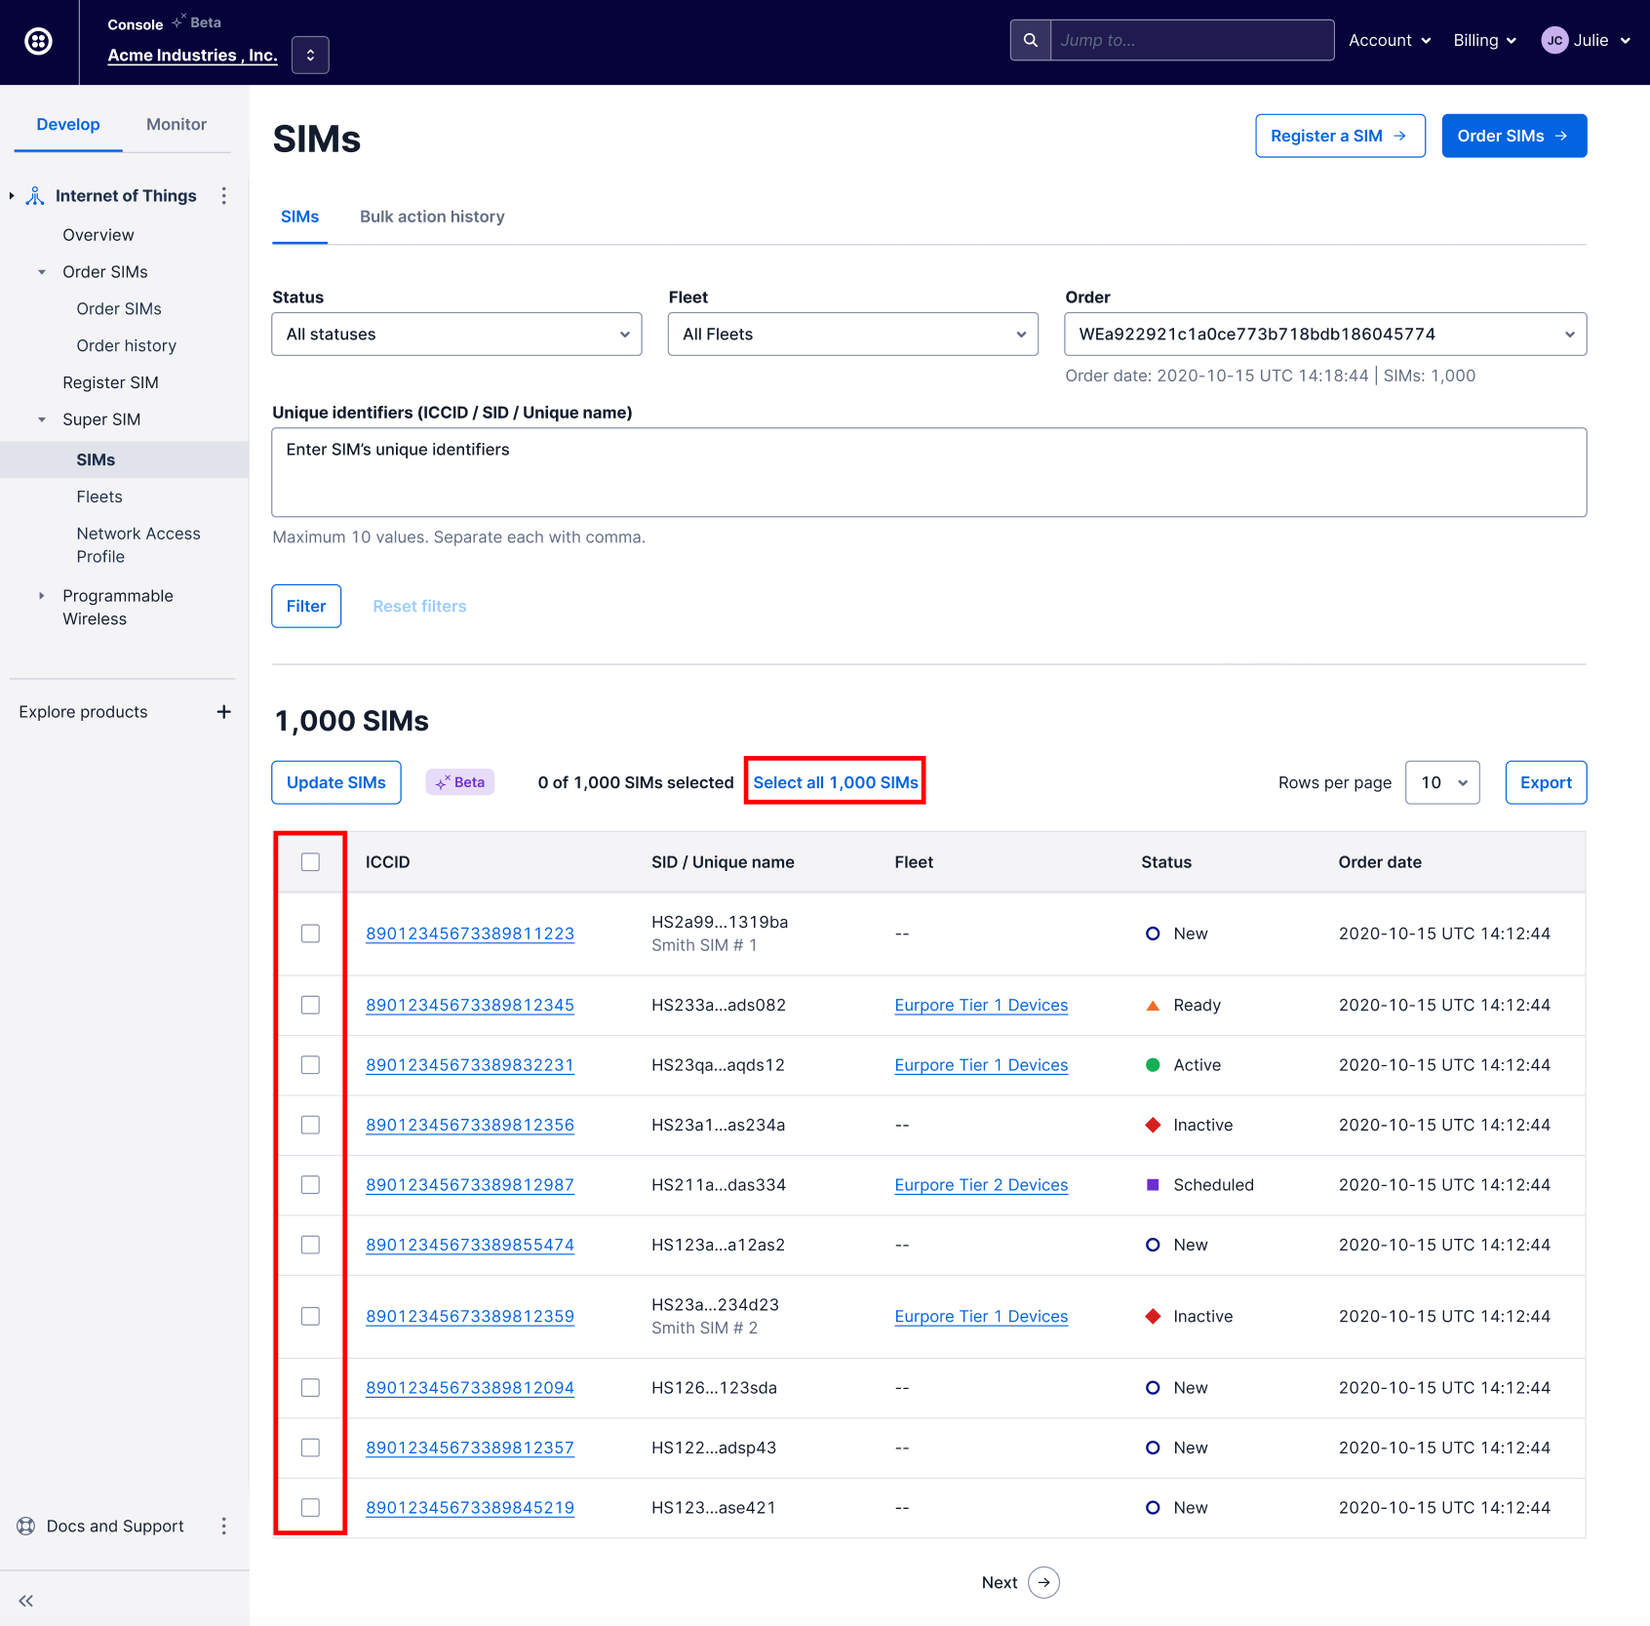
Tick the checkbox for each row that includes a SIM you want to update. Alternatively, click on Select all x SIMs to select every SIM that matches the filter you applied in Step 2 if you did so. If you did not specify a filter, it selects every SIM in your account:
-
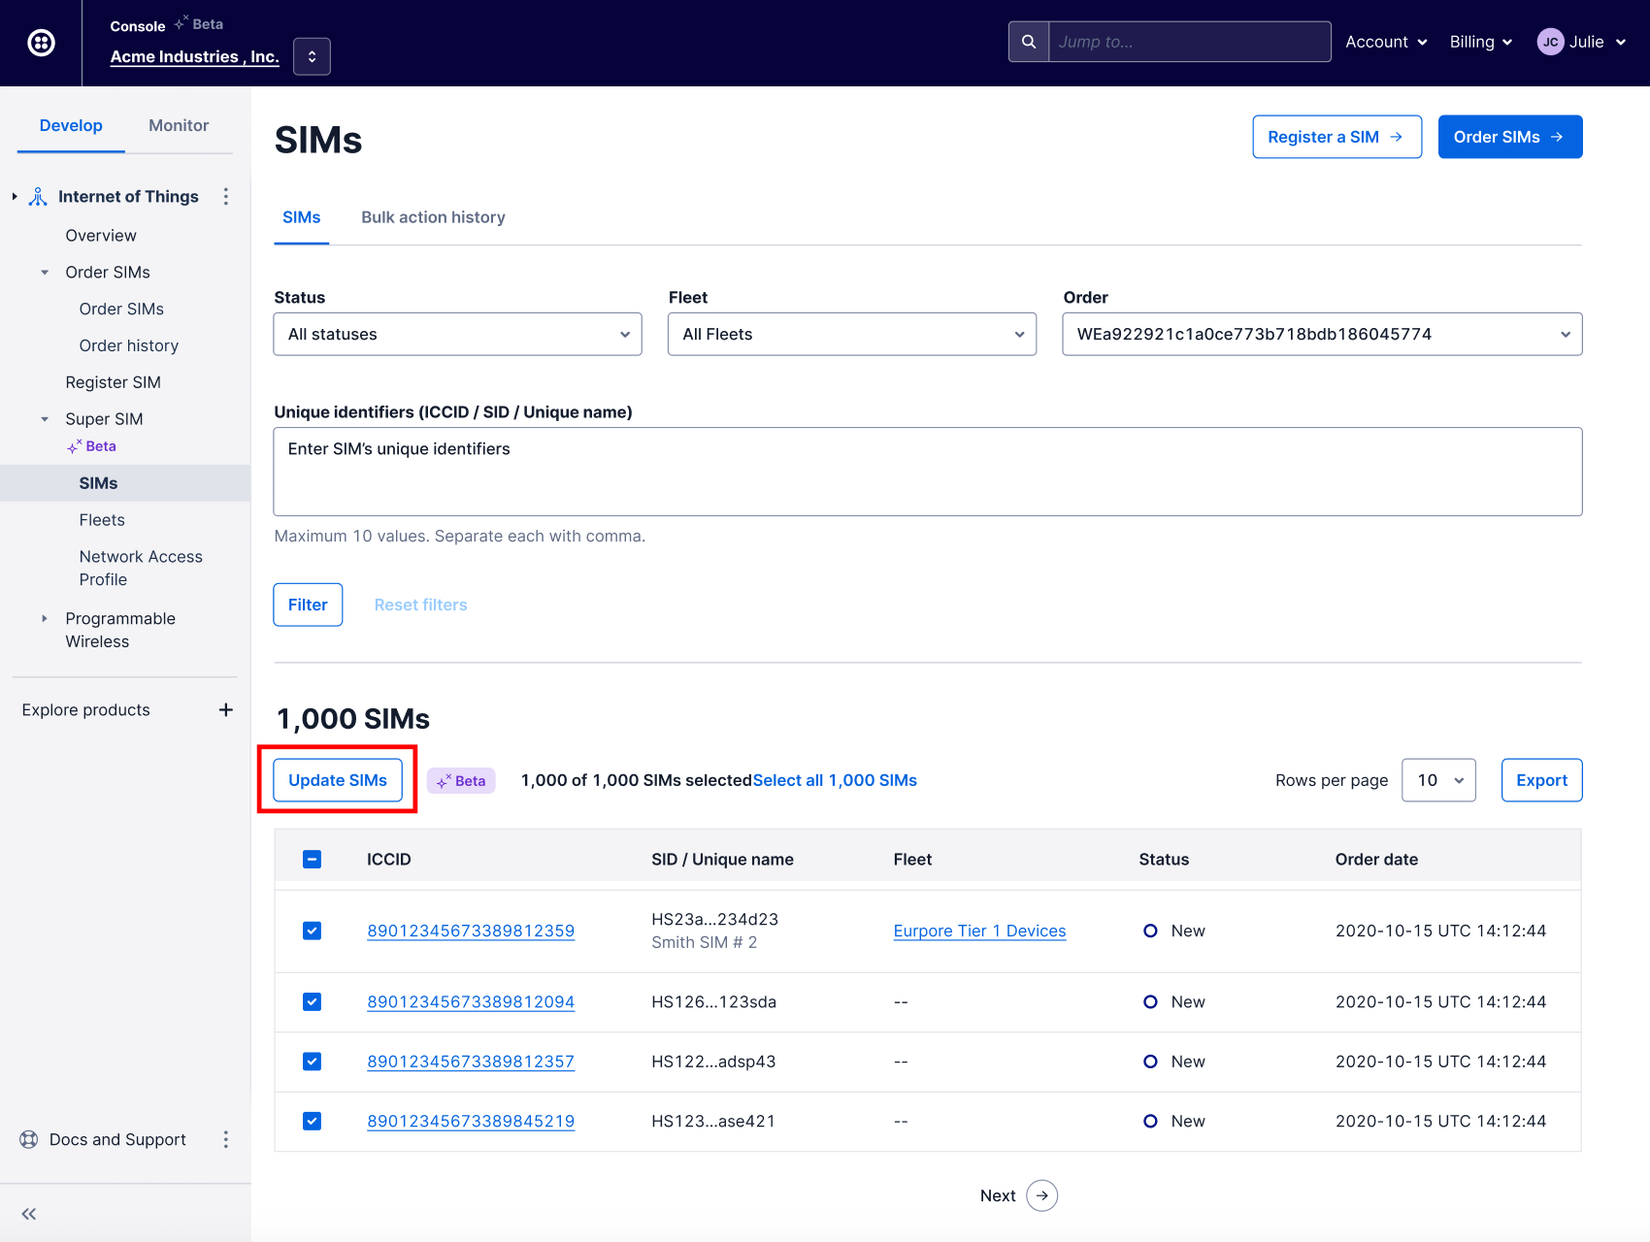
Click the Update SIMs button to open the Bulk Actions Update selected SIMs panel:
-
On the Update selected SIMs panel, select the SIM Status and/or Fleet you want to assign to the selected SIMs:
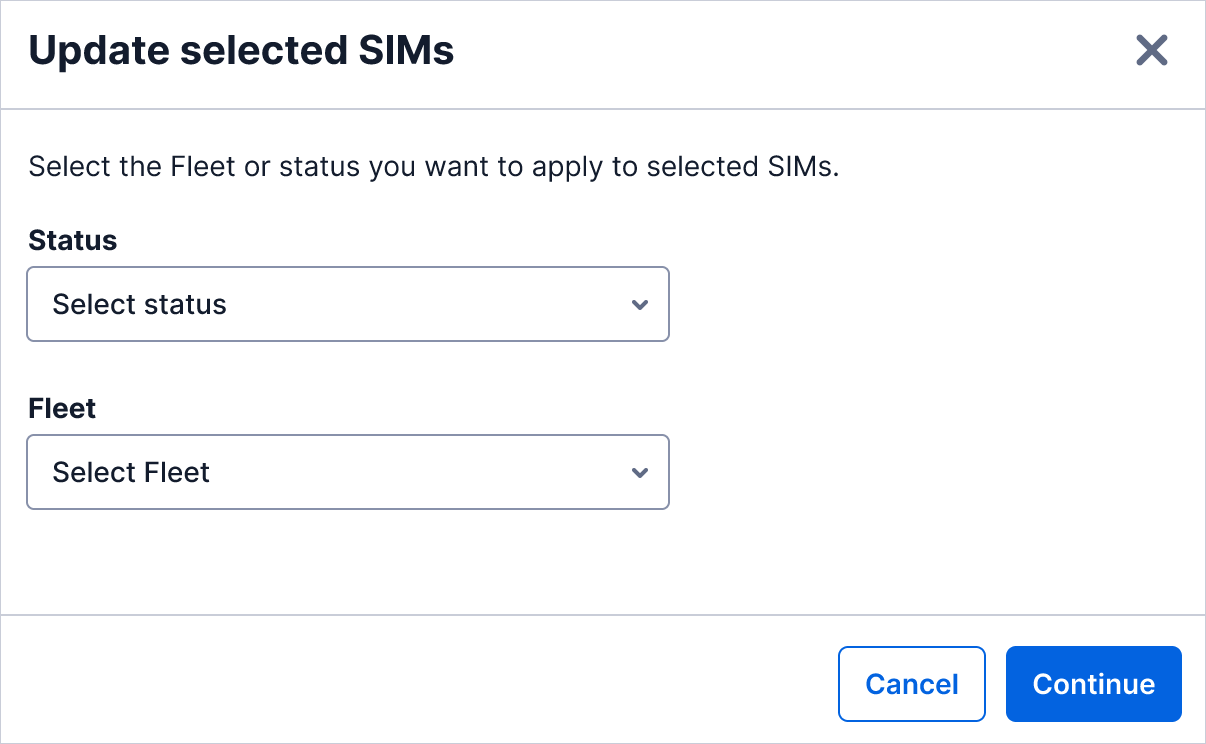
Click Continue.
-
The panel now shows you how many SIMs you are about to update and warns you about any cost implications that your intended action may have, such as Super SIM activation fees. Please take a moment to check the cost calculation.
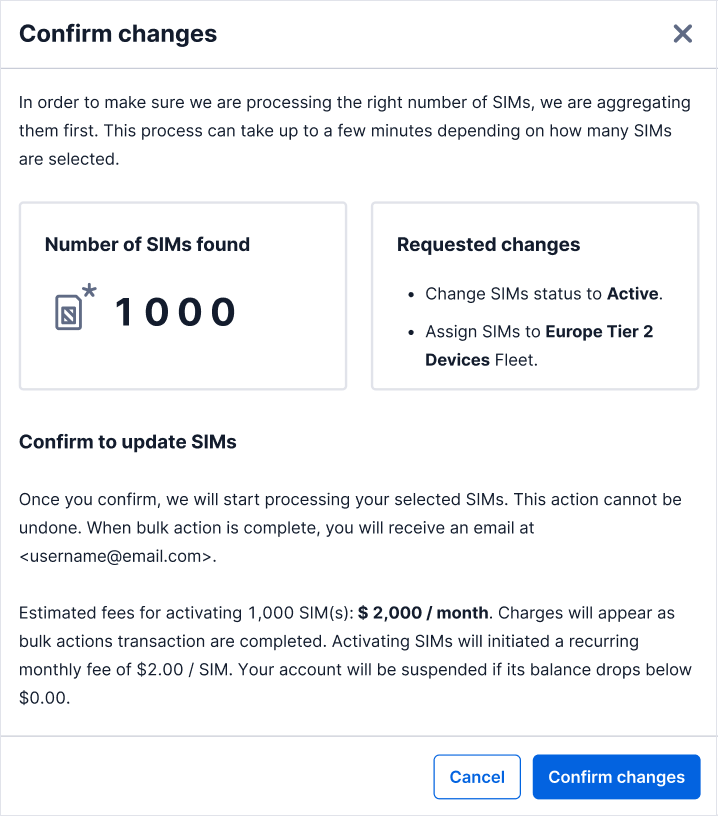
If you are good to go, click the Confirm changes button, or hit Cancel to back out.
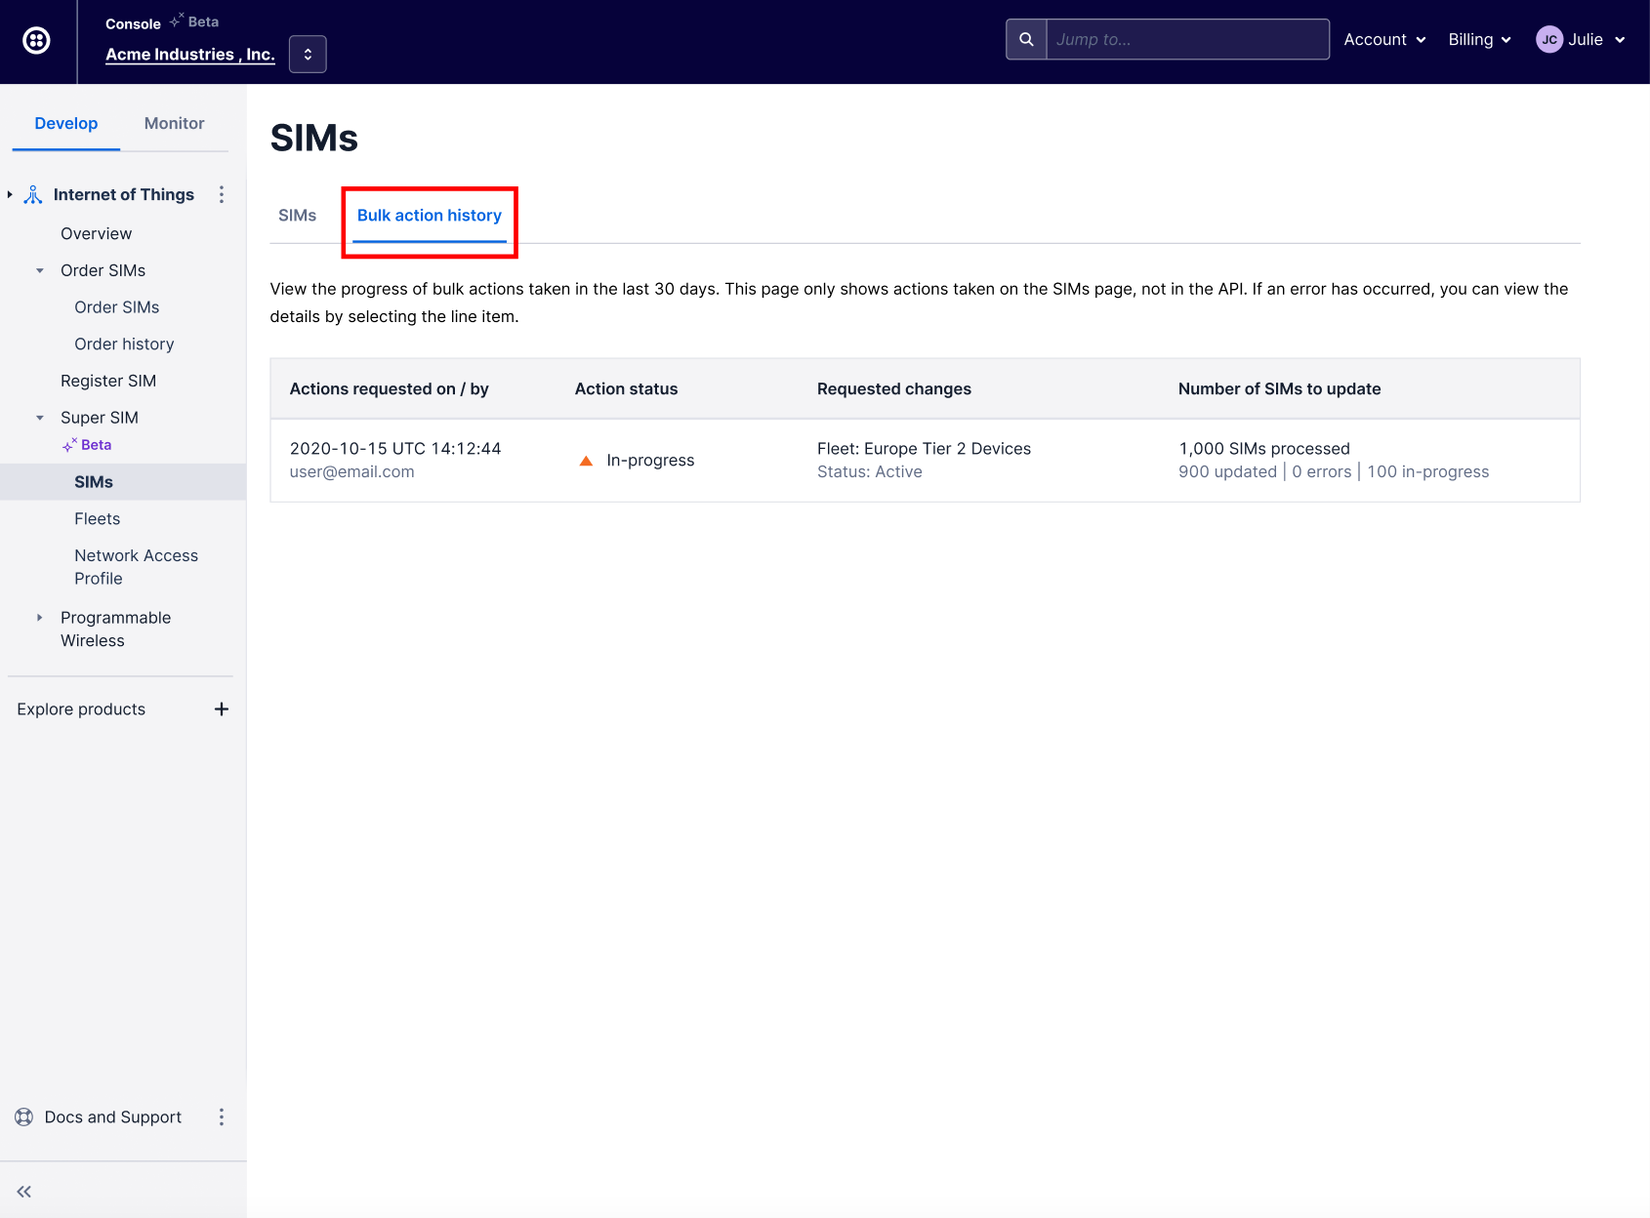
Bulk Actions are applied asynchronously and may take a few moments to complete, especially if you have selected a very large number of SIMs. We'll send an email to your account once the Bulk Action is complete. In the meantime, you can click on the Bulk action history tab to track its progress: