Configuring Okta with Twilio SSO
Info
Single Sign-On for Twilio Console is available for customers with Twilio Enterprise Edition or Twilio Administration Edition. For more information, please talk to sales.
This guide covers configuring your Okta Identity Provider with Twilio for SSO login to Twilio Console. If you are looking to Configure SSO for Twilio Flex, Frontline or SendGrid, please refer to the configuration guides for them:
- Configuring Okta with Twilio Flex SSO
- Configuring Okta as IdP with Frontline
- Configuring Okta with Sendgrid SSO
Before proceeding with SSO Configuration make sure that you have satisfied all of the prerequisites.
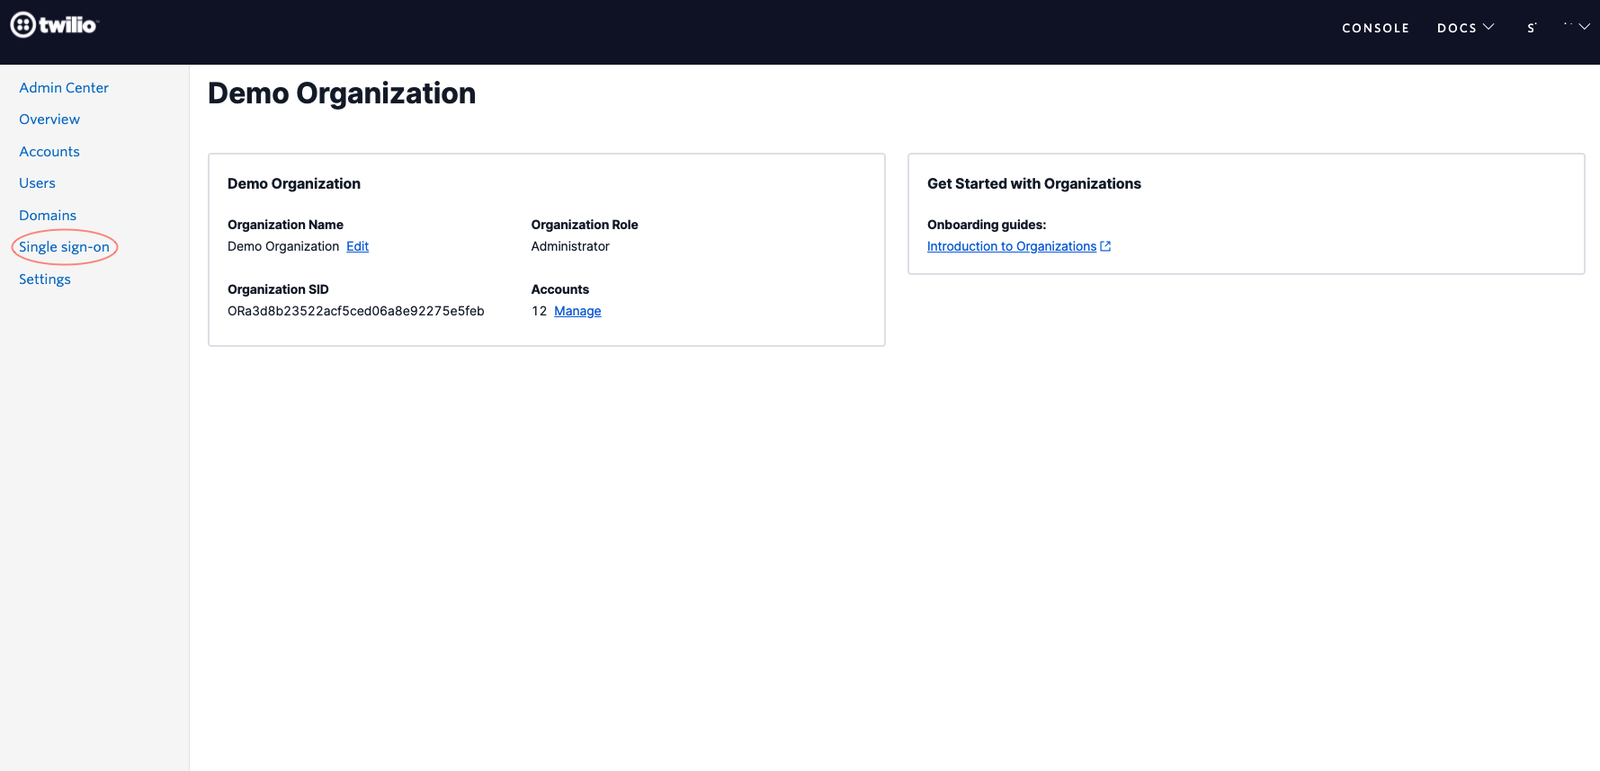
Go to Admin Center and click on the Single Sign-On option in the navigation bar as shown below
Create a new SSO Profile by clicking the 'Create new SSO Profile ' button. You will land on the below screen where you can copy or download the SP Metadata.
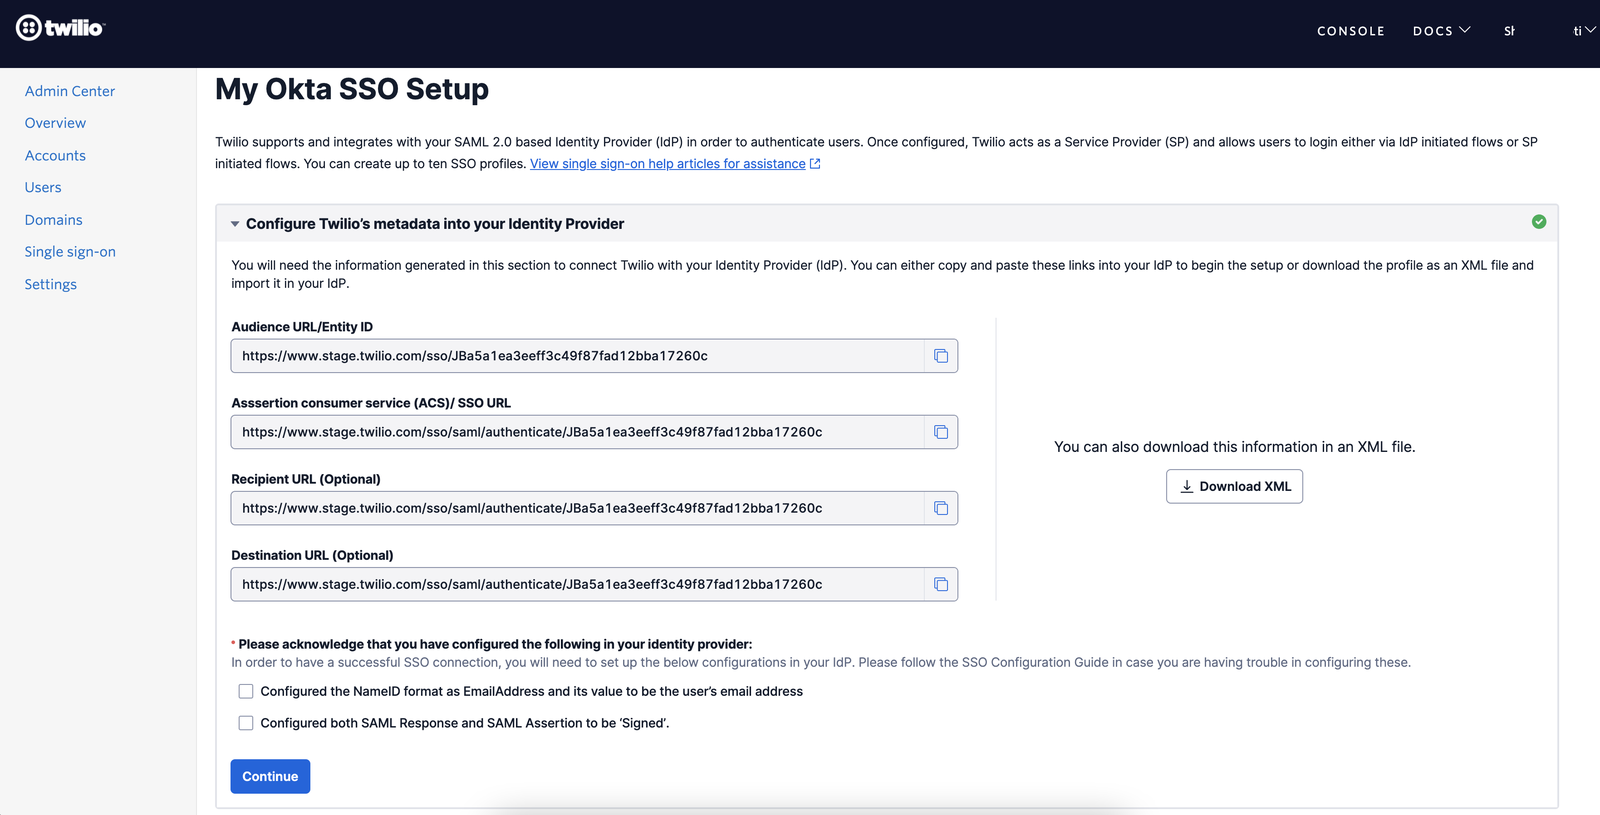
Keep this tab open as you will need to copy and paste the Entity ID and Single Sign On URL values in Okta
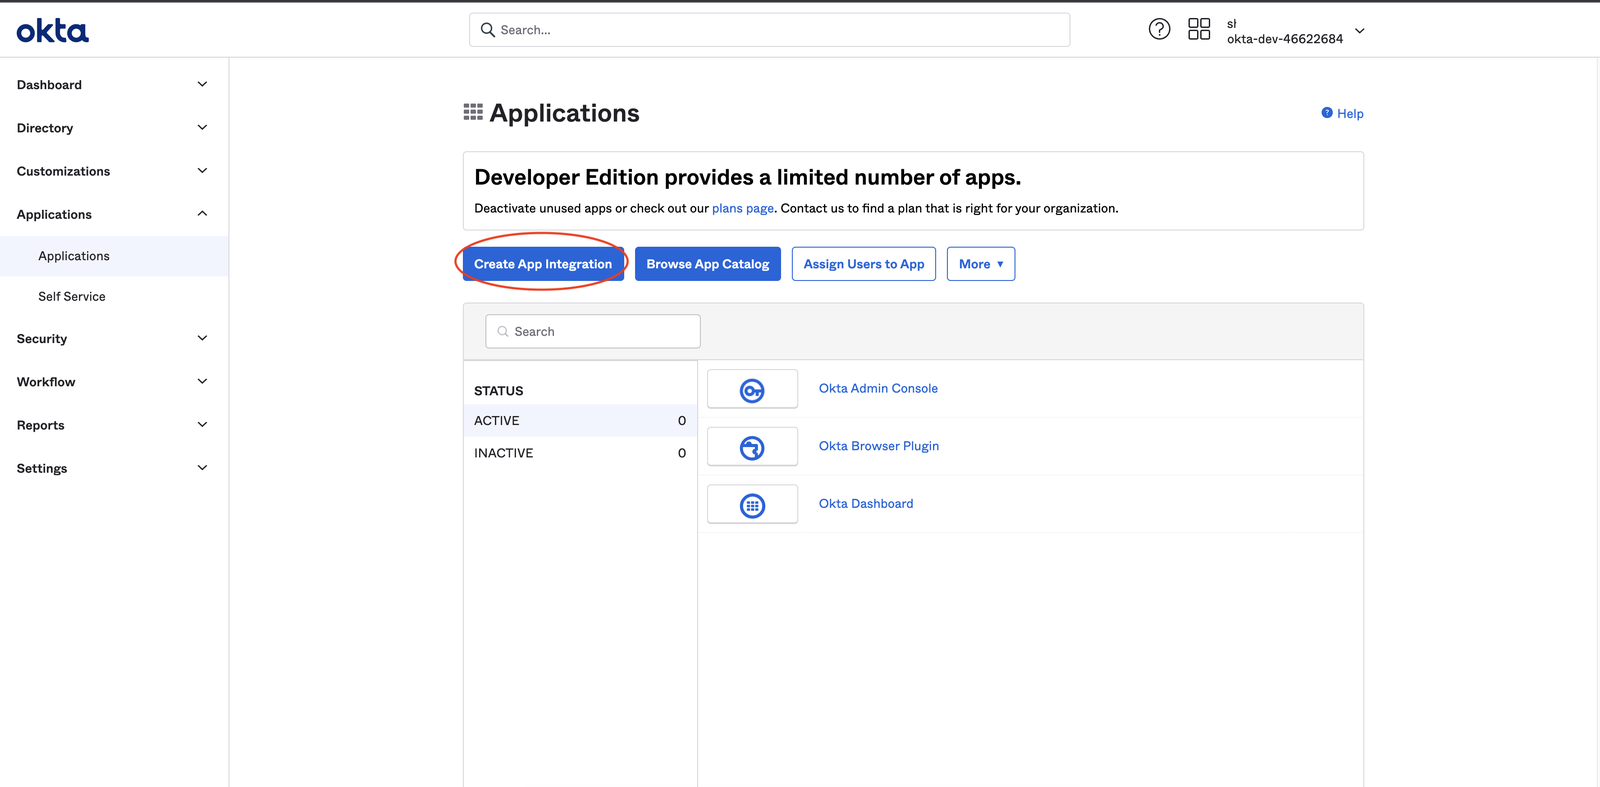
In a new tab open your Okta Admin console, go to Applications and click on 'Create App Integration '
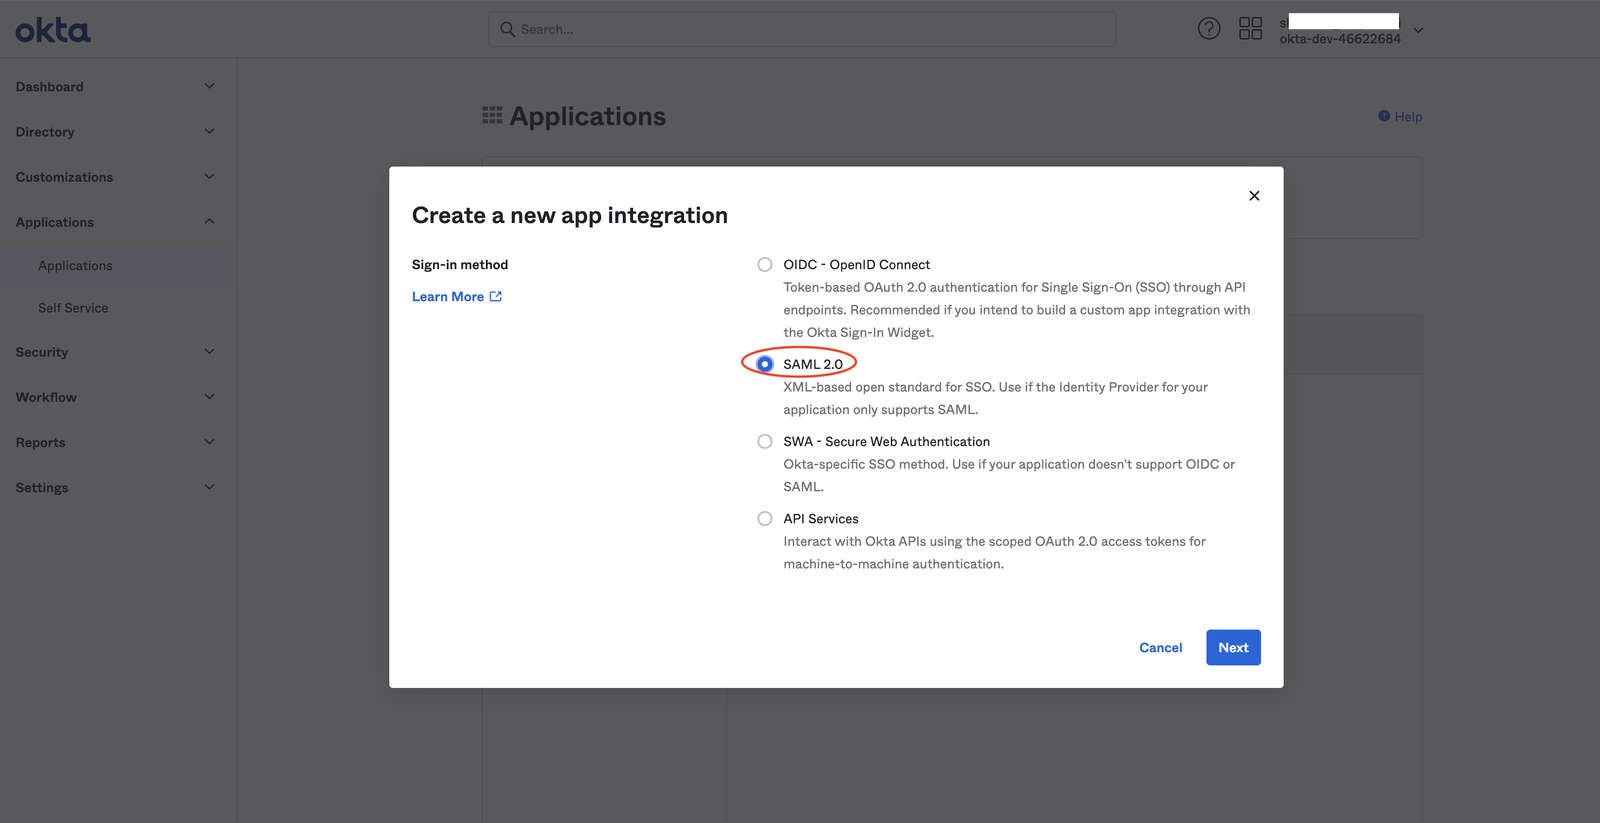
You will see a popup as shown below. Select the sign-in method as 'SAML 2.0' and click Next
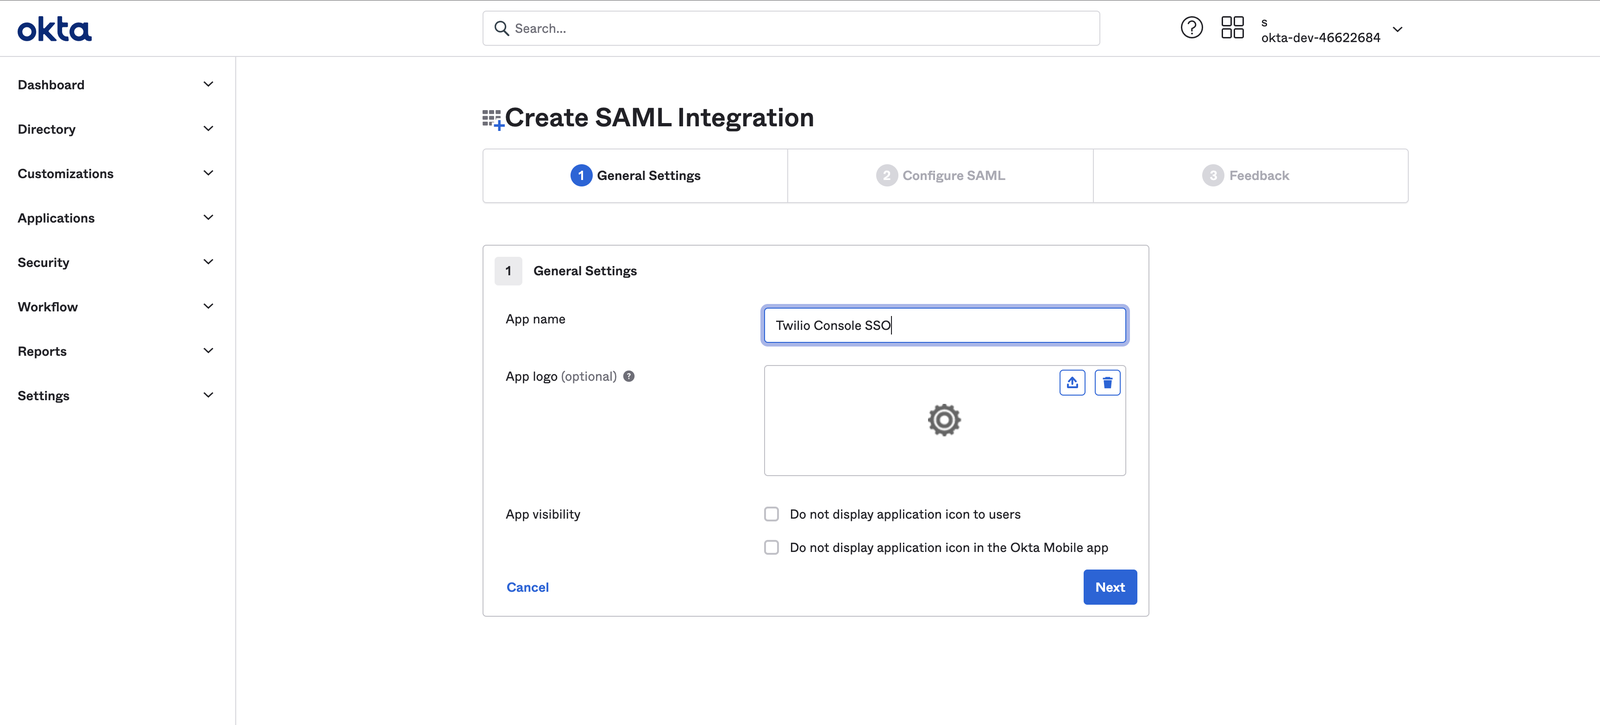
In the next screen, enter an appropriate name for the App you are configuring. This name should be such that your users can recognize and search for it easily from their Okta home page. You should also upload the Twilio logo from here.
To configure the SAML settings, follow the below process -
-
First copy and paste the values for the Single sign-on URL (SSO URL) and Audience URI from the other tab where you have the SSO Profile in Twilio Admin Center.
- Paste the 'Audience URL/Entity ID' value from the Twilio SSO Profile in the 'Audience URI (SP Entity ID)' field of Okta App Integration
- Paste the 'Assertion consumer service (ACS)/ SSO URL' value from the Twilio SSO Profile in the 'Single sign-on URL' field of Okta App Integration
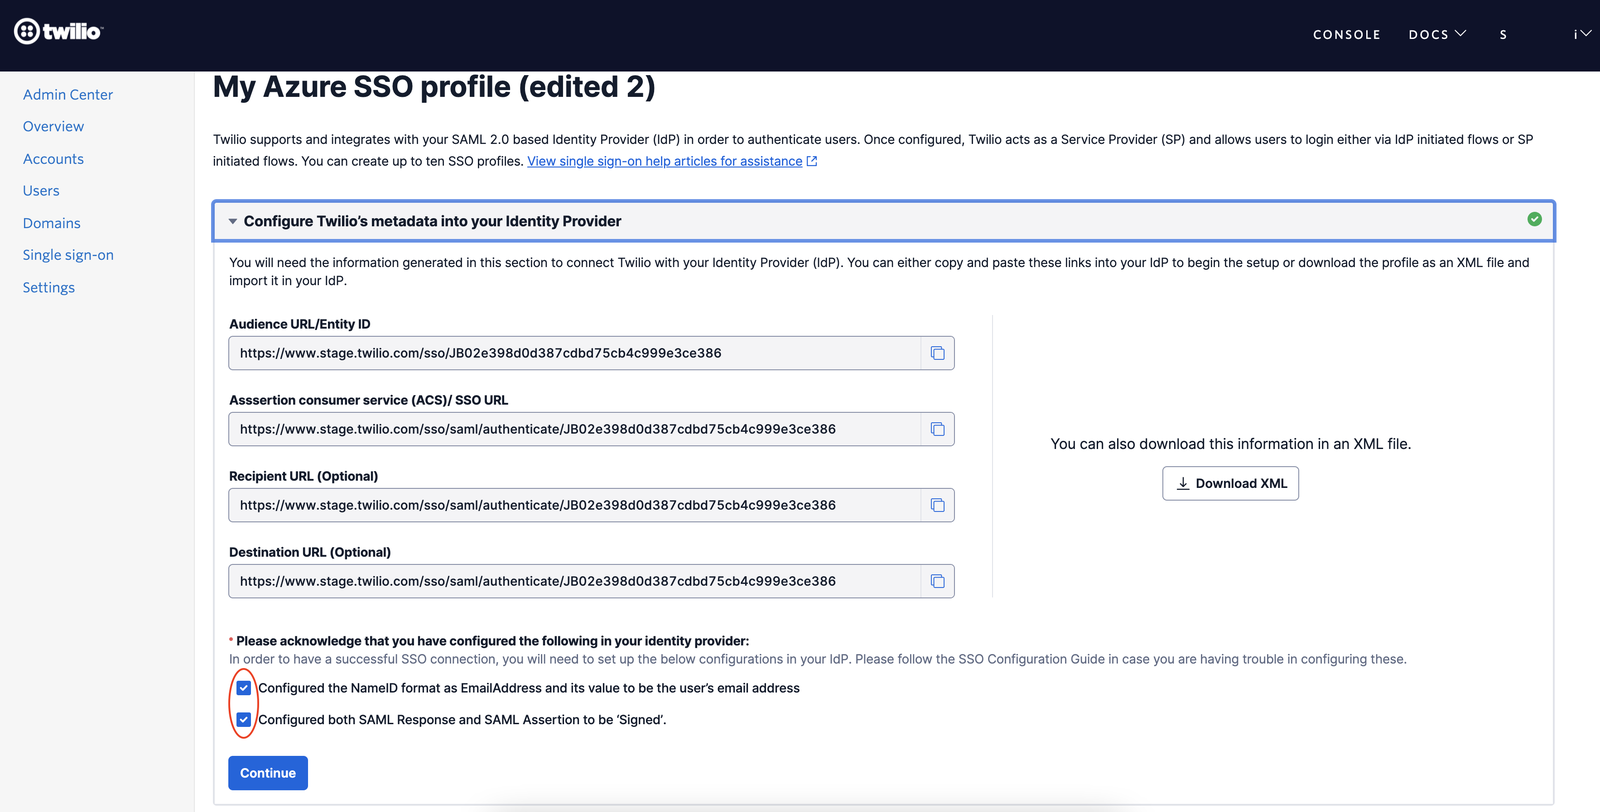
- Keep the checkbox 'Use this for Recipient and Destination URL' selected. Also, keep the 'Default Relay State' blank.
- Next select ' EmailAddress ' as the Name ID Format and select ' Email ' as the Application username. This configuration tells Okta that the application(Twilio Console) uses the email address of the users as the username (i.e. unique identifier).

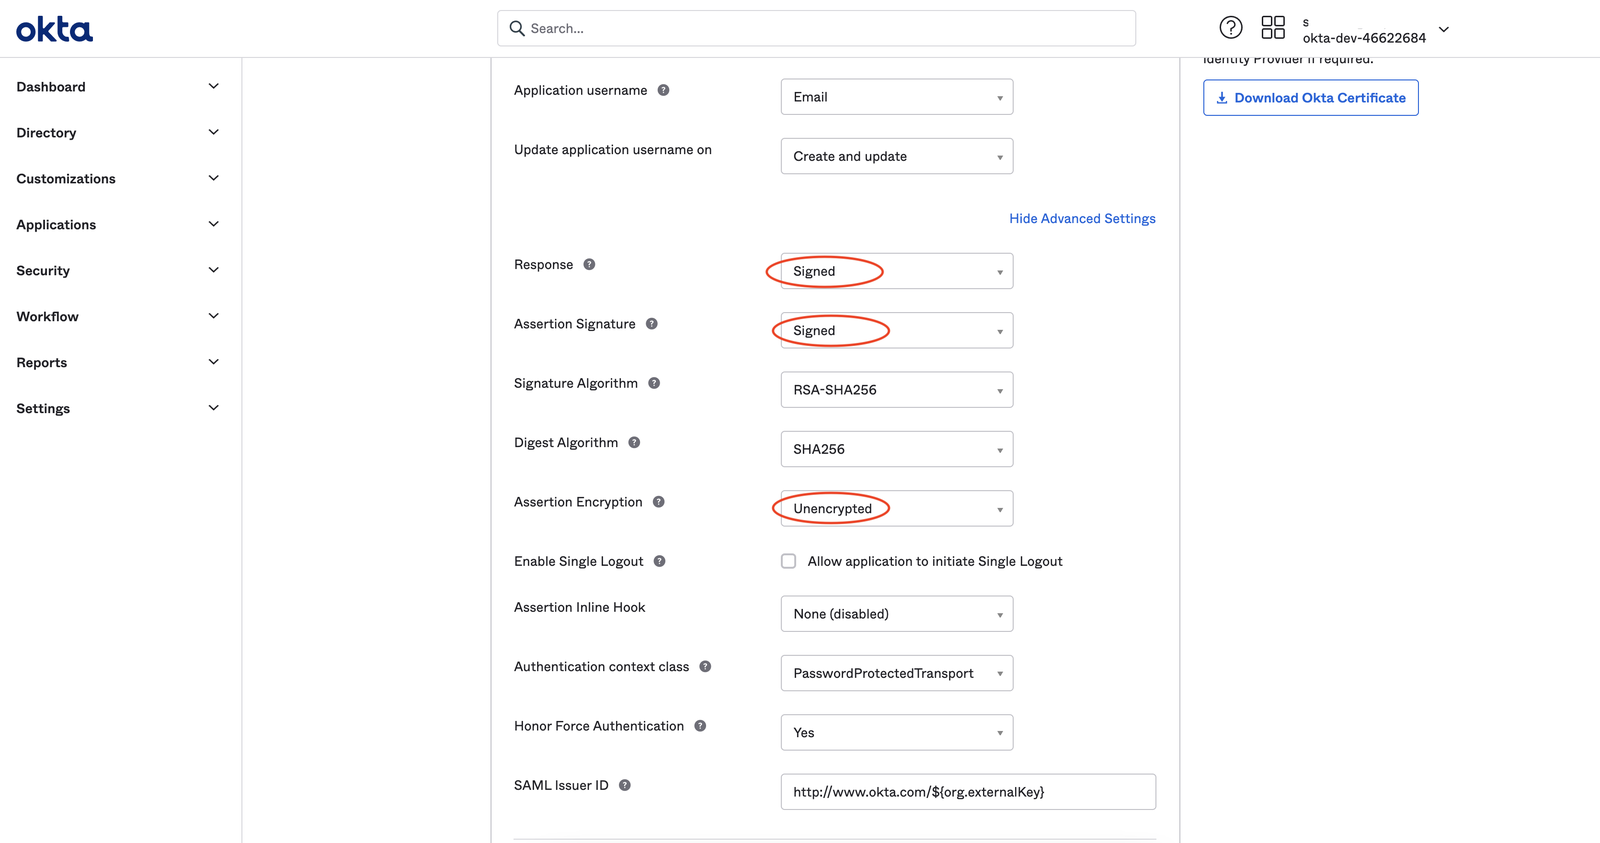
For the next step, click on 'Show Advanced Settings '.
- In the advanced settings, make sure that the Response and Assertion Signature are selected as ' Signed '.
- The Assertion Encryption should be kept as ' Unencrypted '.
- You don't need to make any other changes in this section.
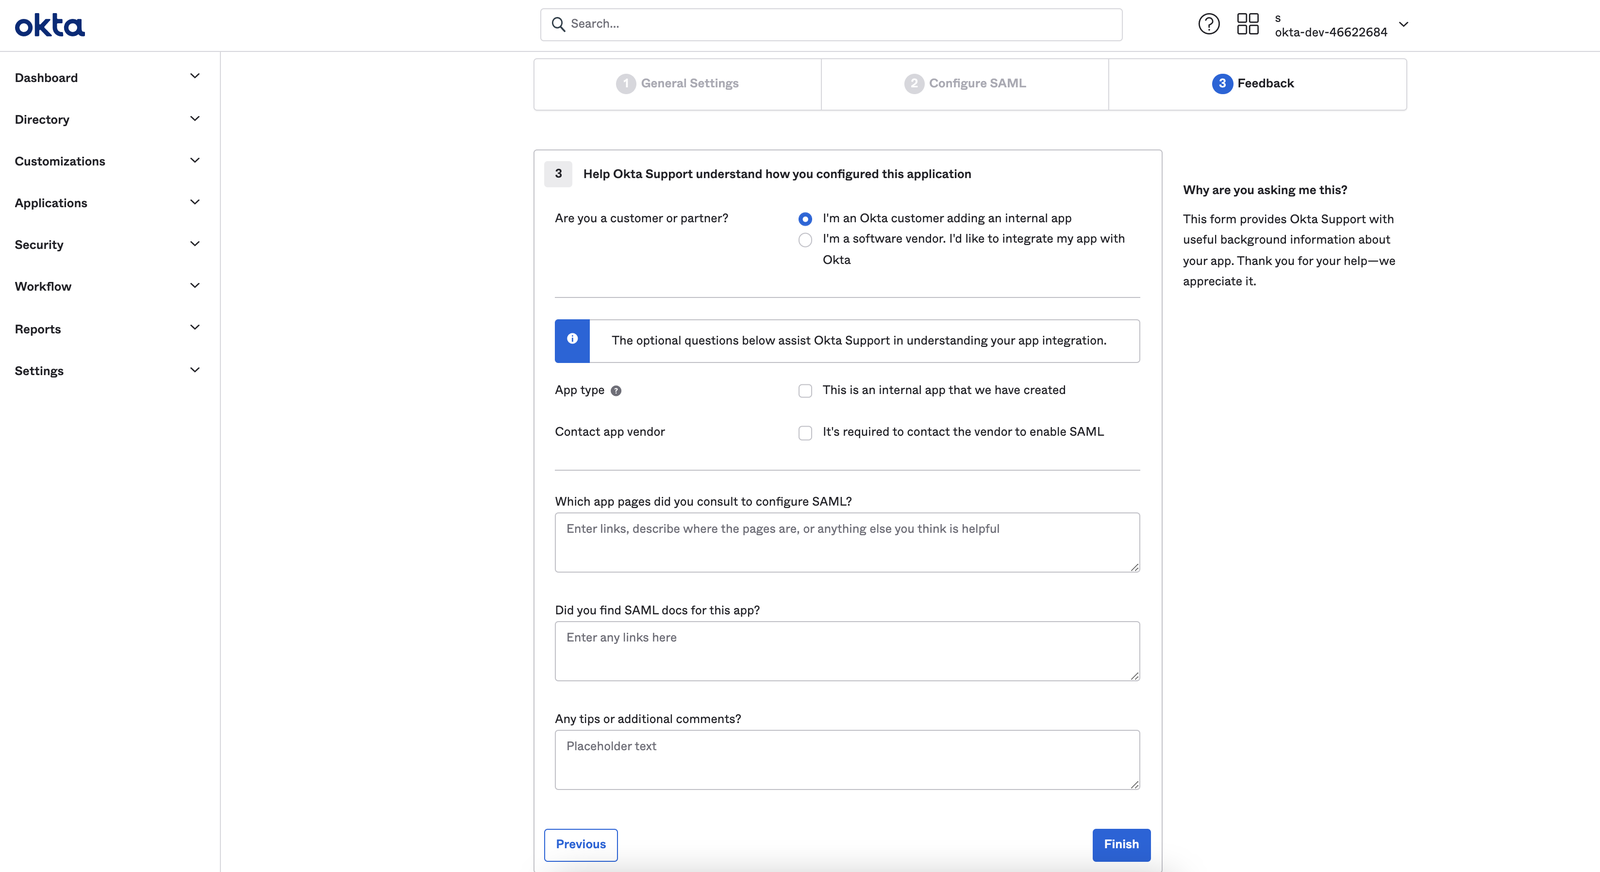
Upon clicking next, you will see the feedback step as shown below - you can simply click 'Finish' without entering anything.
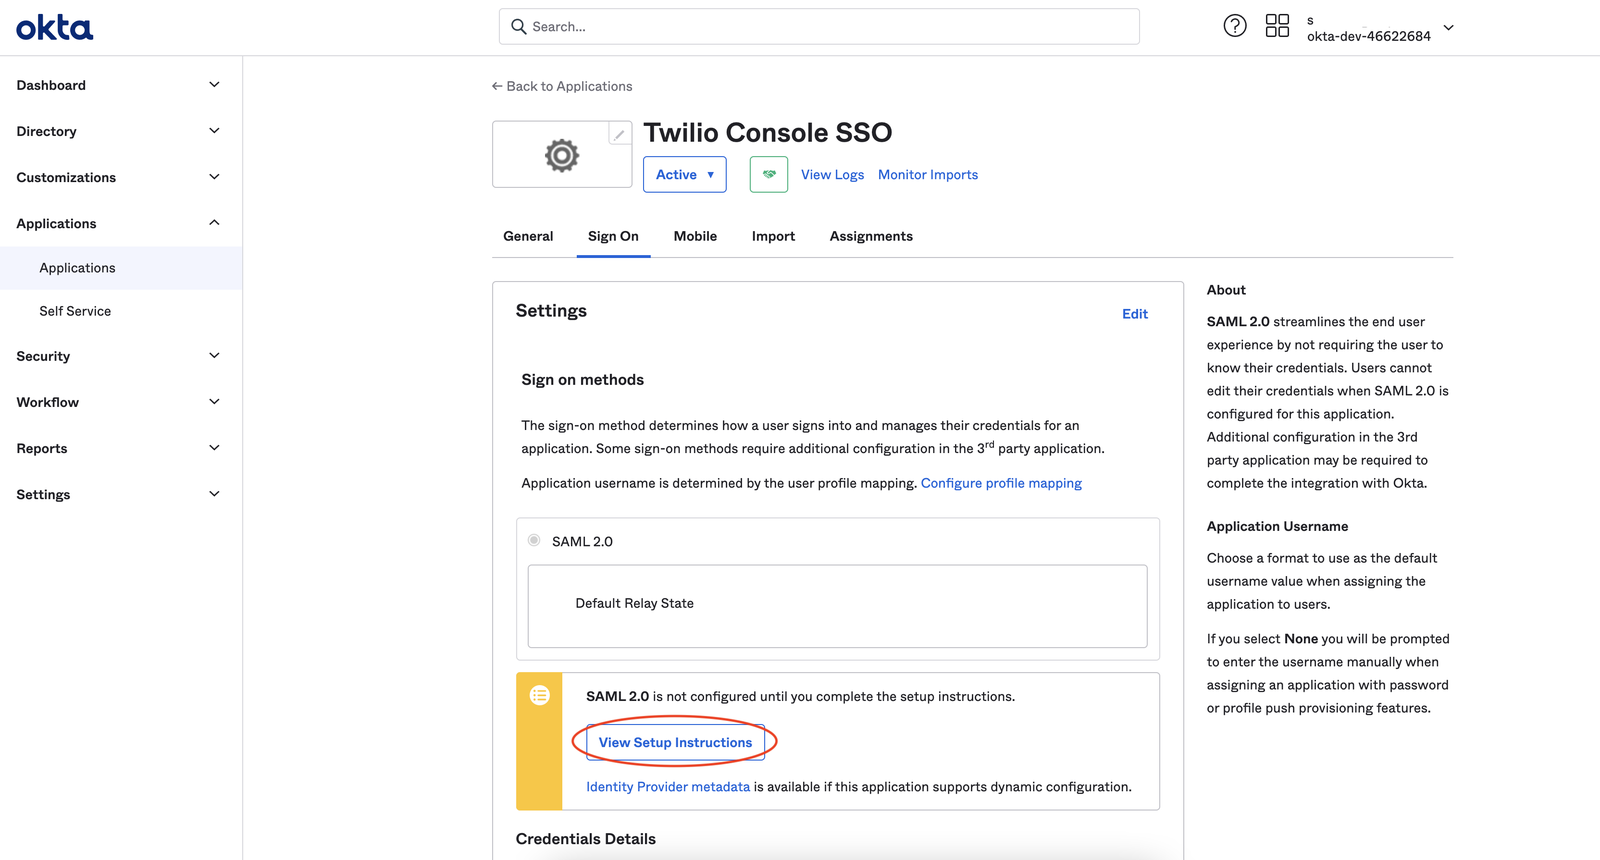
Upon clicking 'Finish' you will land on the below screen. Click on the 'View Setup Instructions ' to view the Identity Provider metadata.
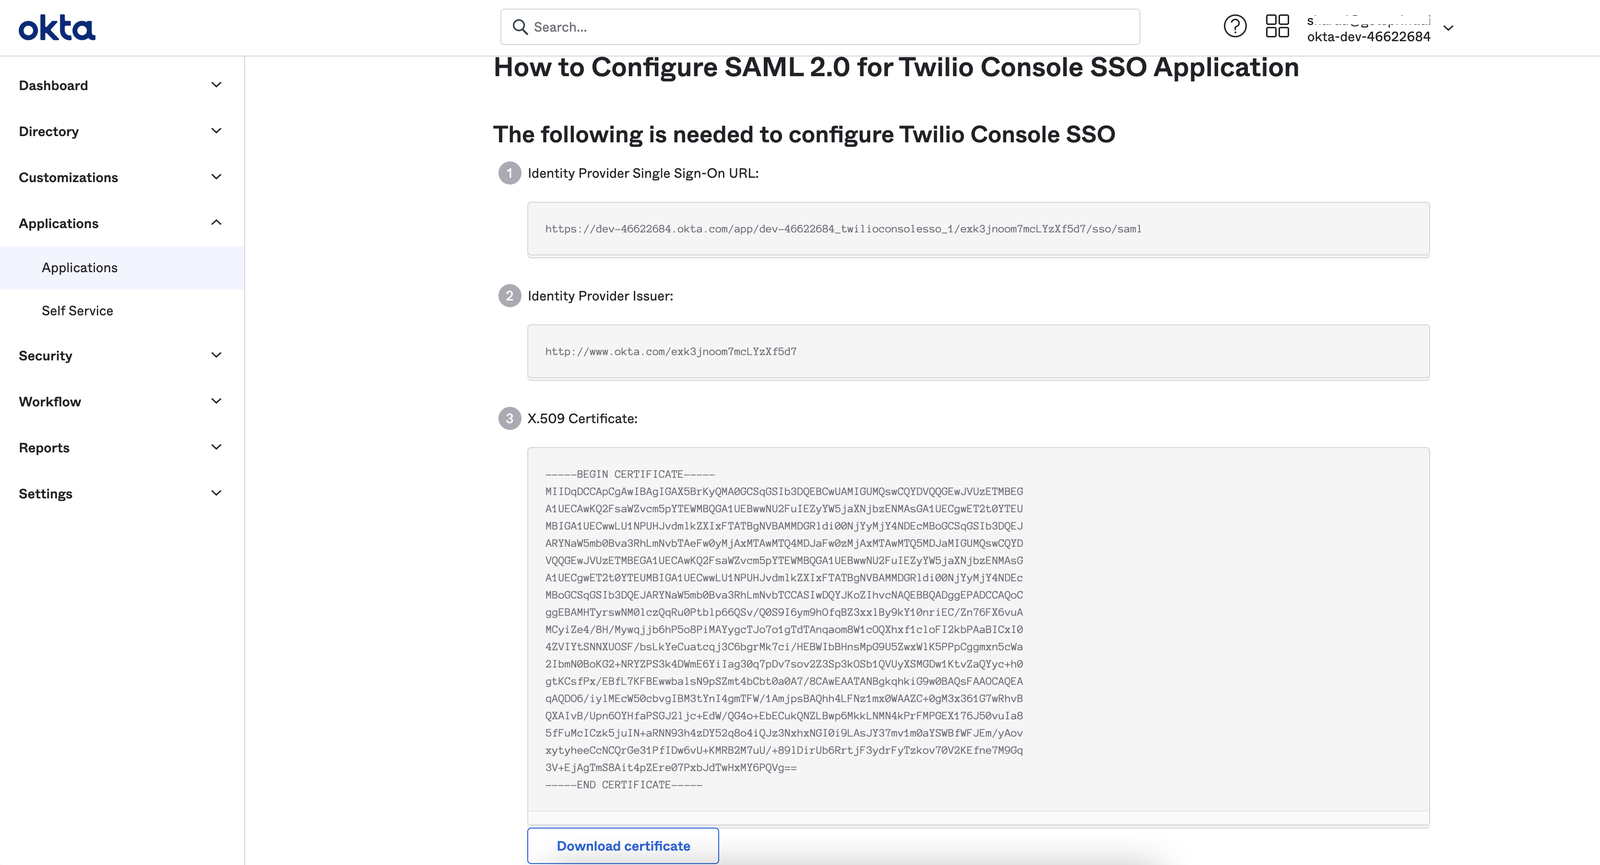
You will see the IdP metadata in a new tab as shown below. Keep this tab open as you will need to copy and paste the values from here into the Twilio Admin Center in the next step.
Go to the tab where you have the Twilio SSO Profile opened. Confirm that you have configured the Signing Option and NameID settings in your IdP and click on Continue
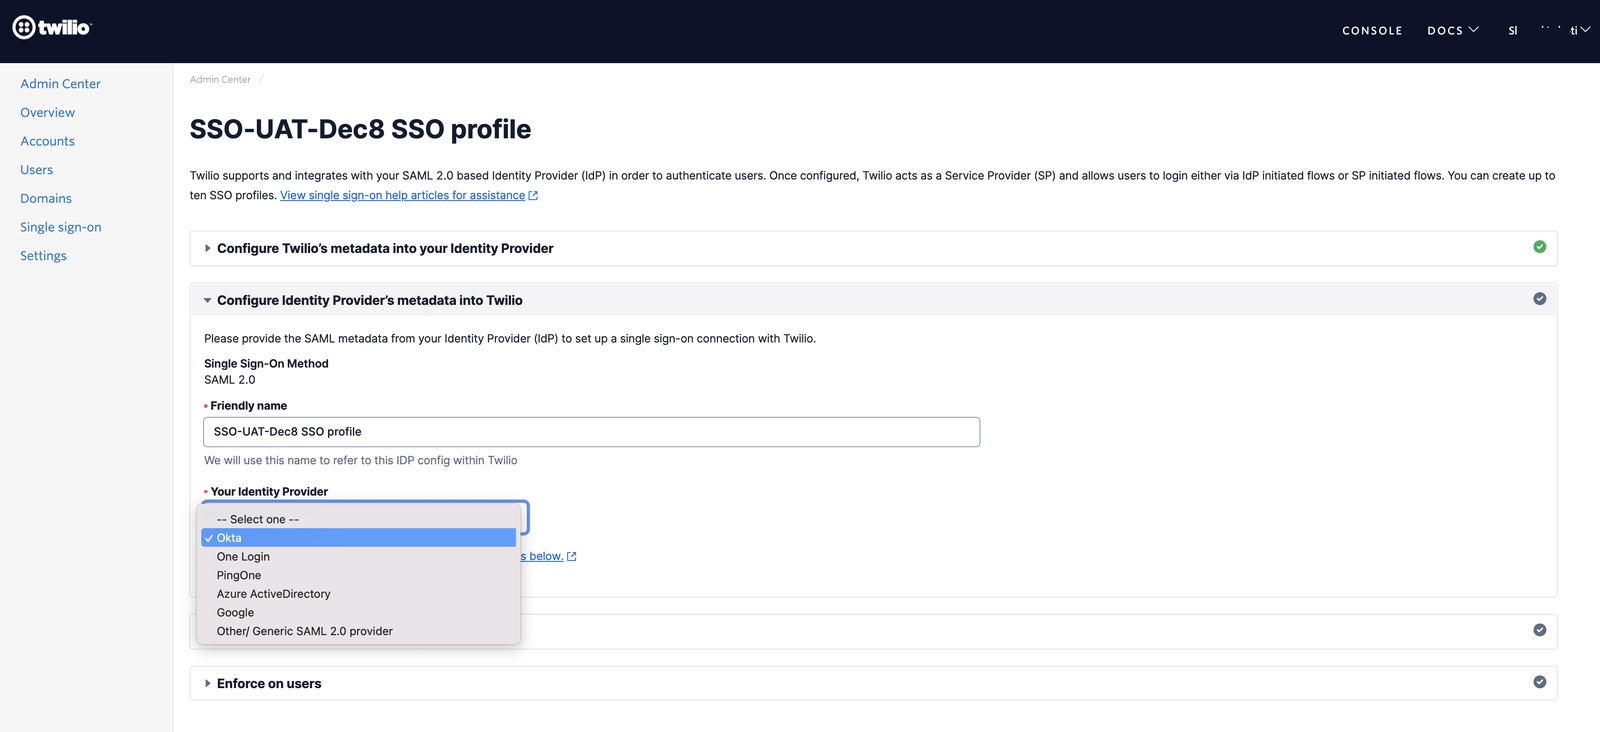
In the next step, please update the friendly name of the SSO Profile to an appropriate value that you can recognize easily and select 'Okta ' as the Identity Provider from the dropdown.
Upon selecting the Identity Provider you will see the IdP metadata fields as shown below. Copy and paste the corresponding values from the Okta Setup Instructions page that is open in another tab.
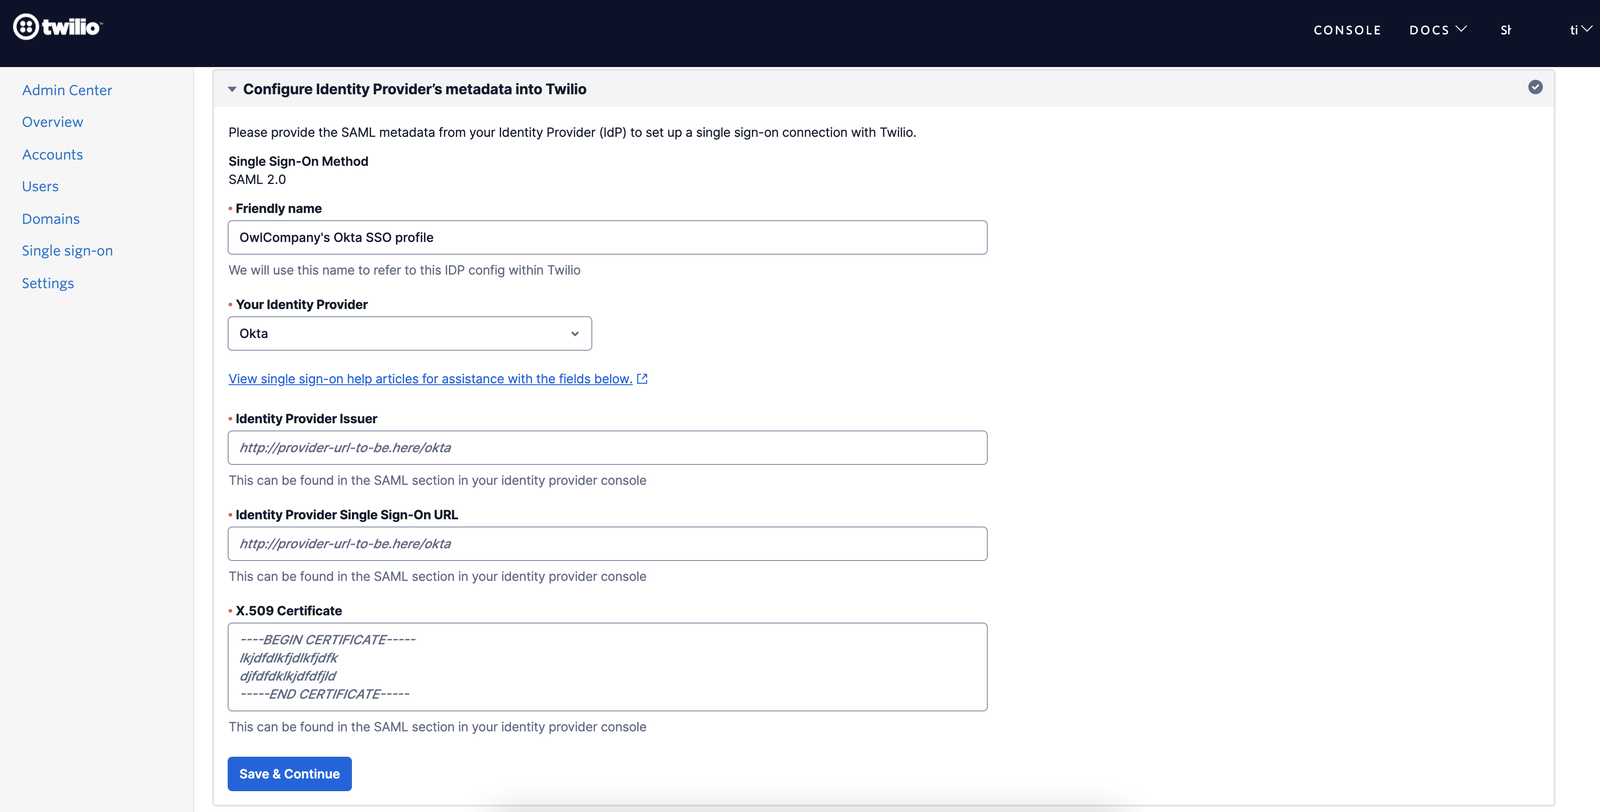
After configuring these 3 values from your Okta Application into the Twilio SSO Profile, click the 'Save & Continue' button to save the SSO Profile and proceed to the next step to test the SSO Connection.