Programmable Chat Android Quickstart
Danger
Programmable Chat has been deprecated and is no longer supported. Instead, we'll be focusing on the next generation of chat: Twilio Conversations. Find out more about the EOL process here.
If you're starting a new project, please visit the Conversations Docs to begin. If you've already built on Programmable Chat, please visit our Migration Guide to learn about how to switch.
In this guide, we will get you up and running quickly with a sample application you can build on as you learn more about Chat. Sound like a plan? Then let's get cracking!
Table Of Contents
The first thing we need to do is grab all the necessary configuration values from our Twilio account. To set up our back-end for Chat, we will need five pieces of information:
| Config Value | Description |
|---|---|
| Service Instance SID | Like a database for your Chat data - generate one in the console here |
| Account SID | Your primary Twilio account identifier - find this in the console here. |
| API Key | Used to authenticate - generate one here. |
| API Secret | Used to authenticate - just like the above, you'll get one here. |
| Mobile Push Credential SID | Used to send notifications from Chat to your app - create one in the console here or learn more about Chat Push Notifications in Android. |
When you build your application with Twilio Chat, you will need two pieces - the client (this Android app) and a server that returns access tokens. If you don't want to set up your own server, you can use Twilio Functions to easily create this part of your solution.
If you haven't used Twilio Functions before, it's pretty easy - Functions are a way to run your Node.js code in Twilio's environment. You can create new functions on the Twilio Console's Manage Functions Page.
You will need to choose the "Programmable Chat Access Token" template, and then fill in the account information you gathered above. After you do that, the Function will appear, and you can read through it. Save it, and it will immediately be published at the URL provided - go ahead and put that URL into a web browser, and you should see a token being returned from your Function. If you are getting an error, check to make sure that all of your account information is properly defined.
Want to learn more about the code in the Function template, or want to write your own server code? Checkout the Twilio Chat Identity Guide for the underlying concepts.
Now that the Twilio Function is set up, let's get the starter Android app up and running.
Danger
NOTE: You should not use Twilio Functions to generate access tokens for your app in production. Each function has a publicly accessible URL which a malicious actor could use to obtain tokens for your app and abuse them.
Read more about access tokens here to learn how to generate access tokens in your own C#, Java, Node.js, PHP, Python, or Ruby application.
To get going quickly, there is a starter Android app written in Kotlin.
- Checkout github repository
Just open this project with Android Studio, and let it sync with Gradle to install all the dependencies.
-
Generate google-services.json
file and place it under
chat-demo-android/. -
Set the value of
ACCESS_TOKEN_SERVICE_URLingradle.propertiesfile to match your Twilio Functions URL.
_10ACCESS_TOKEN_SERVICE_URL=http://example.com/get-token/
Once the app loads, you should see a UI like this one:
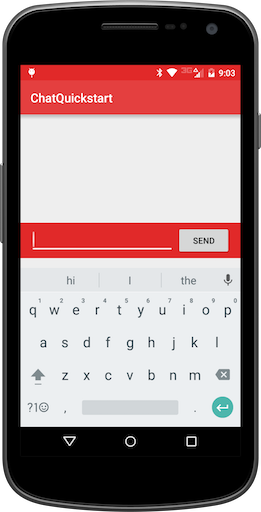
Start sending yourself a few messages - they should start appearing both in a
RecyclerView in the starter app, and in your browser as well if you kept that
window open.
You're all set! Now you can start building your own application. Please follow this guide to integrate the Android SDK into your existing project, head over to our install guide. If you'd like to learn more about how Chat works, you might want to dive into our user identity guide, which talks about the relationship between the mobile app and the server.