Push Notifications on Android for Programmable Chat
Danger
Programmable Chat has been deprecated and is no longer supported. Instead, we'll be focusing on the next generation of chat: Twilio Conversations. Find out more about the EOL process here.
If you're starting a new project, please visit the Conversations Docs to begin. If you've already built on Programmable Chat, please visit our Migration Guide to learn about how to switch.
Push notifications are an important part of the mobile experience. Users have grown accustomed to having push notifications be a part of virtually every app that they use. The Android Programmable Chat SDK is built to have push notifications integrated into it. Managing your push credentials is necessary as your registration token is required for the Chat SDK to be able to send any notifications through GCM or FCM. Let's go through the process of managing your push credentials.
| Attention: The GCM interface is declared deprecated by Google and could be removed by them at any moment. To ensure future compatibility consider using FCM in your products. |
|---|
IMPORTANT: The default enabled flag for new Service instances for all Push Notifications is false. This means that Push will be disabled until you explicitly enable it. Follow this guide to do so.
Both GCM and FCM services look for a file called google-services.json in your Android app to identify push configuration details. Google provides an easy-to-use web interface for generating this file that you can find here. For FCM you can do the same from the Firebase Console.
Copy the google-services.json file you download in the step below into the app/ directory of your Android Studio project.
Once you've gone through and entered your app credentials, you can download the generated file to your desktop. Save the API Key that is displayed on the last page, as we're going to use it later on.

Once you've gone through and entered your app credentials, you can download the generated file to your desktop. Save the API Key that is displayed on the last page, as we're going to use it later on.
Android Studio uses Gradle to parse your credentials from the 'google-services.json' file. Your app has 2 build.gradle files, a project-level one (global) and an app-level one (inside the 'app/' directory).
Add this line to buildscript dependencies in your project-level build.gradle:
_10classpath 'com.google.gms:google-services:3.0.0'
Add this line to the end of your app-level build.gradle:
_10apply plugin: 'com.google.gms.google-services'
You'll need to import the Google Play Services SDK for your client to be able to communicate with GCM. Add the following line to dependencies section of the app-level build.gradle:
_10compile 'com.google.android.gms:play-services:9.0.0'
Note: be sure to use the com.android.tools.build:gradle:2.1.2 build plugin with gradle, not com.android.tools.build:gradle-experimental:0.7.0. The latter will not work with google-services plugin and will not process your JSON file. If you need to use gradle-experimental, you will have to implement JSON parsing yourself or hard code the Sender ID.
You'll need to import the Google Play Services and Firebase Messaging SDKs for your client to be able to communicate with FCM. Add the following line to dependencies section of the app-level build.gradle:
_10compile 'com.google.firebase:firebase-messaging:10.2.0'_10compile 'com.google.android.gms:play-services-base:10.2.0'
Use version 10.2.0 or later, as the earlier ones will not work.
The Application Manifest file defines critical information like permissions and dependency versions for the Android app before it runs any code. You'll need to add a few lines to configure your app to communicate with Google push service.
Add the C2D_MESSAGE permission to prevent other Android apps from registering and receiving your messages.
_10<permission android:name="<your-package-name>.permission.C2D_MESSAGE"_10 android:protectionLevel="signature" />_10<uses-permission android:name="com.google.android.c2dm.permission.RECEIVE" />_10<uses-permission android:name="<your-package-name>.permission.C2D_MESSAGE" />
Next, add the GcmReceiver to handle messages sent from GCM with the proper permissions enabled:
_10<receiver_10 android:name="com.google.android.gms.gcm.GcmReceiver"_10 android:exported="true"_10 android:permission="com.google.android.c2dm.permission.SEND" >_10 <intent-filter>_10 <action android:name="com.google.android.c2dm.intent.RECEIVE" />_10 <action android:name="com.google.android.c2dm.intent.REGISTRATION" />_10 <category android:name="<your-package-name>" />_10 </intent-filter>_10</receiver>
You'll also want to add the GcmListenerService to handle messaging related events. Example implementation can be seen here.
_10<service_10 android:name=".MyGcmListenerService"_10 android:exported="false" >_10 <intent-filter>_10 <action android:name="com.google.android.c2dm.intent.RECEIVE" />_10 </intent-filter>_10</service>
Once you've done that, create a service that extends InstanceIDListenerService to handle registration tokens. Example implementation can be seen here.
_10<service_10 android:name=".MyInstanceIDListenerService"_10 android:exported="false">_10 <intent-filter>_10 <action android:name="com.google.android.gms.iid.InstanceID" />_10 </intent-filter>_10</service>
Add a service to handle subscriptions to GCM. See here for example implementation.
_10<service_10 android:name=".RegistrationIntentService"_10 android:exported="false">_10</service>
Make sure to add the WAKE_LOCK permission to keep the processor from sleeping when a message is received:
_10<uses-permission android:name="android.permission.WAKE_LOCK" />
Lastly, make sure the minimum SDK version is set to 8 or higher so that GCM works properly:
_10<uses-sdk android:minSdkVersion="8" android:targetSdkVersion="17"/>
Add the C2D_MESSAGE permission to prevent other Android apps from registering and receiving your messages.
_10<permission android:name="<your-package-name>.permission.C2D_MESSAGE"_10 android:protectionLevel="signature" />_10<uses-permission android:name="com.google.android.c2dm.permission.RECEIVE" />_10<uses-permission android:name="<your-package-name>.permission.C2D_MESSAGE" />
You'll also want to add the FCMListenerService to handle events related to messaging. Example implementation can be seen here.
_10<service_10 android:name=".FCMListenerService">_10 <intent-filter>_10 <action android:name="com.google.firebase.MESSAGING_EVENT"/>_10 </intent-filter>_10</service>
With FCM you can set defaults for the values that may be missing from the incoming notifications - these defaults will be used in that case. The notification background color and icon can be set like this:
_10<meta-data_10 android:name="com.google.firebase.messaging.default_notification_icon"_10 android:resource="@drawable/ic_launcher" />_10<meta-data_10 android:name="com.google.firebase.messaging.default_notification_color"_10 android:resource="@color/darkred" />
Once you've done that, create a service that extends InstanceIDListenerService to handle registration tokens. An example implementation can be seen here.
_10<service_10 android:name=".FCMInstanceIDService"_10 android:exported="true">_10 <intent-filter>_10 <action android:name="com.google.firebase.INSTANCE_ID_EVENT"/>_10 </intent-filter>_10</service>
Next, add a service to handle subscriptions to FCM. See here for example implementation.
_10<service_10 android:name=".RegistrationIntentService"_10 android:exported="false">_10</service>
Make sure to add the WAKE_LOCK permission to keep the processor from sleeping when a message is received:
_10<uses-permission android:name="android.permission.WAKE_LOCK" />
Lastly, make sure the minimum SDK version is set to 8 or higher so that FCM works properly
_10<uses-sdk android:minSdkVersion="8" android:targetSdkVersion="17"/>
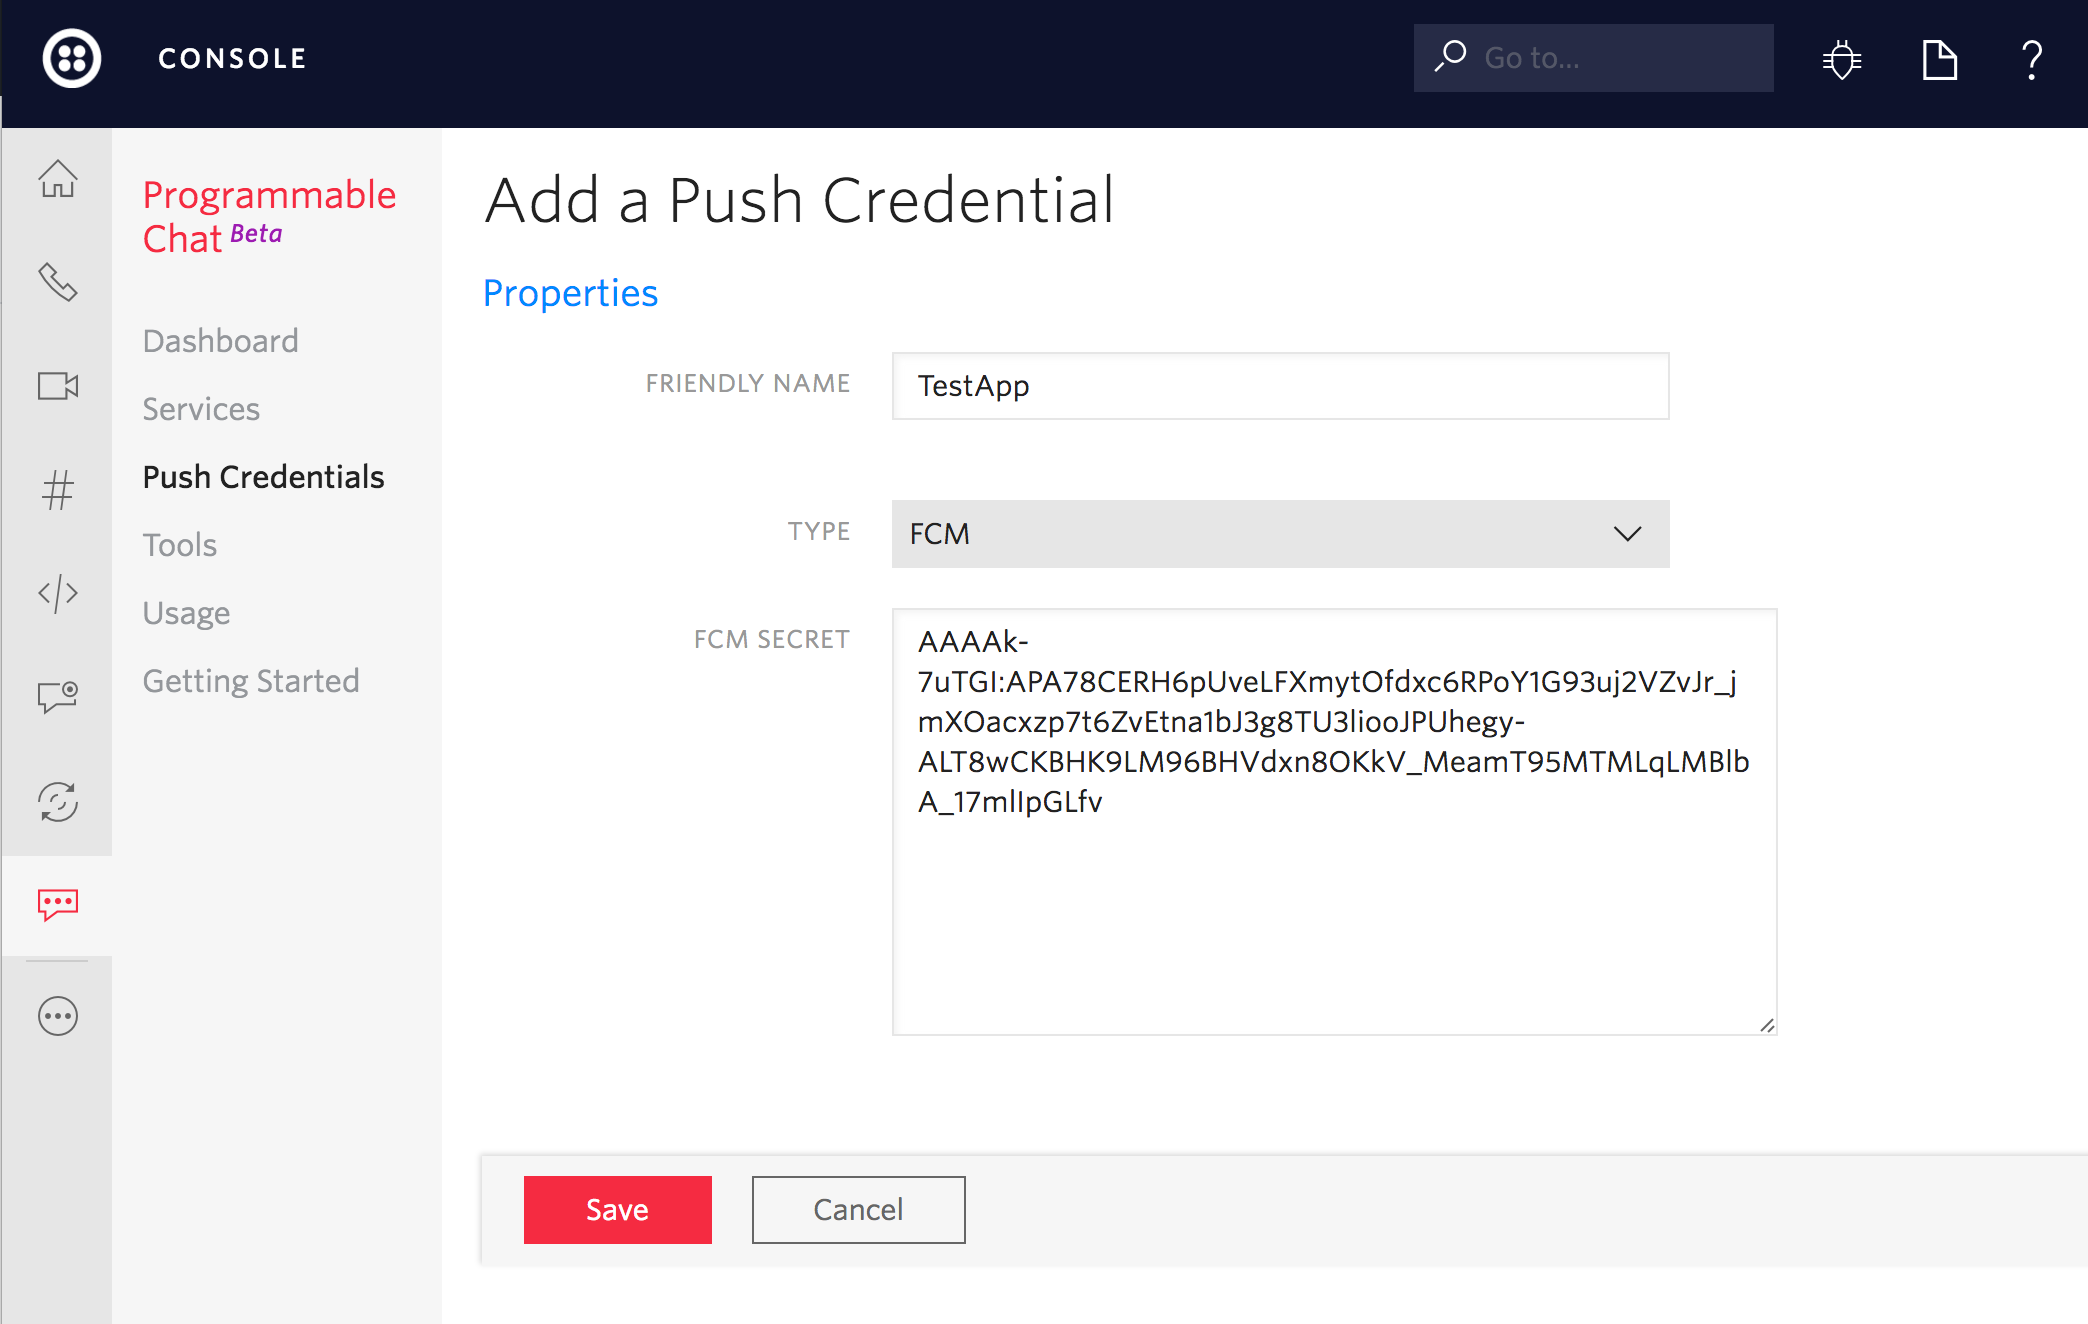
Now that we have our app configured to receive push notifications let's upload our API Key by creating a Credential resource. Check out this page to generate a credential SID using the API key.
From the drop-down, choose GCM and paste in the key.
The final step is to ensure that your Chat Android client Access Token includes the correct credential_sid - the one you created in Step 5 above. Each of the Twilio Helper Libraries enables you to add the push_credential_sid. Please see the relevant documentation for your preferred Helper Library for the details. Here is an example using the Node.js Twilio helper Library:
_10var chatGrant = new ChatGrant({_10 serviceSid: ChatServiceSid,_10 pushCredentialSid: GCM_or_FCM_Credential_Sid,_10});
Depending on whether you use GCM or FCM (you cannot use both at the same time), you will need to call correct ChatClient API methods - registerGCMToken and unregisterGCMToken for GCM, or registerFCMToken and unregisterFCMToken for FCM. See the documentation for details.
Nice! That's all we need to make sure the client has access to your registration token!
Next: Notifications on Web