How to Trigger a Usage Alert with the Twilio CLI
Time to read: 6 minutes
May 10, 2021
Written by
Reviewed by

The Twilio CLI has many capabilities, including allowing you to keep track of how much of the Twilio API you’re using for billing purposes. In addition to checking your usage amounts, you can also set up a trigger that will let you know when you’ve spent a certain amount of money. To learn how to do this, follow along!.
Prerequisites
To get started with this tutorial, you’ll need the following items ahead of time:
- Node.js installed on your machine
- A free Twilio account (sign up with this link and get $10 in free credit when you upgrade your account)
- A Twilio phone number
- The Twilio CLI
- ngrok
Login to the Twilio CLI
Open up a terminal or command prompt and login to the Twilio CLI by running the following command:
This will prompt you to enter your Twilio Account SID and Auth Token, both of which can be found on the Twilio Console.
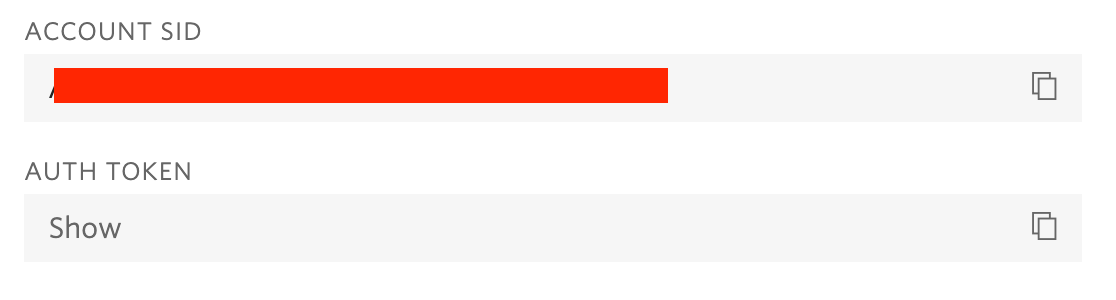
After copying and pasting your credentials into the terminal prompts (your pasted values will be hidden), press the return key to submit them.
Now that you’re logged in, you’re ready to use the Twilio CLI!
Get usage records using the Twilio CLI
In your terminal, if you run the command twilio you’ll see a list of all the top level commands available via the CLI.
The api command is where you’ll find most of the Twilio functionality you’re used to using programmatically.
Feel free to explore the CLI as you move through this tutorial.
Your usage data can be found by running the following command:
After running this command, you’ll see the following text:
This text is telling you that there are two available sub-commands on the usage command: records and triggers. You’ll look at both in this tutorial, but you’ll start with records.
To see what the records subcommand does, run this in your terminal or command prompt:
This command will return the following text:
This response is showing you all the different time periods for which you can see your usage data:
- All time
- Daily
- Last month
- Monthly
- This month
- Today
- Yearly
- Yesterday
You can try running each of these sub-commands to see what they return. These sub-commands also have flags you can use to help narrow your results.
For example, the daily subcommand will default to return the usage data for each Twilio product on the current day. If you’d like to see a specific date range, you can pass start and end dates in the YYYY-MM-DD format:
This command will show usage data, by Twilio product, for May 6, 2021.
You can also narrow down the CLI response to a specific category/Twilio product.
For example, if you only wanted to see today’s usage data for SMS, you could run this command:
Using the --help flag after any sub-command will show you all the available flags you can use along with other helpful details.
Now that you know how to find your usage records, it’s time to set up a trigger alert.
The usage trigger command
The basic command for setting up a usage trigger is as follows:
There are other flags you can add to this command (found by running twilio api:core:usage:triggers:create --help), but the three shown in the above command are the minimum required flags.
I’ll explain each of them.
Callback URL
A usage trigger is a webhook. This means that once you hit the usage threshold, the CLI is going to make an HTTP request. You need to provide the desired destination for this HTTP request in order to “catch” the trigger and then process it.
For example, you might want to send yourself an SMS notification after your account spends a certain amount of money on sending SMS messages to customers. The callback-url is the location of the app where you’ll receive that HTTP request and create your personal SMS notification. This could be a URL created with Twilio Functions, or a URL from another server-side app like an Express app.
Trigger Value
The trigger-value flag is where you’ll provide the value at which the trigger will fire. This flag is often used in tandem with the trigger-by flag, whose value could be one of: count, usage, price. If you don’t include the trigger-by flag, then the trigger-value flag will be processed as a usage value.
Usage is the primary way you would measure a category of Twilio product. For example, usage for Programmable Voice is measured in call minutes. Usage for Programmable SMS is measured by individual messages.
Usage Category
The usage-category flag is referring to the Twilio product or usage category you want the alert for, such as sms or calls. To see all of the available usage categories (there are a great number of them), run the command twilio api:core:usage:triggers:create --help.
Set up a usage trigger and SMS alert
Build your Express server app
For this tutorial, you’ll use the Twilio CLI to set up a usage trigger that will send your personal phone number an SMS every time your account makes 1 voice call. This is a very low threshold which was chosen only to make it easy to test your trigger.
Note: The reason you’re setting this trigger up on a voice call is because if you tried to test the trigger after 1 SMS message you would accidentally trigger an endless loop of alerts until you closed your server.
The first step is create a server so your app can receive the HTTP request when the trigger fires.
In your terminal, navigate to a suitable location on your computer, create a new project directory, and initialize a new Node.js project:
Install Express, dotenv, and the Twilio Node Helper Library:
Your Twilio credentials will be stored in a .env file, so create this file inside usage-trigger and add the following, replacing the placeholders with the same Twilio credentials that you used to login to the CLI earlier.
Save and close this file.
Create another new file inside the usage-trigger folder called index.js. Open index.js in your favorite text editor and add the following code:
Delete the comment on line 8, highlighted above, and replace it with the following code, taking care to replace the from number with your Twilio phone number, and the to phone number with your personal phone number, both given in E.164 format:
This code uses the Twilio Node Helper Library to send an SMS to your personal number with a message informing you that you’ve reached your usage threshold. The message also includes information on the current value of the usage for your trigger category.
Save your file and start your local server by running the following command from inside the usage-trigger directory in your terminal:
In a new terminal window, run the following command to expose your server to the internet:
Copy the secure forwarding URL - this is the callback URL you’ll use when you set up your trigger.
Create the trigger in the CLI
With your callback URL in hand, in a new terminal window use the CLI to create your trigger, replacing the value for the callback-url flag with your new URL from ngrok:
With your trigger created, it’s time to test it out.
Test the trigger
In one final terminal or command prompt window, run the following command to create a voice call directly from your CLI.
Before running the command please be sure to change the to and from flag values to your personal phone number and your Twilio phone number, respectively:
In a few moments, your phone will ring and you’ll hear a message that says “Ahoy, friend”.
At this point, your trigger should fire.
Check back at the terminal window running your Express server. When the HTTP request hits your server you’ll see a message logged that says “Usage trigger alert received”, and after your personal SMS notification is successfully sent you’ll see a log line containing the SID of the message. Shortly thereafter, you’ll receive an SMS to your phone.
Normally this process takes just a few seconds, but if you don’t see it right away, please note that sometimes the trigger can take up to several minutes to hit your server.
Congratulations on setting up your first usage trigger with the Twilio CLI! There’s a ton of things you can do with the Twilio CLI - let me know what you discover on Twitter!
Ashley is a JavaScript Editor for the Twilio blog. To work with her and bring your technical stories to Twilio, find her at @ahl389 on Twitter. If you can’t find her there, she’s probably on a patio somewhere having a cup of coffee (or glass of wine, depending on the time).


Related Resources
Twilio Docs
From APIs to SDKs to sample apps
API reference documentation, SDKs, helper libraries, quickstarts, and tutorials for your language and platform.
Resource Center
The latest ebooks, industry reports, and webinars
Learn from customer engagement experts to improve your own communication.
Ahoy
Twilio's developer community hub
Best practices, code samples, and inspiration to build communications and digital engagement experiences.