Building an App from Scratch with Angular and Webpack
Time to read: 6 minutes
March 13, 2018
Written by

Using Angular CLI is a popular way of creating Single Page Apps (SPA) with Angular. However, sometimes CLI is not an option for your project or you just want to have better control on what’s going on behind the scenes. Let’s take a look at how we can create an Angular project entirely from scratch.
In this post we will:
- Set up a Node project
- Create an Angular application and make calls to an external API
- Bundle the application using
webpack
To accomplish tasks make sure you have the following installed:
- Node.js and npm (at the moment of writing this post I was using Node.js v8.5.0 and npm 5.3.0)
Let’s get started!
Set up the project, webpack & ‘Hello World!’As a first step which we have to initialize our Node project and install the packages we will use:
Let’s create our application entry point, a simple ‘Hello World’ which we’ll change in the near future:
We are going to host our app using Node.js, so create a server.js file:
Create a file src/index.html which will host our SPA:
To add some styling to the app, add the following code in src/assets/styles/main.css:
Here we’ll use my favorite fancy background image:

Download the picture and place it in the
src/assets/img folder.
Create The Main TypeScript File and Prepare to Compile
We’ll write our app in TypeScript and will then transpile it to JavaScript. The output will be injected into the output rendered by Node.js.
Let’s create our main file – src/main.ts:
Next we are going to prepare for the compilation of our app. Add the following build and start scripts to your package.json file:
We use webpack to bundle our code. Webpack is also the bundler used by Angular CLI behind the scenes. We are going to use webpack instead of the CLI to have more control of what we are doing during the build. Next we need to create a webpack.config.js file for our compilation:
Let’s stop here for a moment and explain what is going on inside the Webpack config file. This file returns an object consumed by Webpack to let it know what to build and how to build it:
- First we need to define the
entryfile, in our case it is./src/main.ts. - After that we tell Webpack what output file we expect and where (we use the
__dirnamevariable because Webpack expects an absolute path). - We also introduce
CopyWebpackPluginto move our assets together with the compiled application. - Finally we want to instruct Webpack to attach our script in the index.html file. To achieve that we use
HtmlWebpackPlugin. Inside the plugin we are specifying atemplatefile, in which aLet’s run our application and take a look if it is working as we expect. Run
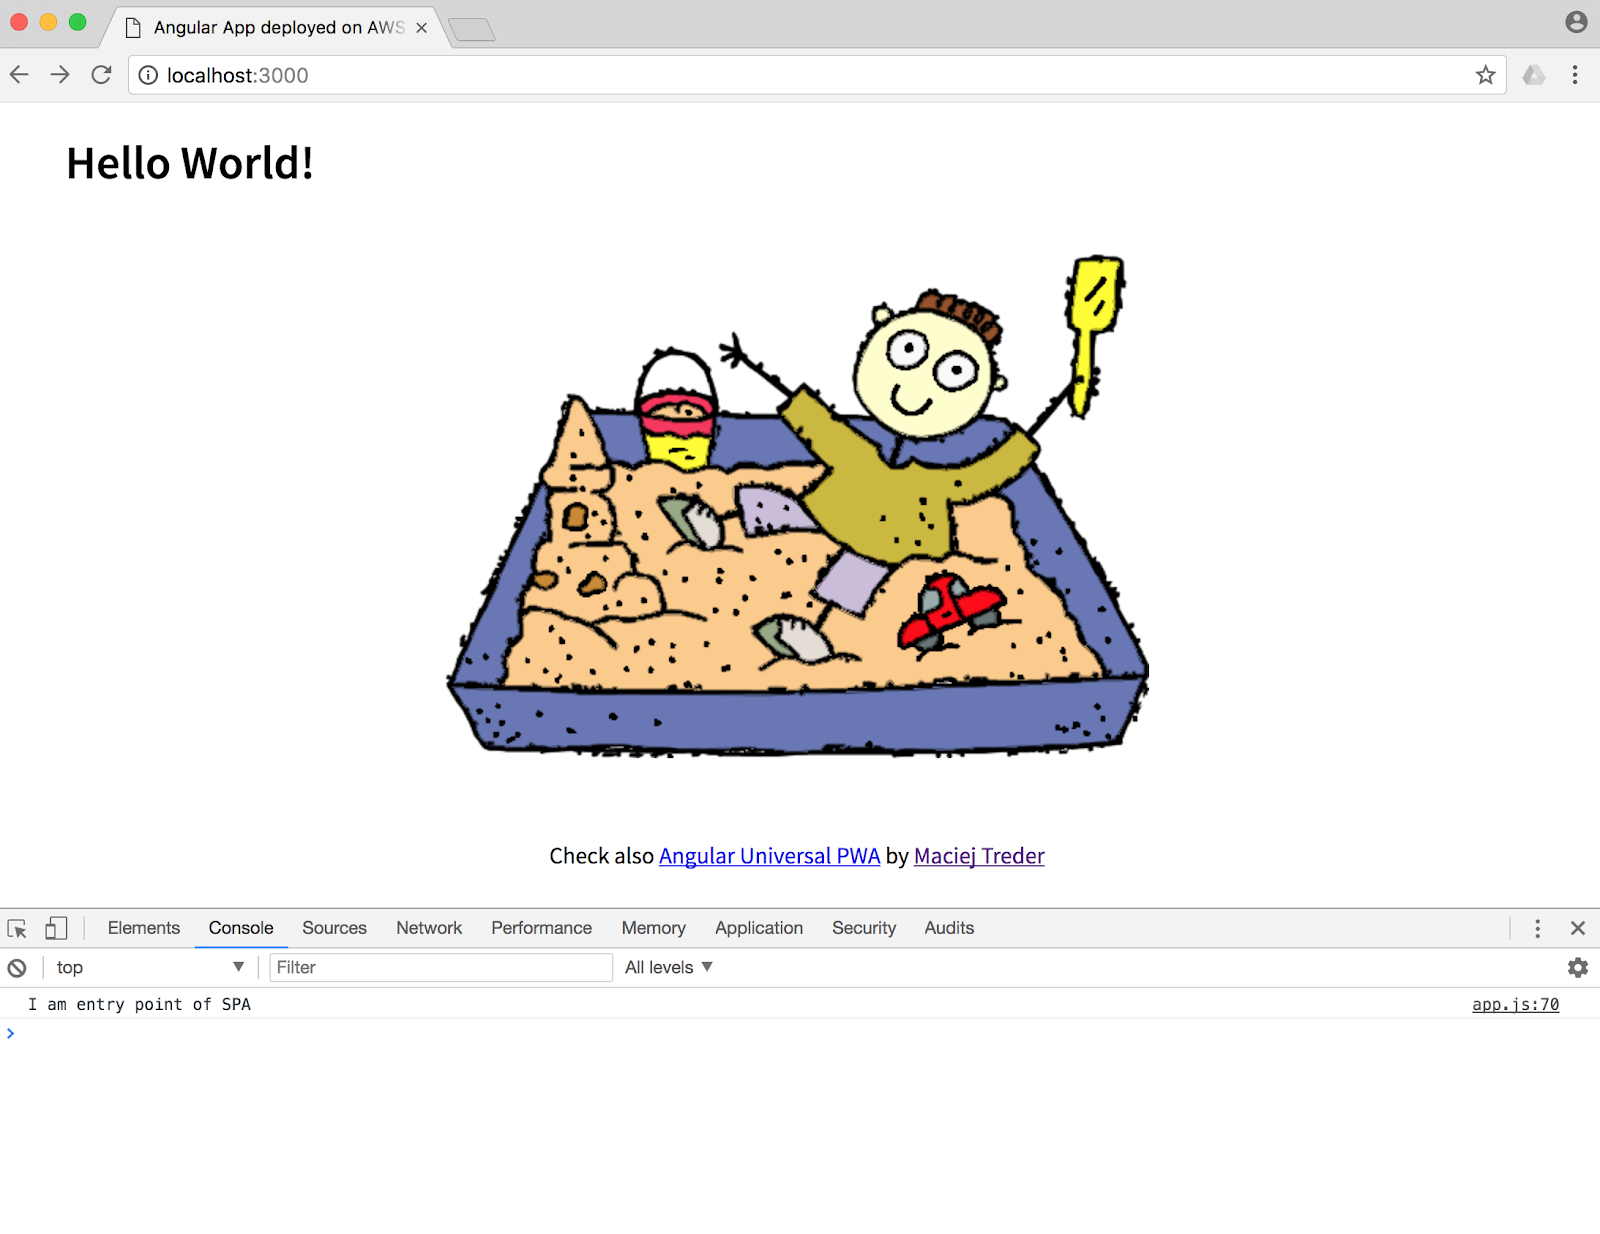
npm startin your command-line:
Open the URL (in this case http://localhost:3000) in your browser and you should see:
You can find all the code up to this point in this GitHub repository
Go on with Angular
Now that our setup is done, we can move forward with Angular. Install Angular’s dependencies by running:
We can prepare the files which we are going to edit in this step by running:
Add the following two things in the src/index.html file. The first is the “base path” (it is necessary to make Angular routing work correctly). Second is our App “wrapper” (). After these changes your src/index.html should look like the following:
Now we can start working on the Angular aspect of the app. Create your first component inside the src/app/app.component.ts file:
Every component must be declared in some module to be used. Copy this code into src/app/app.module.ts:
This is going to be main Module of our app so we add the bootstrap attribute inside the @NgModule annotation. It specifies which component should be used upon the start of our application.
Now that our basic module is ready, let’s invoke it from src/main.ts:
Next we need to update our compilation configuration. First, inside webpack.config.js, we need to inform Webpack what kind of files it should resolve and let it know how to compile our TypeScript files using @ngtools/webpack. Lastly we use ScriptExtPlugin to give Webpack information on how we want to load our application in the index.html file.
(If we don’t do that, Angular will complain that it doesn’t know where to load our application. You’ll see the following error in the browser console:Error: The selector "app" did not match any elements). We want our script to be loaded in defer mode (executed after DOM initialization), so we need to add this information in ScriptExtPlugin. Modify your webpack.config.js file accordingly:
We also need to configure the TypeScript compiler used by @ngtools/webpack by creating a tsconfig.json file with the following content:
The experimentalDecorators option is responsible for properly processing decorator annotations (@Component and @NgModule). lib specifies the libraries used in our application and dependencies.
Now we are ready to compile and launch our application:
Open http://localhost:3000 in your browser and your application should look like this:

You can find all the code up to this point in this GitHub repository:
More on components and services
Our app isn’t really complicated so far. Let’s add a service to it by installing the following dependencies and initializing the files:
Start by adding more code to src/app/app.component.ts:
We introduced a few concepts here. First, we showed external templates and styles using templateUrl and styleUrls. Angular gives us the possibility to create HTML templates and stylesheets outside of the component class and this makes our code cleaner.
Create the HTML template by placing the following code into src/app/app.component.html:
And the stylesheet in src/app/app.component.css:
Additionally, we introduced the concept of Dependency Injection. If you take close look at the constructor you will see a parameter of type EchoService. Angular will look for a class of this type and instantiate a singleton for us. After that it will be automatically (almost magically) injected into our component and we will be able to reuse it later (this mechanism works similar to auto-injection in the Spring Framework).
We also used the Observable type and async pipe inside template. Observables work similarly to Promises asynchronous types that emit values pushed to them by another function. If you are unfamiliar with Promises, make sure to check out “A quick guide to JavaScript Promises”.
Observables allow multiple listeners and can emit multiple values that can be manipulated using different operations such as map or filter (you can read more about it at the RxJS github page ). The sync pipe is a special Angular mechanism to display our variable in the view template only when it is evaluated (in other words: a value is emitted by the Observable).
Last but not least we showed the OnInit interface and ngOnInit lifecycle methods. Interfaces in TypeScript work the same way you might expect expected – if you implement it, you must implement methods declared in it. In this particular case, we need to implement the ngOnInit() method. This method is one of the “Angular lifecycle hooks” – methods called automatically by the Angular engine for different life stages of components such as initialization, destruction and other events. You can learn more about them in the Angular documentation.
More Angular ‘Magic’
We injected into component a service that doesn’t exist yet. Create it by adding the following code into src/app/services/echo.service.ts:
This service contains only one method to make a GET request to the https://jsonplaceholder.typicode.com/posts/1.
We’ve been using a lot of Angular “magic” but before our app is fully working we need to connect everything. This is done in the @NgModule decorator of our main module. Make the following changes to provide the necessary information about our new service and dependencies in our application. Modify the src/app/app.module.ts accordingly:
Let’s break down the information specified in this decorator a bit:
bootstrap– the component we want to load as a “main” oneimports– links to other modules; here we currently have only modules from the@angularlibrarydeclarations– a list of components used in the moduleproviders– list of services used across module
The code for our app is now ready. As a last step before the final compilation, we need to modify our webpack configuration once more. Because we introduced external HTML templates and stylesheets, we need to add new loaders for these file types. Change the module section in the webpack.config.js file to:
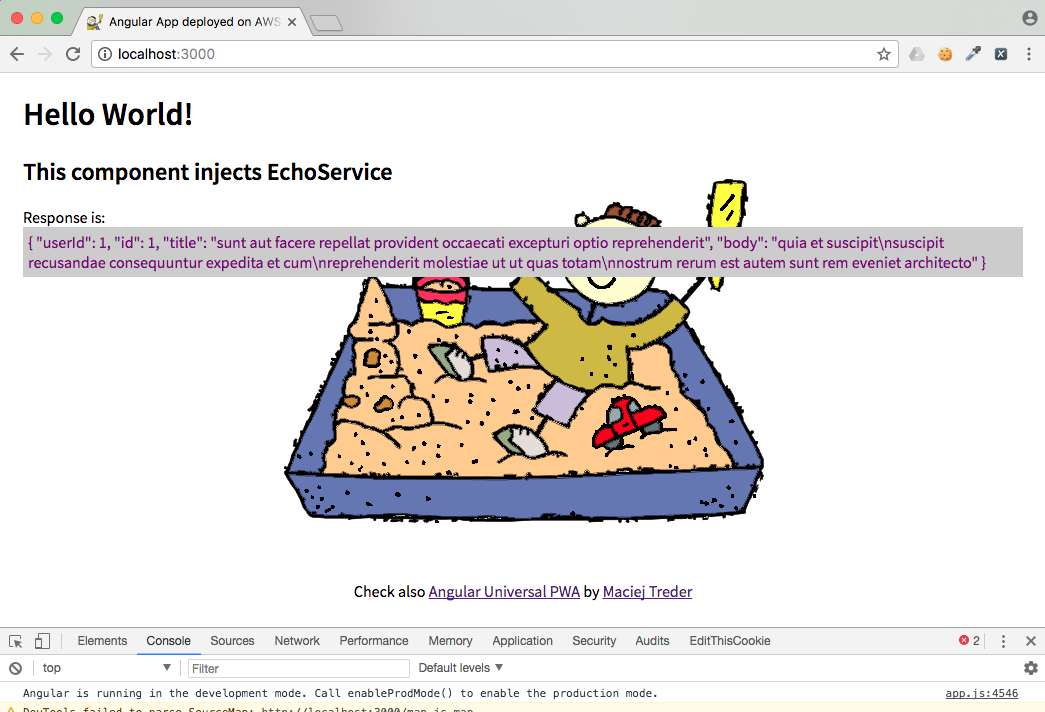
Compile and run your application:
When you open http://localhost:3000, the result should now look like this:
If you want to reproduce the steps up to here, you can also clone the code from this GitHub repository:
Summarizing Scratch Building an Angular and Webpack App
Today we successfully implemented and ran an Angular 5 application entirely from scratch. You also learned about modules and services in Angular. I have hope that you enjoyed it and have already a great idea on where to take your application!
GitHub repository: https://github.com/maciejtreder/angular-universal-pwa/tree/angular_and_webpack_demystified_step3
Also, check out https://github.com/maciejtreder/angular-universal-pwa to learn more Angular features.
Maciej Treder,
contact@maciejtreder.com
https://www.maciejtreder.com
@maciejtreder (GitHub, Twitter, StackOverflow, LinkedIn)


Related Resources
Twilio Docs
From APIs to SDKs to sample apps
API reference documentation, SDKs, helper libraries, quickstarts, and tutorials for your language and platform.
Resource Center
The latest ebooks, industry reports, and webinars
Learn from customer engagement experts to improve your own communication.
Ahoy
Twilio's developer community hub
Best practices, code samples, and inspiration to build communications and digital engagement experiences.